Configure Workflow Addon
This guide covers installing the Workflow addon (requires an AYON Studio license), running the event processor service — either as an AYON service or via CLI — and configuring the Dispatch Directory and Simple Actions settings.
Last updated About 1 hour ago
Install Workflow Addon
Get the addon: Navigate to the Addon Market (
M+M) in your AYON server, search for "workflow," and click Install. This requires an AYON Studio license, see Pricing for details.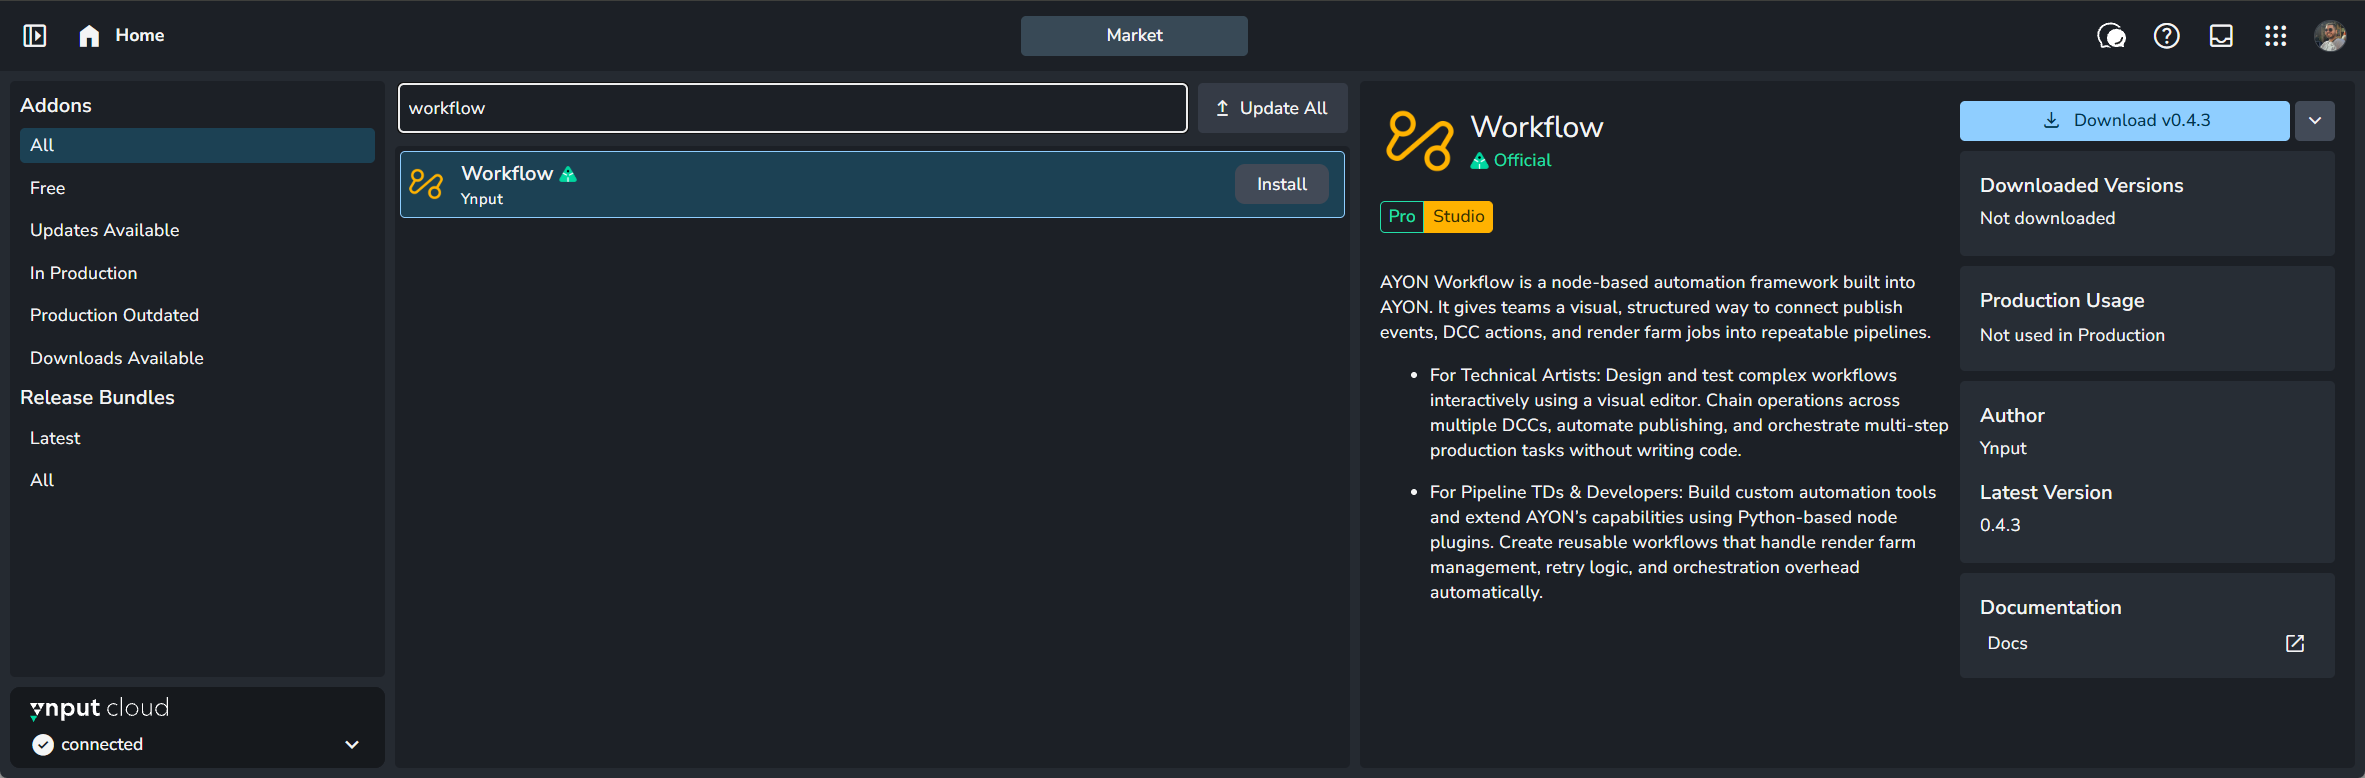
Add it to your production bundle: Navigate to your bundles (
B+B), create and duplicate your production bundle, and set the workflow addon to the available version on your server. For more information on working with bundles, see Bundles & Addons.Update your dependency package: you can either use the dependency package that comes with updating Pipeline to the latest release, or build one yourself — see What are dependency packages and how do you update them?
Run Event Processor Service
The event processor service is required for using event-triggered workflows. It's responsible for listening to server events and running the relevant workflow when one occurs, as well as running scheduled workflows based on the cron expressions set within them. It scans registered workflows periodically, so newly registered workflows are picked up without needing to restart the processor.
There are two ways to run the processor service, and you can't run both at the same time — you'll need to pick one:
Option 1: Spawn the Workflow Event Processor Service as a regular AYON service
Option 2: Run it as a process on an AYON-initialized workstation via CLI
Option 1 — Spawn an AYON Event Processor Service (no pipeline nodes)
This option is best for server-side workflow automations — for example, creating a daily playlist or syncing task/parent-folder status.
This is a lightweight processor that doesn't support pipeline nodes, and it always executes workflows in memory — it does not dispatch to the farm.
The pipeline nodes it does not support:
NukeRender, BlenderRender, BlenderWorkfile,
Publish, Representation
Steps:
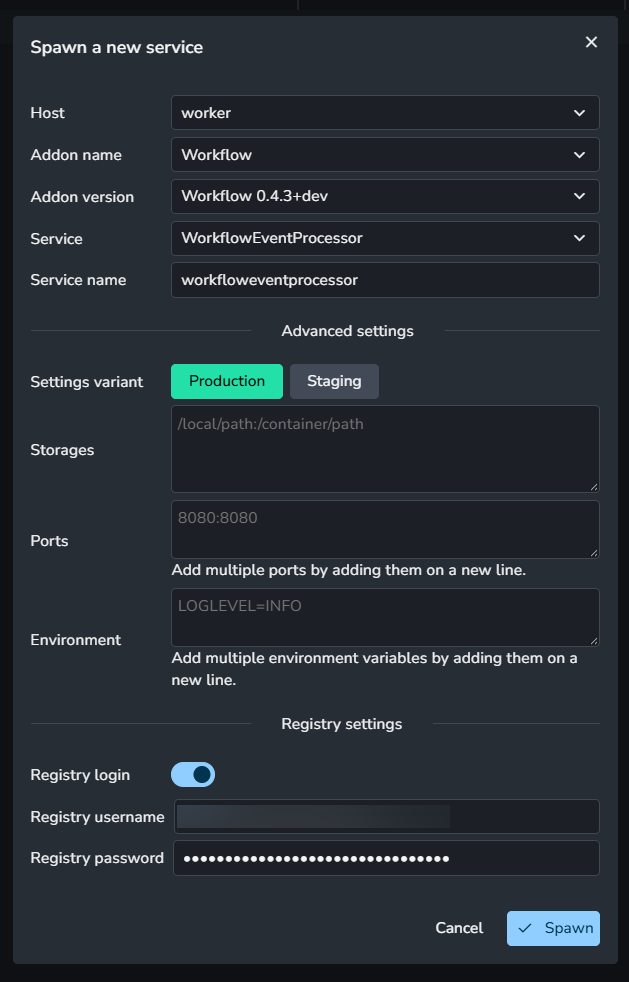
Navigate to the AYON Services page (
V+V).Click + New Service to add a new service.
In the popup window, select the Workflow addon and Workflow Event Processor. Importantly, enable Registry Login and enter the registry credentials, which are currently provided by request. Reach out to support to obtain them.
Once you click Spawn, you'll see the service appear. Wait until its status turns green (Running).

After the service is created, you can stop, start, or edit it as outlined in AYON Services.
Managing updates: since this runs as a managed AYON service, updating it requires first updating the Workflow addon version in your production bundle, then removing the existing service and creating it again — selecting the new addon version from the
Option 2 — Run the AYON Event Processor Service via CLI (full pipeline support)
This is the full-featured version of the processor. It's versatile and can run all node types, including pipeline nodes; it can dispatch to the farm; and it can access your pipeline storage, where published files and workfiles are stored.
Steps:
Examplecd <ayon-launcher-installation-location>
./ayon_console.exe addon workflow event-processor --token <AYON_API_KEY>A valid AYON_API_KEY must be passed explicitly using the --token flag, since this method does not rely on the credentials of the logged-in user, if any.
Note that with this approach, you'll also need to manage updates to the processor manually.
Ideally, you'll want to daemonize this process so it runs as a long-term background service rather than a one-off foreground command.
Workflow Addon Settings
Dispatch Directory
Setting located at:
ayon+settings://workflow/dispatch_directory

Sets the default directory location for dispatch data. This location must be accessible from both the dispatching user machine and the farm machine running the job.
The {root} key points to the root directory (path) set below, at ayon+settings://workflow/dispatch_directory/root_directory, where you can configure paths per OS.
It also supports these time keys: {d}, {dd}, {m}, {mm}, {yy}, {yyyy}, {H}, {HH}, {M}, {MM}, {S}, {SS}.
Simple Actions
Setting located at:
ayon+settings://workflow/simple_actions

This is where you expose workflows as actions, so they can be triggered on demand. It has two lists: one for folders and one for versions.
Each item added to either list has three settings:
Action Label: the label shown for the action.
Execute Locally: when enabled, the action triggers the workflow to run on the user's machine, in line with how applications are launched from action menus — this completely bypasses the event processor. Enabling this toggle is useful for workflows that use pipeline nodes. When disabled, the workflow is left for the processor to run instead.
Workflow Name: a list where you select from registered workflows, filtered based on the
OnActionFromFolderandOnActionFromVersioninput nodes.
For examples, see the Workflows & Automations guide.