Web Publisher
Last updated 5 months ago
The Web Publisher is a premium addon included with the Studio subscription, or as an extra with a Pro subscription.
Overview
The Web Publisher is a premium addon that simplifies the process of publishing assets, primarily designed for remote artists to share their work with supervisors for review.
It streamlines workflows and eliminates the need for tedious installation of pipeline tools and manual processes.
Key features include:
Remote Publishing: Remote artists, who may not have access to studio storage or the AYON Launcher, can publish directly from the AYON server. The addon then handles downloading the files and executing the publish process.
Full Scene Submission: The Web Publisher also allows for the submission of full scenes, which are transferred to the studio and processed there. This allows the remote work to leverage the full studio render farm and processing power.
note about cloud. as Webpublisher needs access to storage in studio. It does integrate version with representations having pipeline files -> they won't be stored on server they are stored in studio.
Preparation
To begin,
Install the addon and ensure it's included in your production bundle.
Adjust the Web Publisher Addon Settings according to your project or studio preferences.
Run the Web Publisher service. For more information on running services, refer to the AYON Services.
Crucial Note: The Web Publisher service must have direct access to your studio storage. Therefore, you need to use an on-premises AYON Service Host (ASH) worker (local to your studio network) to run the service.
Service Configuration:
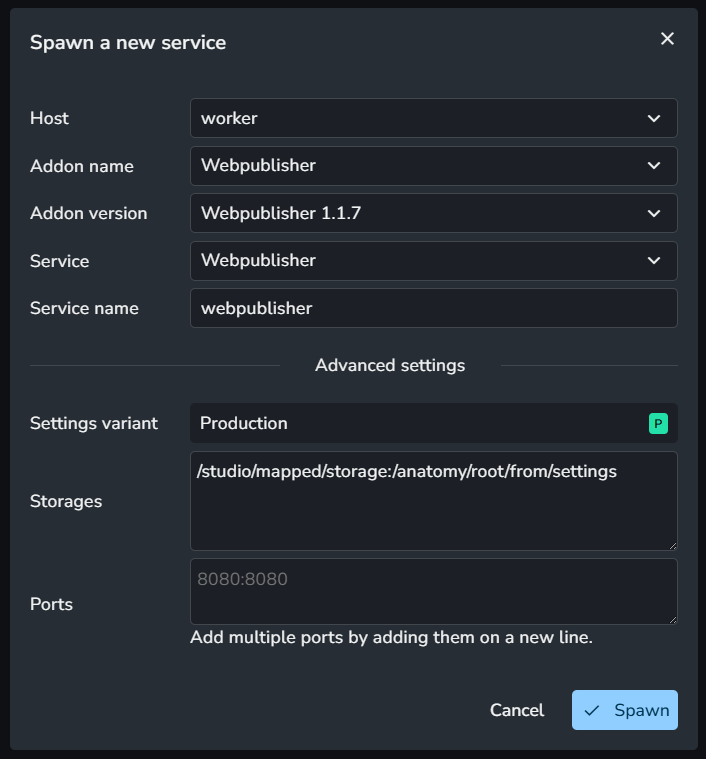
Within the Service's advanced settings, you must configure the
storagessetting to grant the service access to your studio's file system.The format for the
storagessetting depends on the Operating System (OS) where your ASH worker is running:Windows Machine: The
storagessetting can look like//c/projects:/mnt/share/projects(assuming you are using WSL or a similar mapping).Linux Machine: The
storagessetting can look like/mnt/share/projects:/mnt/share/projects(ensuring the path is mounted correctly on the ASH worker).
Using the Web Publisher

To use the Web Publisher, navigate to the dedicated tab within your project:
Navigate to Your Project: Go to your project by clicking the Projects button at the top-right of the AYON Web UI, or by pressing the shortcut key
1to display the project list.Access the Web Publisher: Click on the Web Publisher tab within your project view.
The Web Publisher interface is divided into two main panels:
Left Panel (Batch Creation): You can create a new publish batch here. This process is similar to the workflow described in Working with AYON Tray Publisher, where you select the target task, set the variant name, and add your files.
Right Panel (History and Progress): Here, you can check the progress of your current publish submissions and view the full publishing history.
Batch Creation
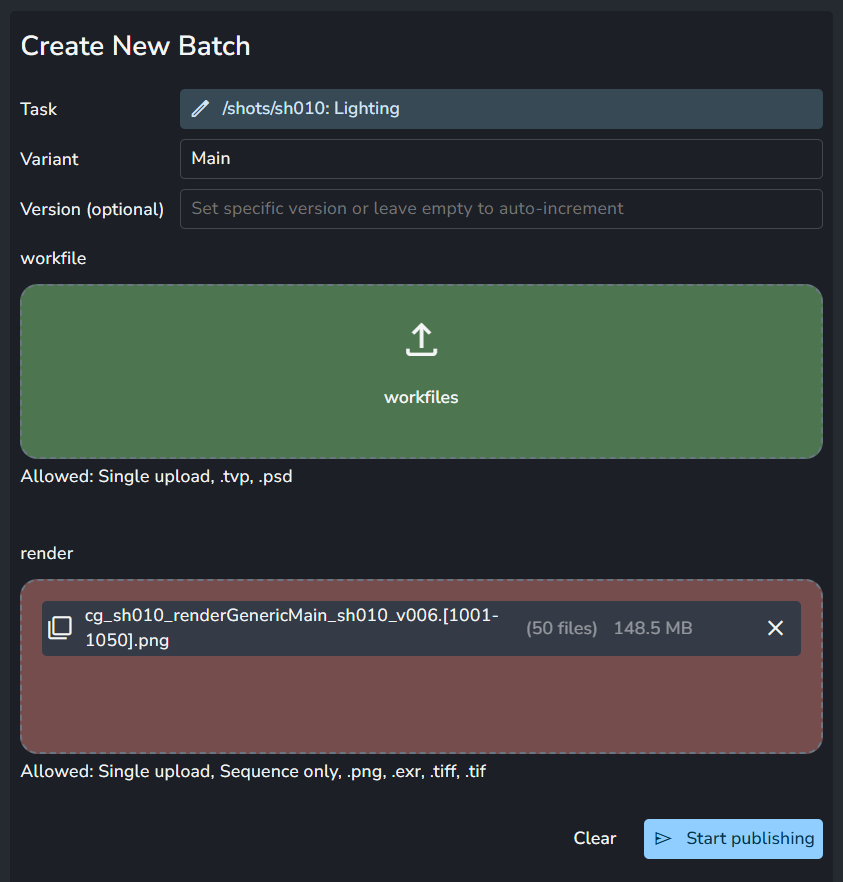
Creating a new publish in the Web Publisher is similar to Working with AYON Tray Publisher:
Select the destination task for your publish.
Set the variant name and version as needed.
Select the workfile(s) to upload.
Select the render(s) to upload.
Click Start publishing.
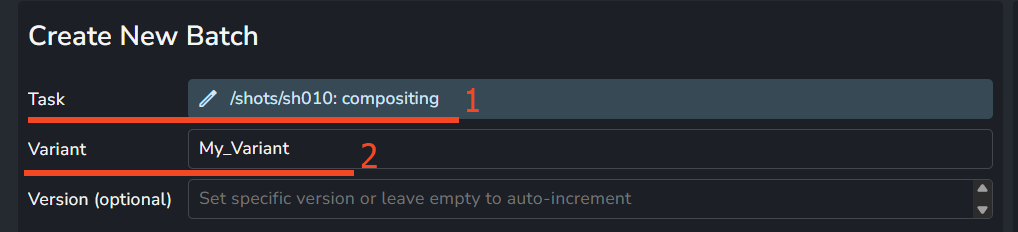
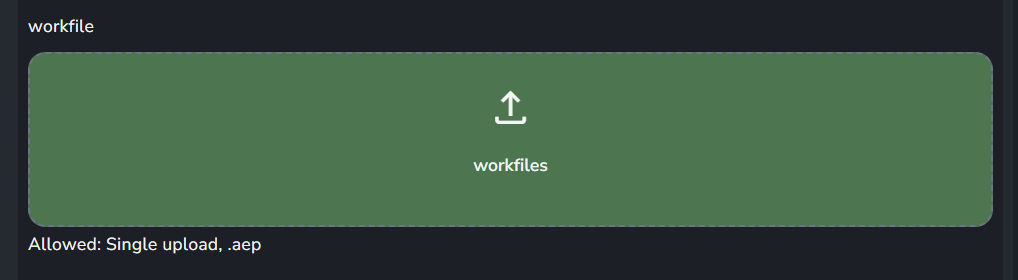
Batch Creation Options
The options presented in the Create New Batch interface follow the configuration set in Collect Published Files. This is where you can find the mapping setting for configuring options based on Task Type.
For example, when selecting a folder with the task type Compositing, the available options will follow the value setting defined in the mapping for that specific task type.

Batch Creation Options | Collect Published Files Product Type Mapping |
 |  |
 | 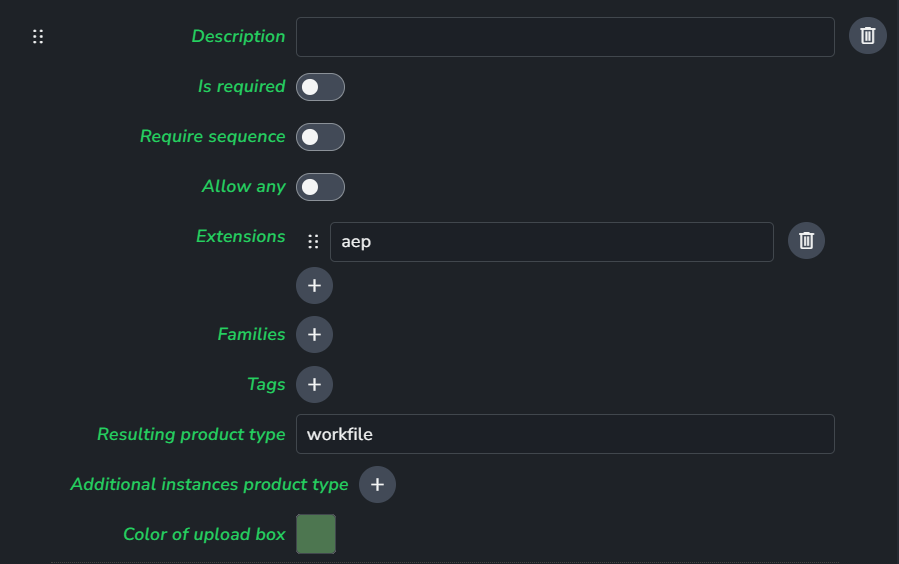 |
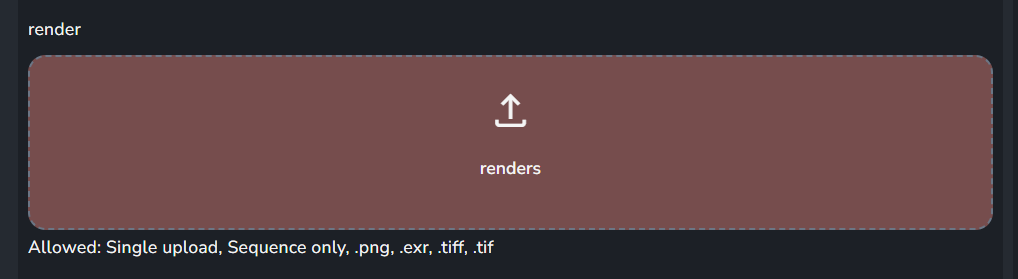 | 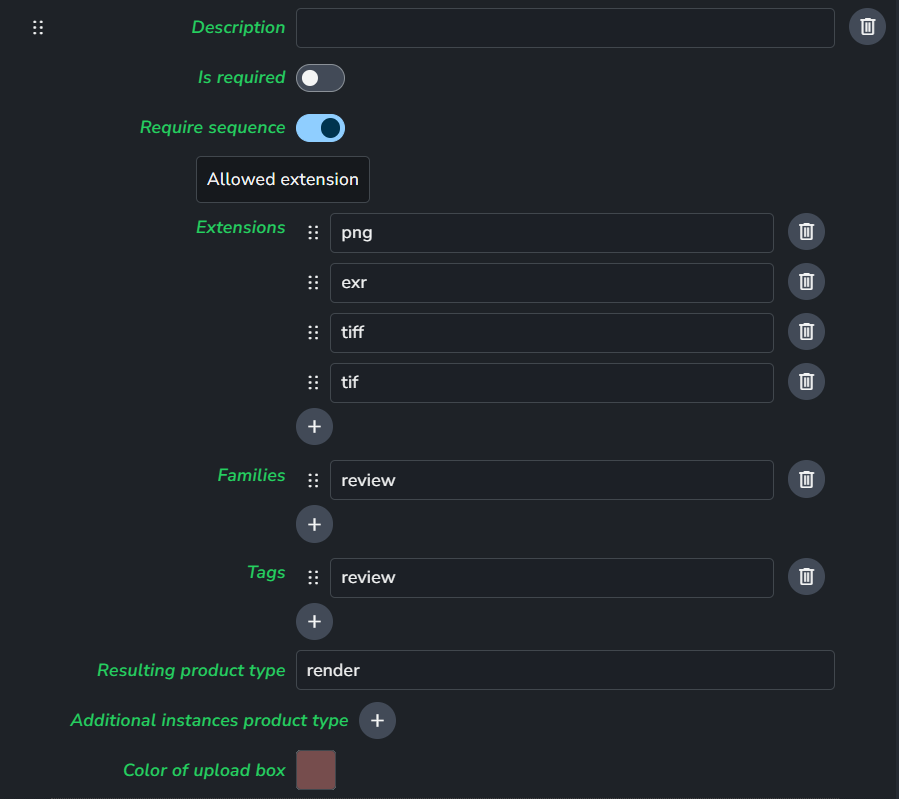 |
Publishing History And Progress
The right side panel of the Web Publisher tab contains the full publishing history, where you can view details and take further actions on past submissions.

Web Publisher Addon Settings
General Settings
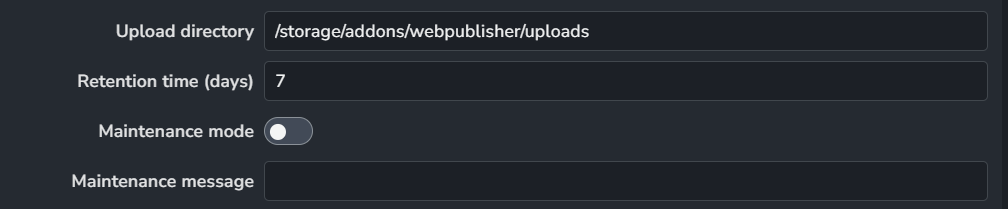
Upload Directory: Defines the directory within the Web Publisher service Docker container where logs and uploaded files related to the publishing process will be temporarily stored.
Retention time (days): Specifies how long uploaded files should be kept in storage for potential re-processing.
Maintenance Mode: Limits regular users from accessing the upload functionality and the Web Publisher's features entirely.
Maintenance Message: The message that will be shown to regular users while the service is in maintenance mode.
OCIO Config
Setting Location:
ayon+settings://webpublisher/imageio

OCIO config: When enable…
Config path:
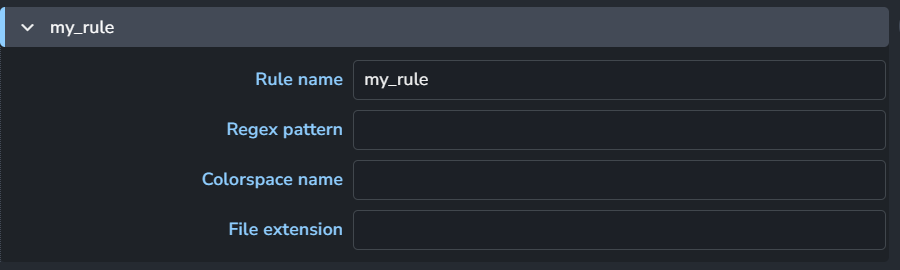
File Rules
Rules
Timeout profiles
Setting Location:
ayon+settings://webpublisher/timeout_profiles
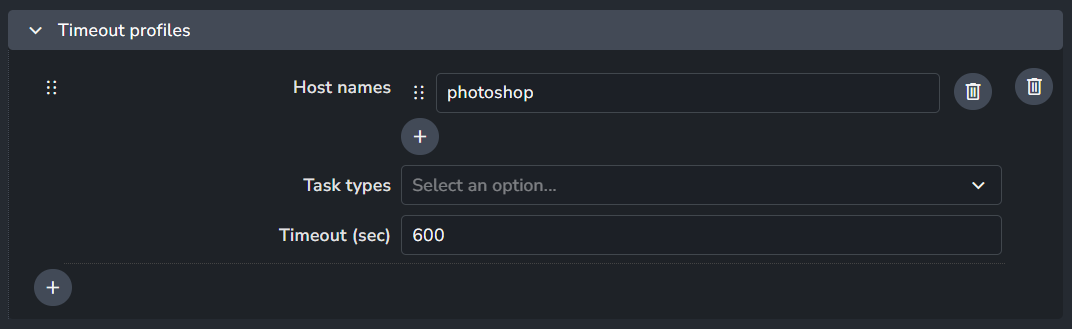
This section allows you to specify process timeouts per application (host) and task type. Each entry includes:
Host names: The specific application hosts (e.g.,
maya,nuke) this timeout profile applies to.Task types: The specific task types (e.g.,
Compositing,Modeling) this timeout profile applies to.Timeout (sec): The maximum processing time allowed, specified in seconds.
Publish plugins
Collect Published files
Setting Location:
ayon+settings://webpublisher/publish/CollectPublishedFiles
These profiles control the user interface (UI) displayed in the Create New Batch panel when a task is selected.
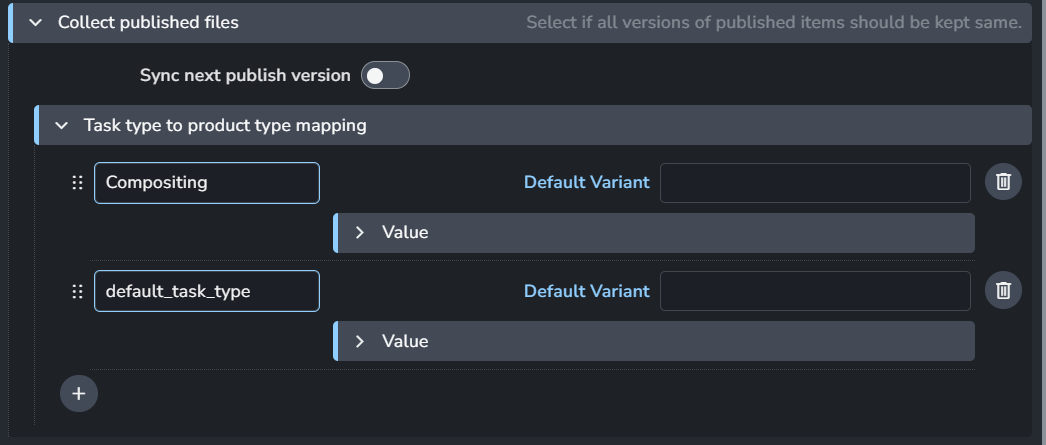
Sync next publish version: When enabled, the maximum available version number for the products being published is found and used consistently for all products within that same publish batch.
Task type to product type mapping: This setting allows you to add custom UI mappings via the
+button. Each mapping includes:Task Type: This is the specific task type that triggers this UI configuration when a new batch is created.
Default Variant: The default variant name set when creating a new batch. If this field is left blank, it will fall back to
Main.Value: You can add multiple values via the
+button. Each value includes a set of options that will be visible when a new batch is created and the associated Task Type is selected.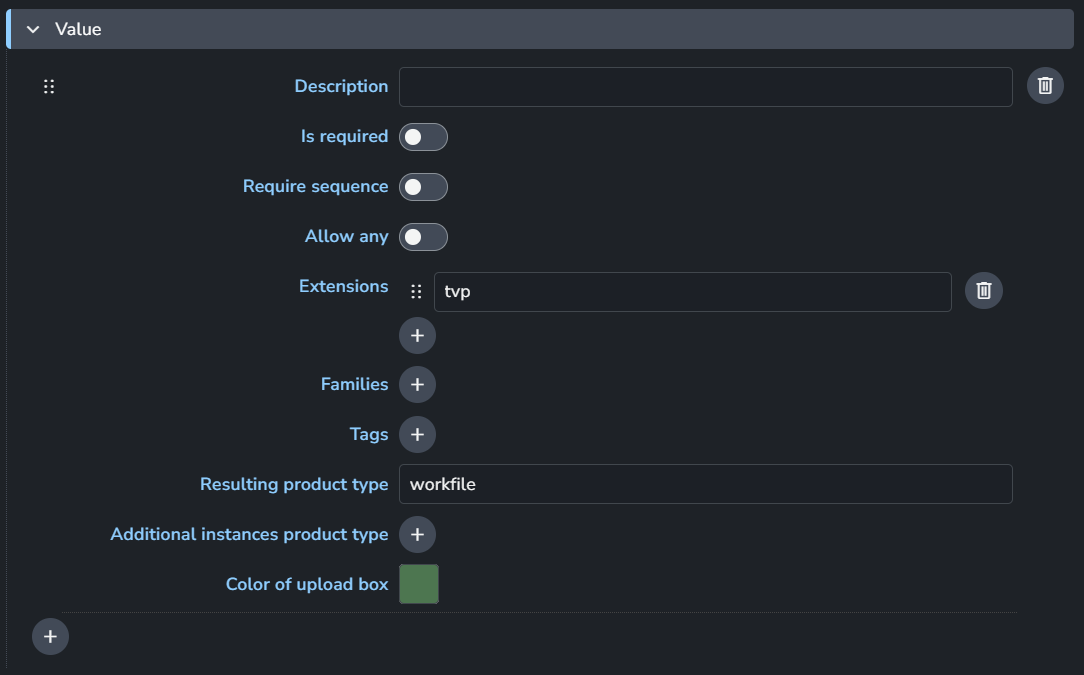
Collect TVPaint instances
Setting Location:
ayon+settings://webpublisher/publish/CollectTVPaintInstances

Layer name regex: This is the regex pattern used to extract render layer and render pass names from the TVPaint layer name.
Requirement: The regex must contain the named groups layer and pass, which are essential for the creation of RenderPass instances.
Example:
When applying the default Regex pattern (?P<layer>L[0-9]{3}\w+)(?P<pass>.+) to the layer name: L001_Person_Hand
The pattern results in:
Extracted layer:
L001_PersonExtracted pass:
Hand
Web Publisher Admin Notes
Web Publisher CLI
This section, intended for TDs, outlines how to access the addon from the command-line interface (CLI) using the AYON executable. For additional information, refer to Launcher - Admin Notes.
The Web Publisher Addon provides the following CLI commands:
Examplecd <ayon-launcher-installation-location>
./ayon_console.exe addon webpublisher <command> [OPTIONS]listen
Triggers listener of webpublisher.
Examplecd <ayon-launcher-installation-location>
./ayon_console.exe addon webpublisher listen --topics <topic(s)>publish
Internal Command shouldn’t be used.
publishfromapp
Internal Command shouldn’t be used.
Debugging Web Publisher
To debug issues with the Web Publisher, follow these steps:
Check the Event Viewer: Look for the
webpublisher.processevent in AYON's Event Viewer.Access Process Logs: The detailed logs for the publishing process are stored within the Web Publisher service's Docker container, located at:
<webpublisher_upload_dir>/<webpublisher_process_id>.logwhere
webpublisher_process_idis the ID of the correspondingwebpublisher.processevent.Access the Docker Container: To retrieve these logs, you need to access the container via your command line:
docker exec -it aysvc_webpublisher bash
Web Publisher Service Notes
Every time the Web Publisher service is restarted, any previously downloaded data is purged. The service then begins a fresh installation of the launcher inside its Docker container, placing it in the /etc/ayon_launcher folder.
All other necessary data, such as dependency packages and downloaded addons, are stored in the /root/.local/share/AYON directory.