Workflow Editor: Your First workflows
Last updated 10 days ago
Overview
Workflows are visual graphs for tasks and automations without writing code.
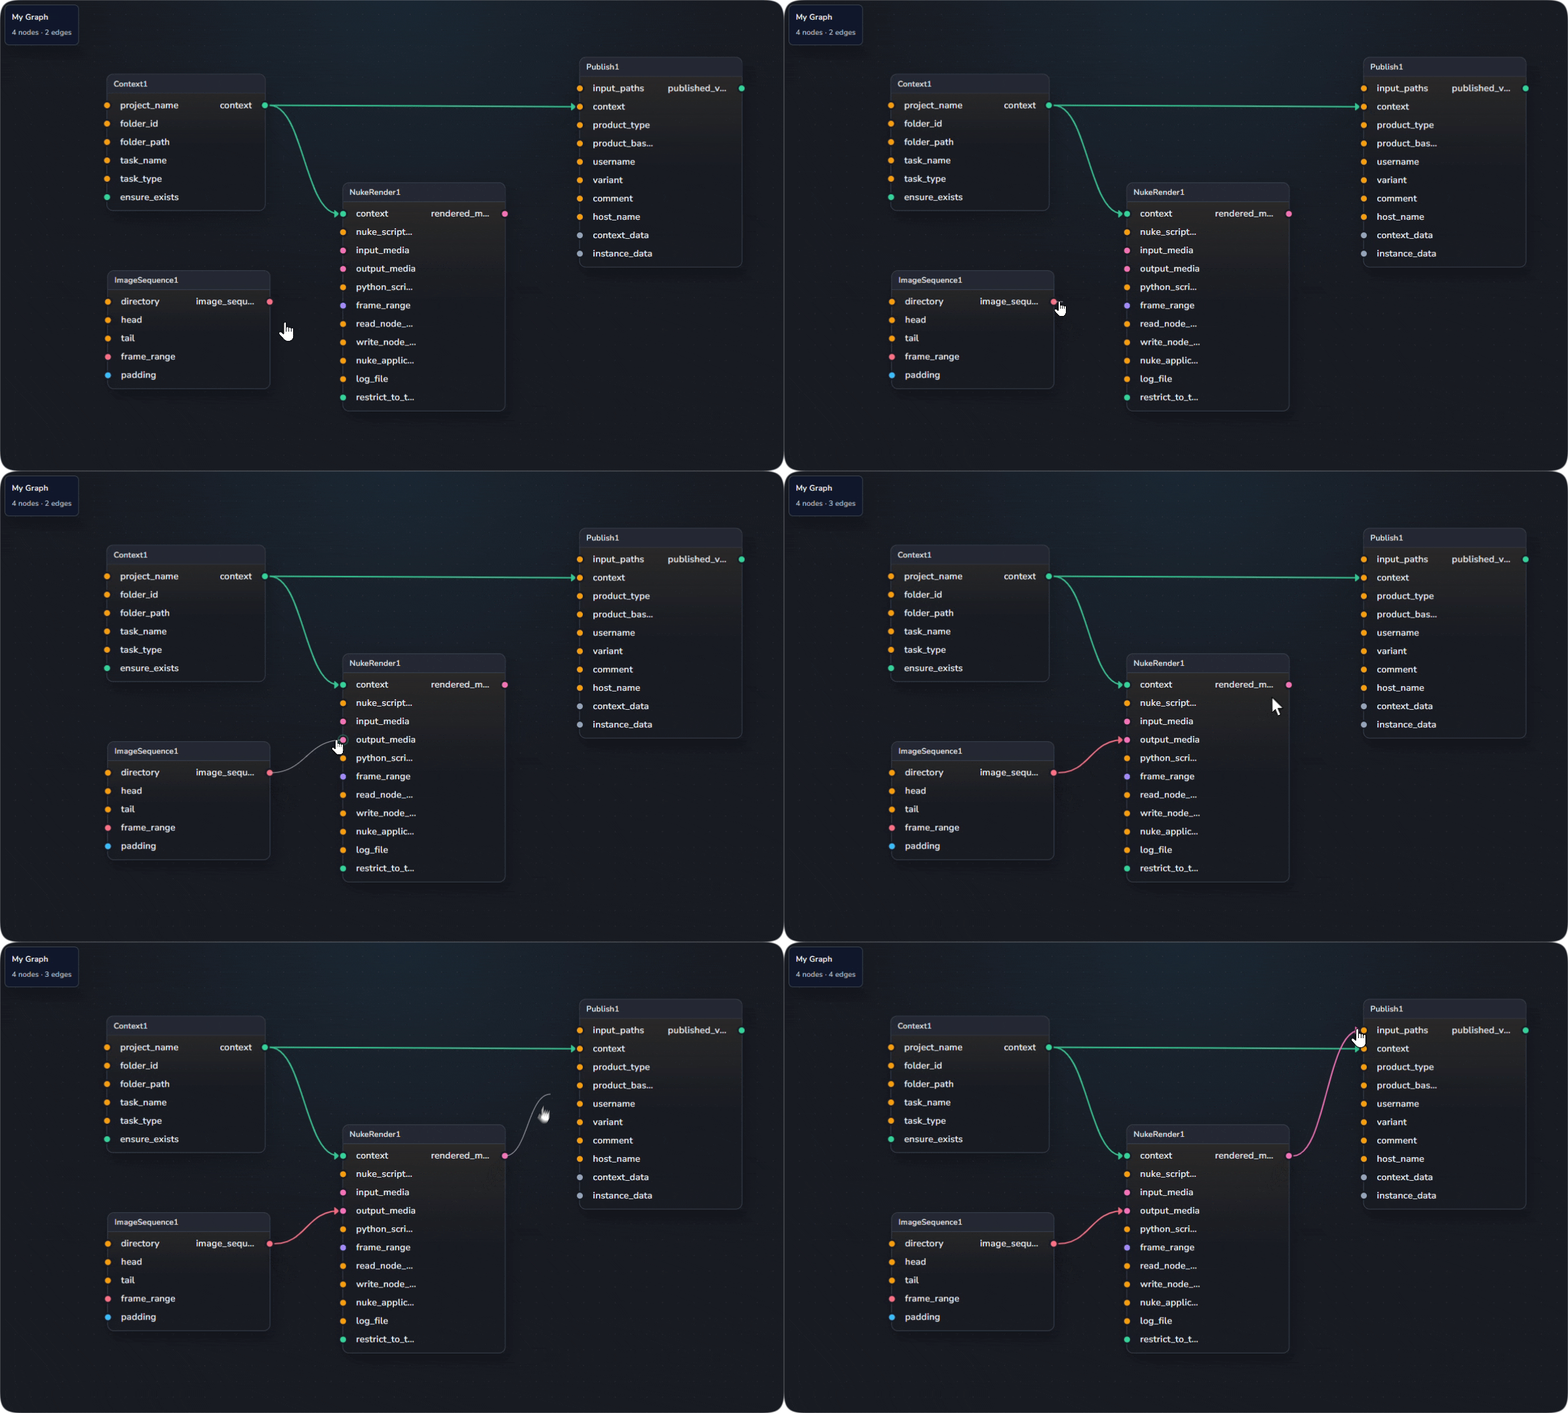
This guide walks you through your first workflow graph and includes a reference for the graph editor.
Quick Start
We will introduce three workflow graphs as quick start examples:
Hello World!
Download Example
hello_world.json
1.4 KB• Text
First start AYON desktop app and the Workflow Editor, go to the system tray, find the running AYON icon, open the menu via right-clicking, and select Workflow Editor.
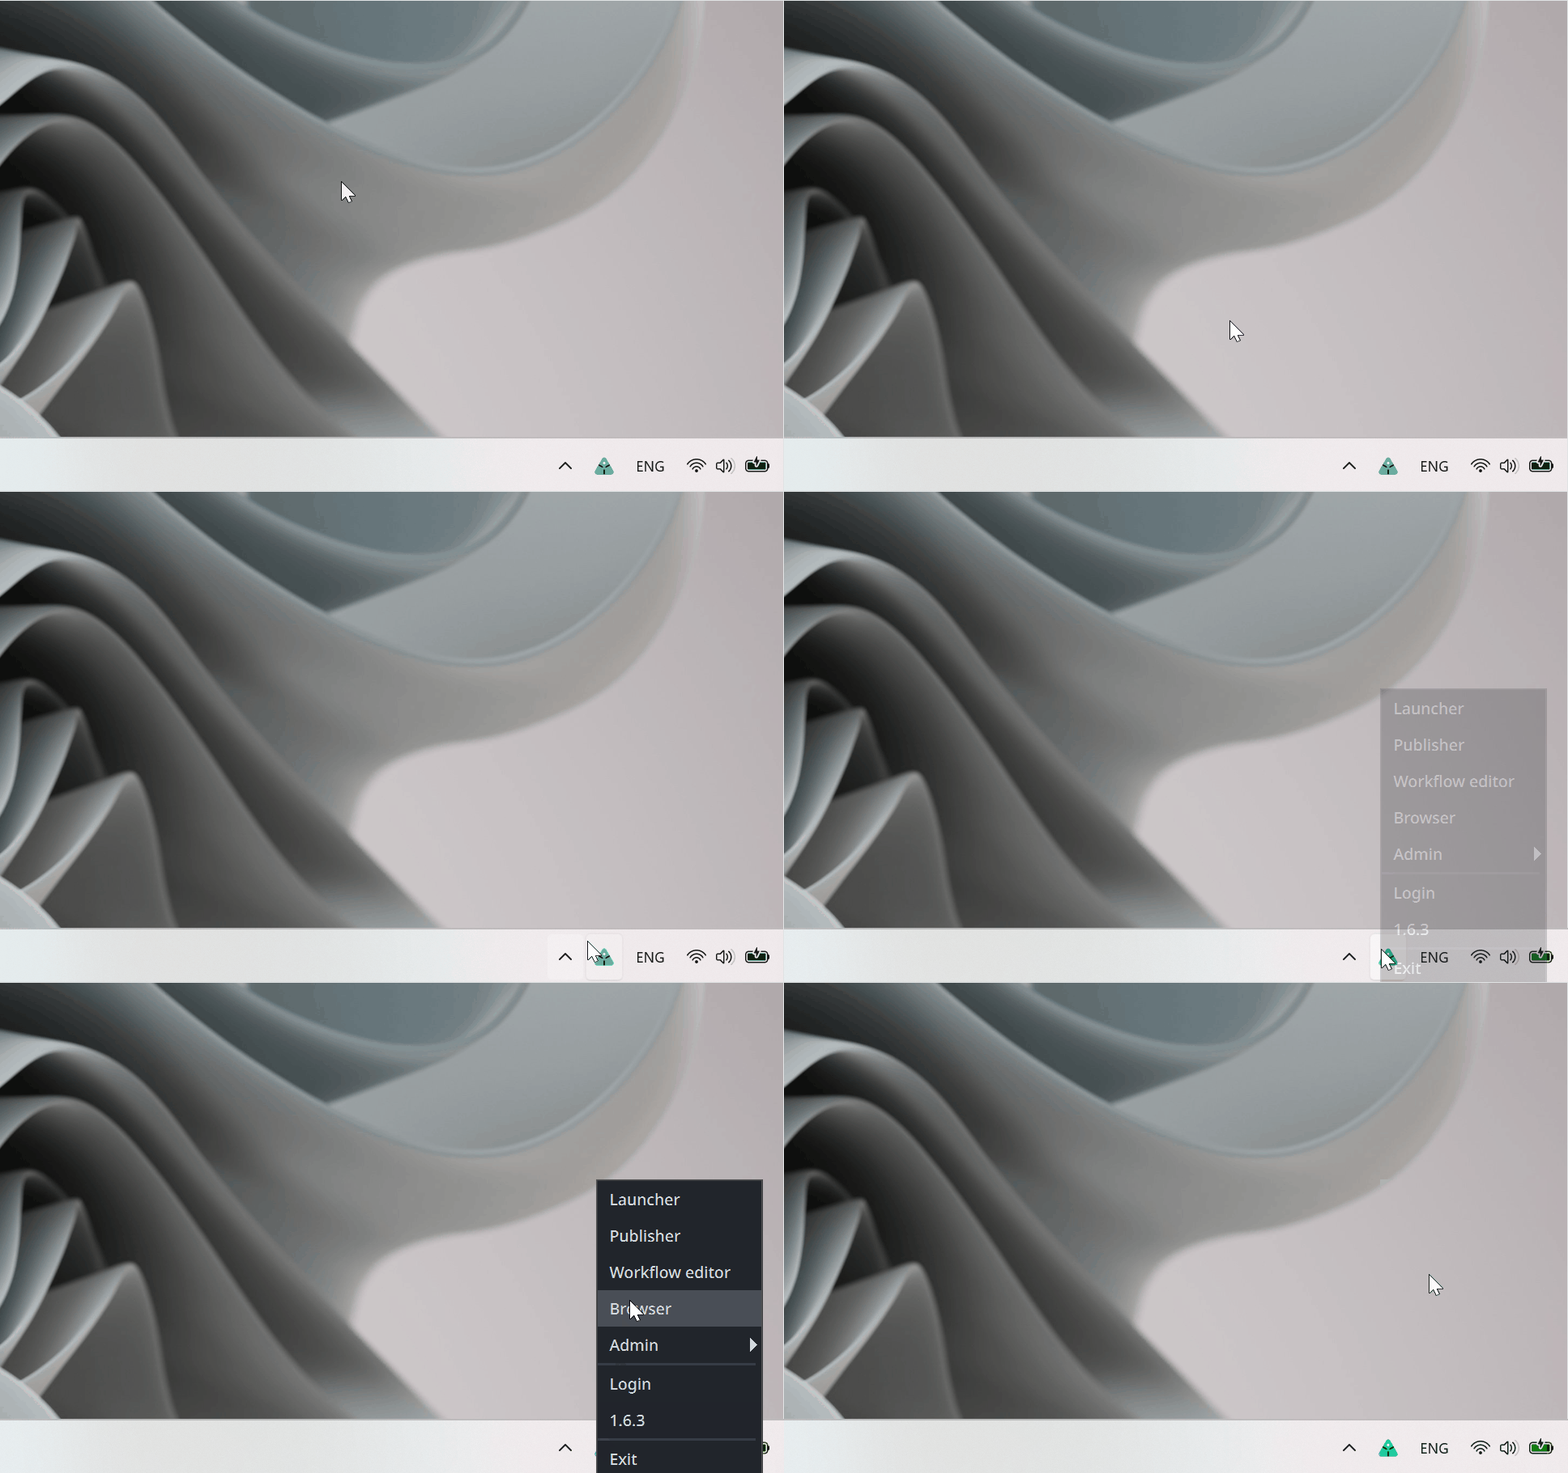
Note: AYON desktop app must be installed and running before you can use the Workflow addon on your machine.
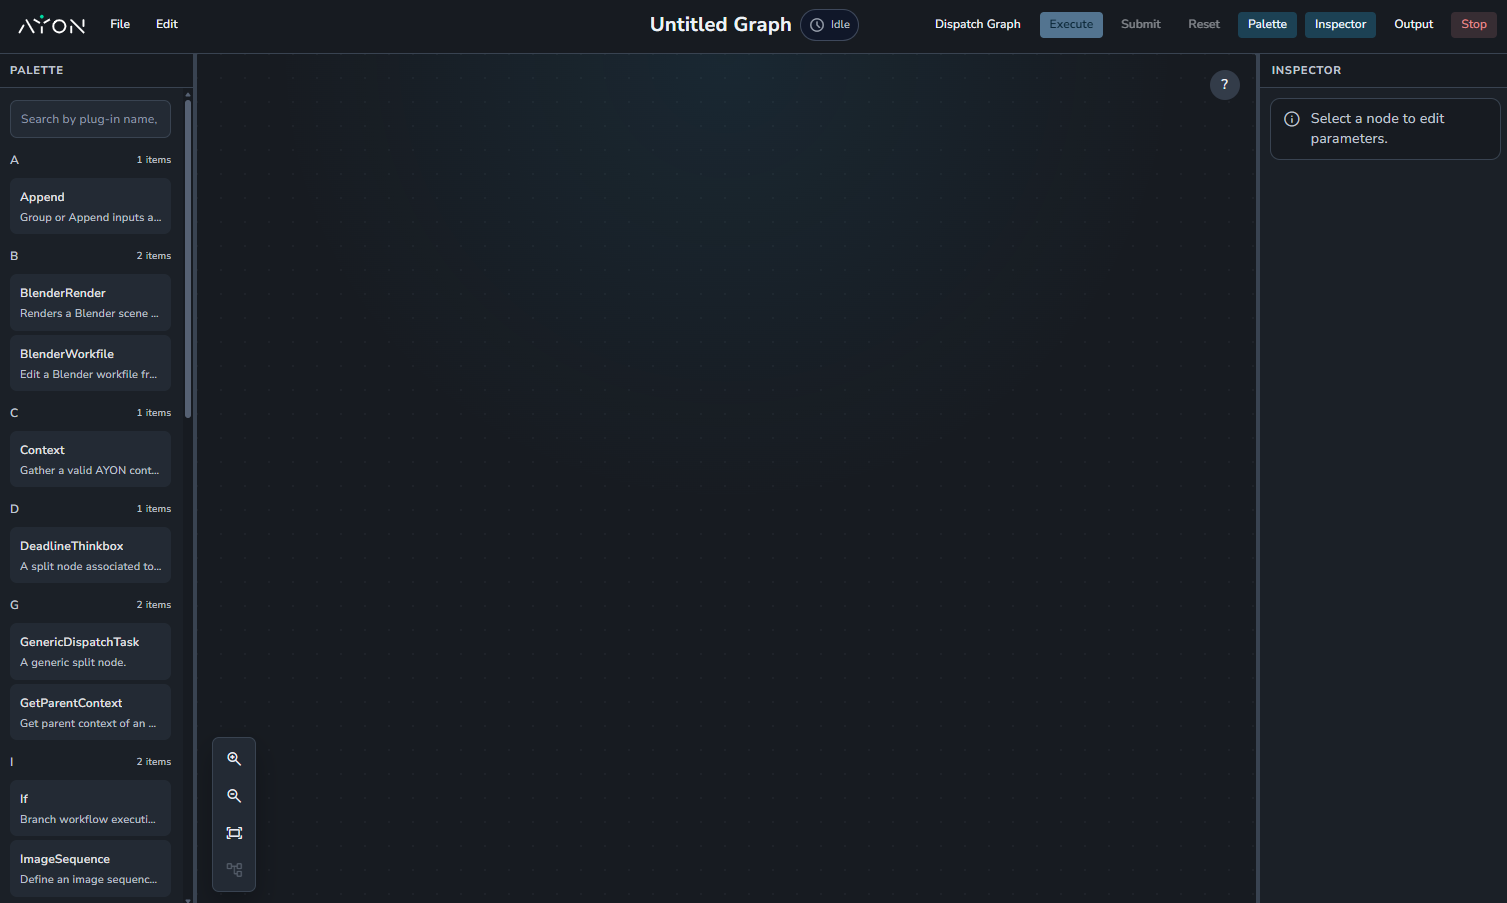
The Workflow editor appears as a new tab in your web browser of your choice.
Press
TABto bring the Create menu offering you all available nodes while in the main central work area of the editor…
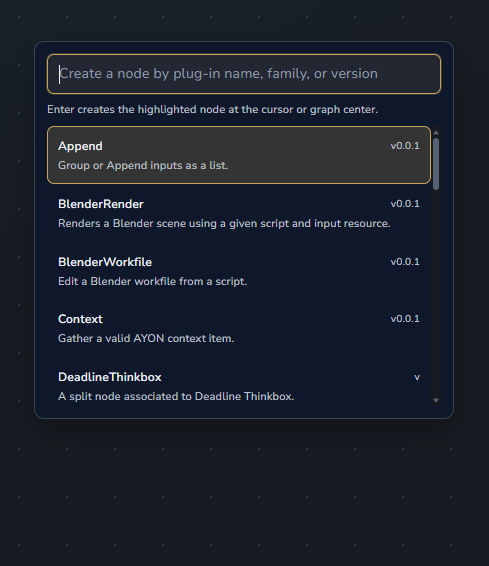
Create your first Node by choosing
NoOpnode using search function.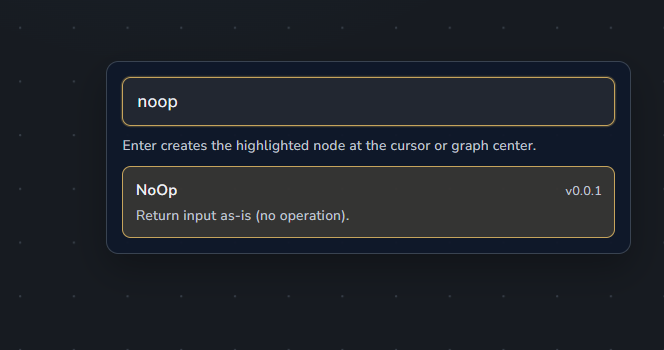
Inspect your newly created
NoOpnode in the Inspector on the right side and set theinput_datatostrand typeHello World!Execute the graph locally by the pressing the blue
Executebutton in the upper right and turn on theOutputpane which should be located at the bottom of the screen.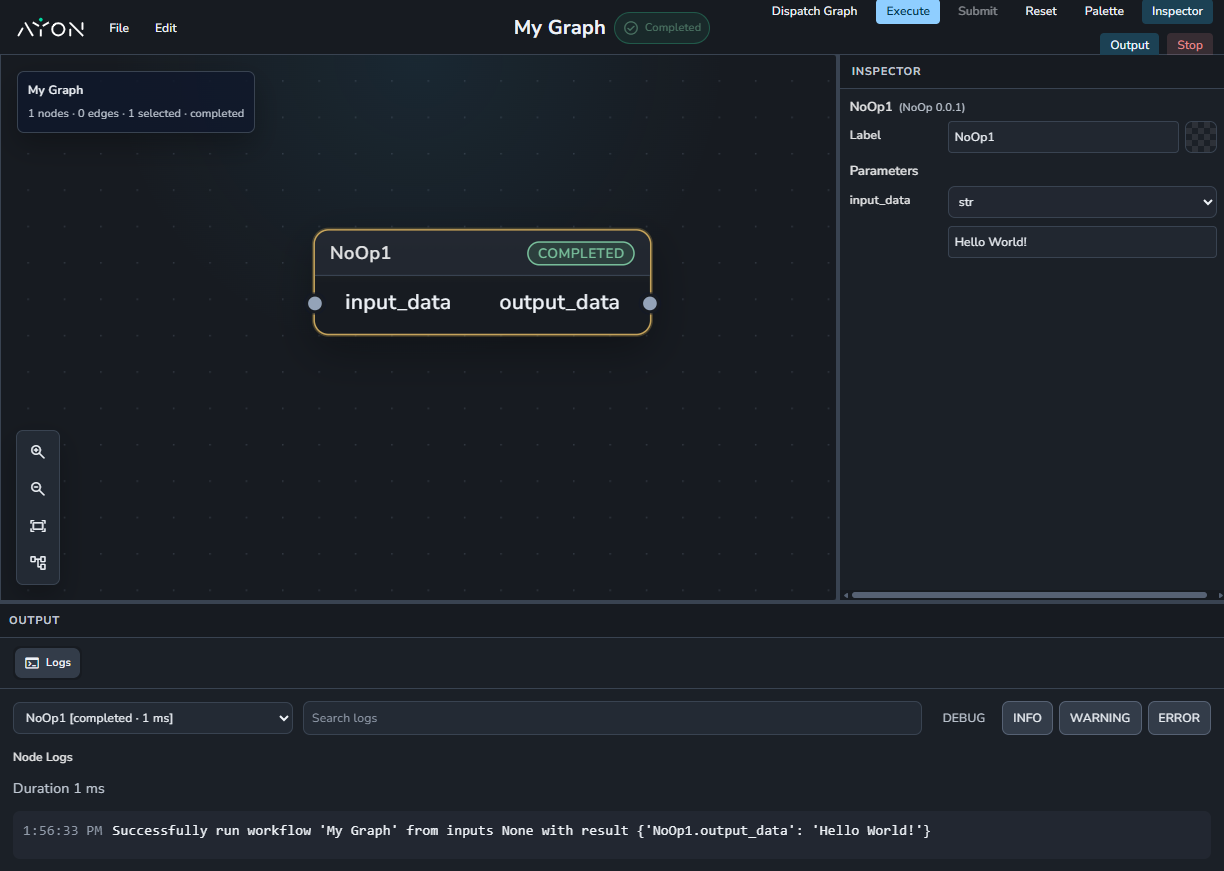
Lastly set a name for your workflow via clicking the title above.
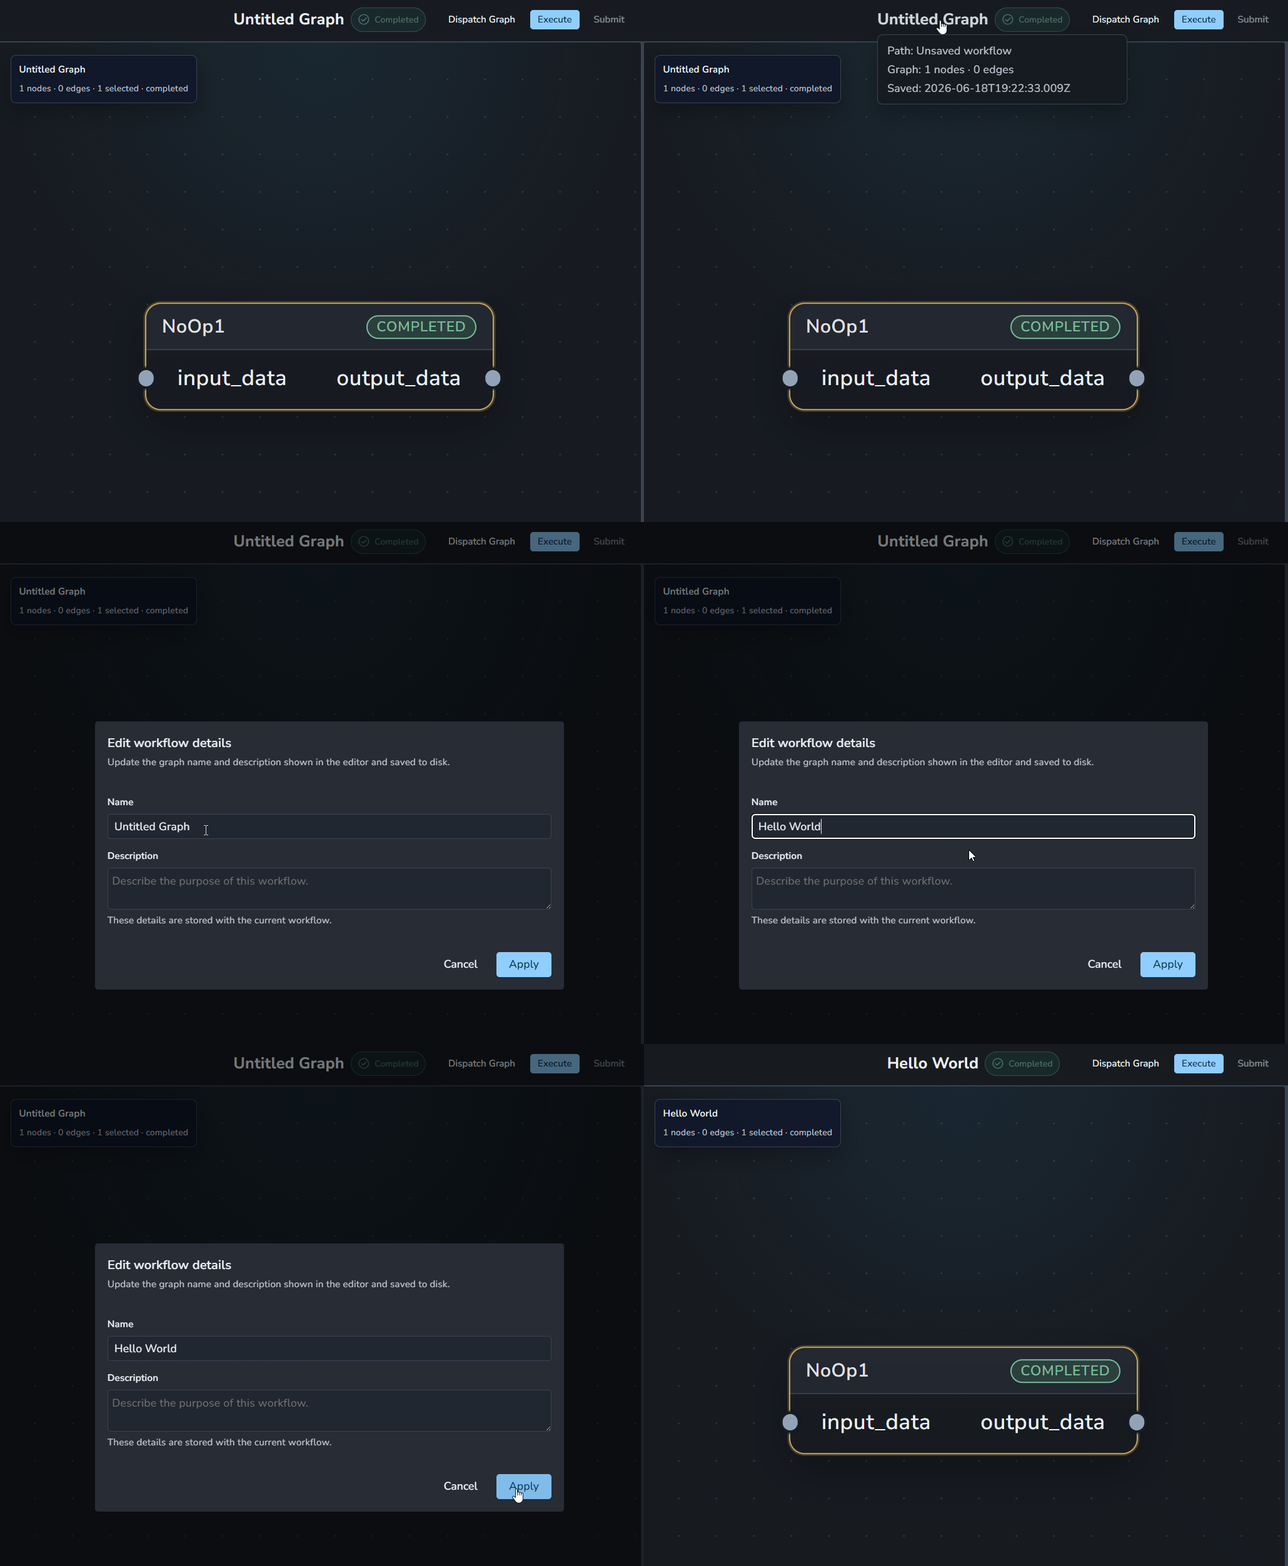
Navigate to
File > Save…and save your workflow as a JSON file.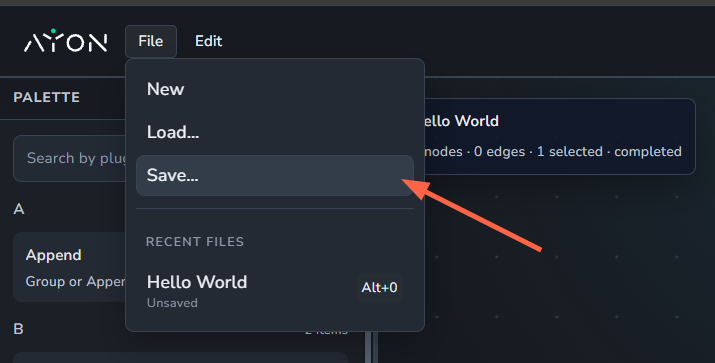
Congrats! You have just successfully created your very first AYON workflow!
Render a Blender File
Download Example:
render_a_blender_file.json
4.6 KB• Text
example_render.blend
523 KB
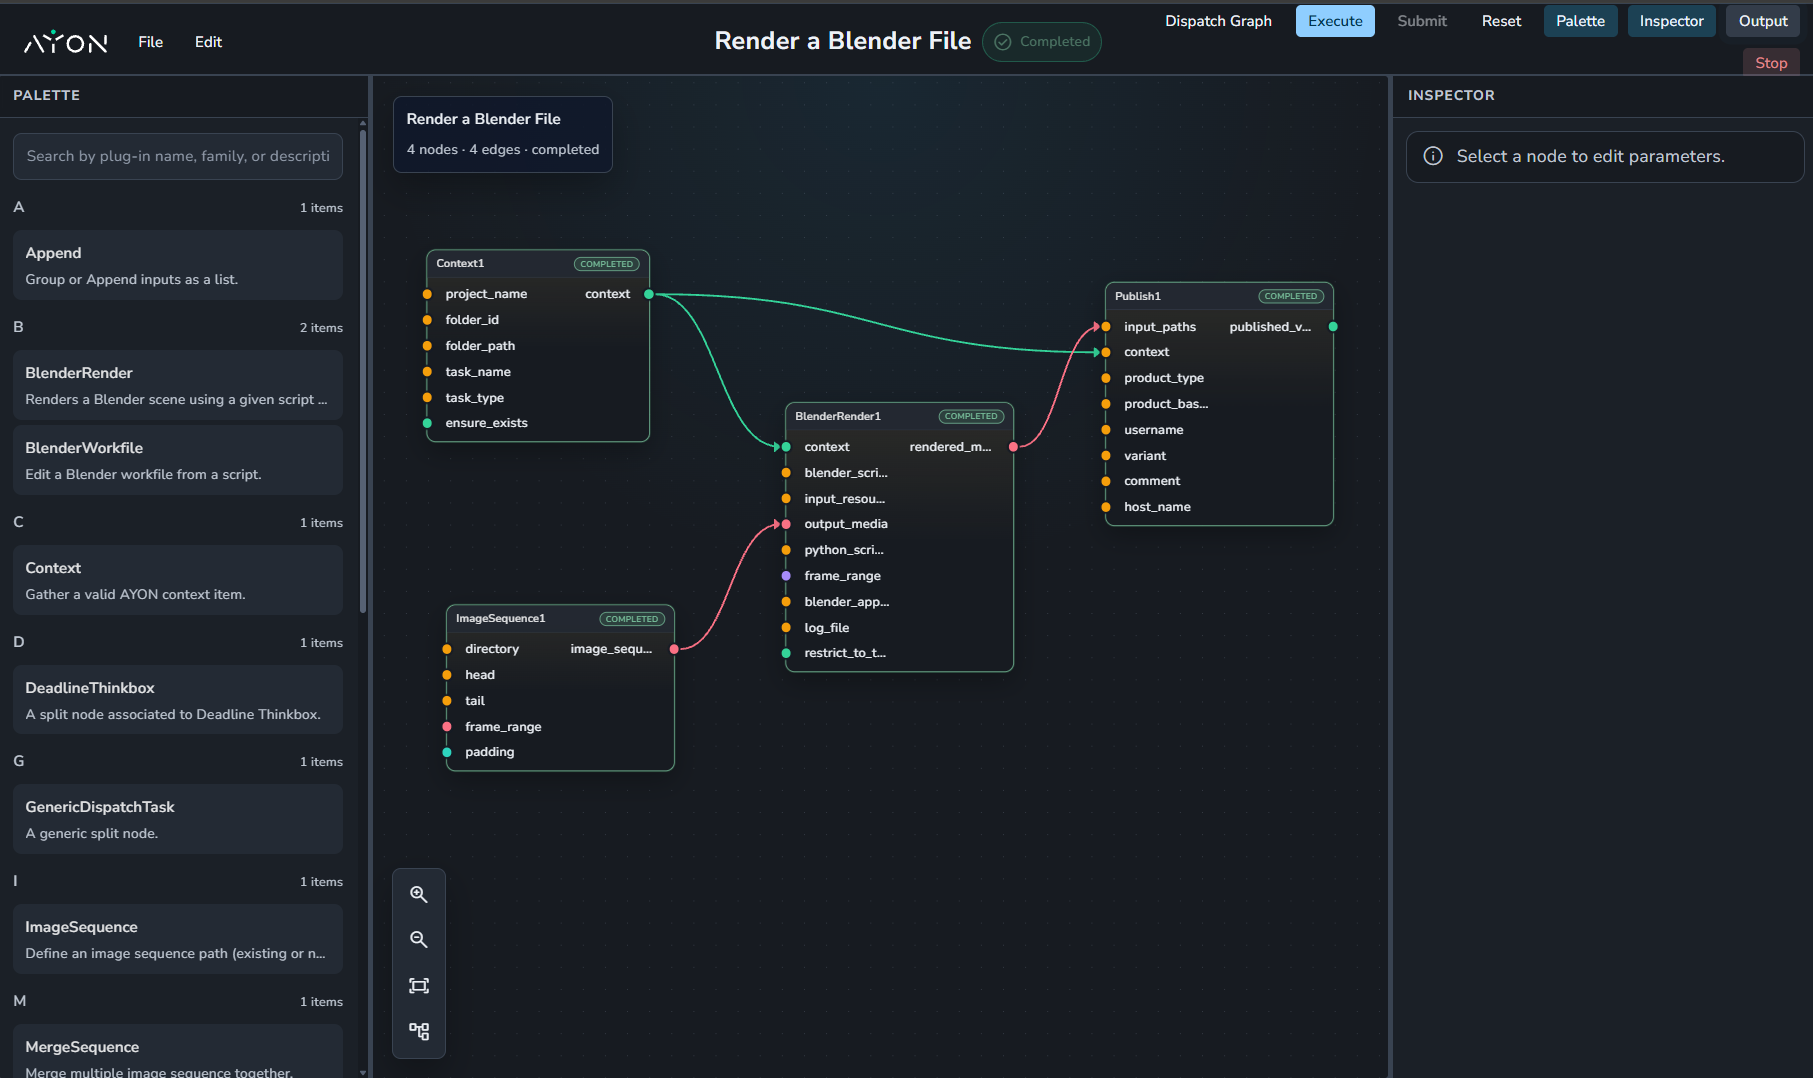
While you can go directly to the tab menu in the graph editor and create a blender render node, it won’t work outside of the box as it requires some preparation.
Steps:
Add nodes: Add “blender render”, “context”, “image sequence”, and “publish” nodes
Make connections:
Connect the output of the context to the “blender render” and “publish” nodes, this tells the workflow engine that the context used to open the blender file is the same we are publishing to.
Connect the output of “image sequence” to the “output_media” in the “blender render” this tells the engine what render files to expect and their frame range.
connect the output of the “blender render” to the “input_paths” of the “publish” node which tells the engine to publish the input media.
Set parameters:
“Context” Node: Set project_name, folder_path, task_name, and task_type.
“Image Sequence”: Set directory of the render file, head and tail of render file, frame_range, and padding. same as configured in the blender file.
“Blender Render”: Set “blender_script_bath”, “frame_range” to render and “blender_application_variant“ from application addon configuration.
“Publish”: set the “product_type”, “variant”, and “username”.
Press: “Execute”
Render a Blender File on Farm
Download Example:
render_a_blender_file_on_farm.json
5.8 KB• Text
We can start from the previous example Render a blender file and make it run on farm.
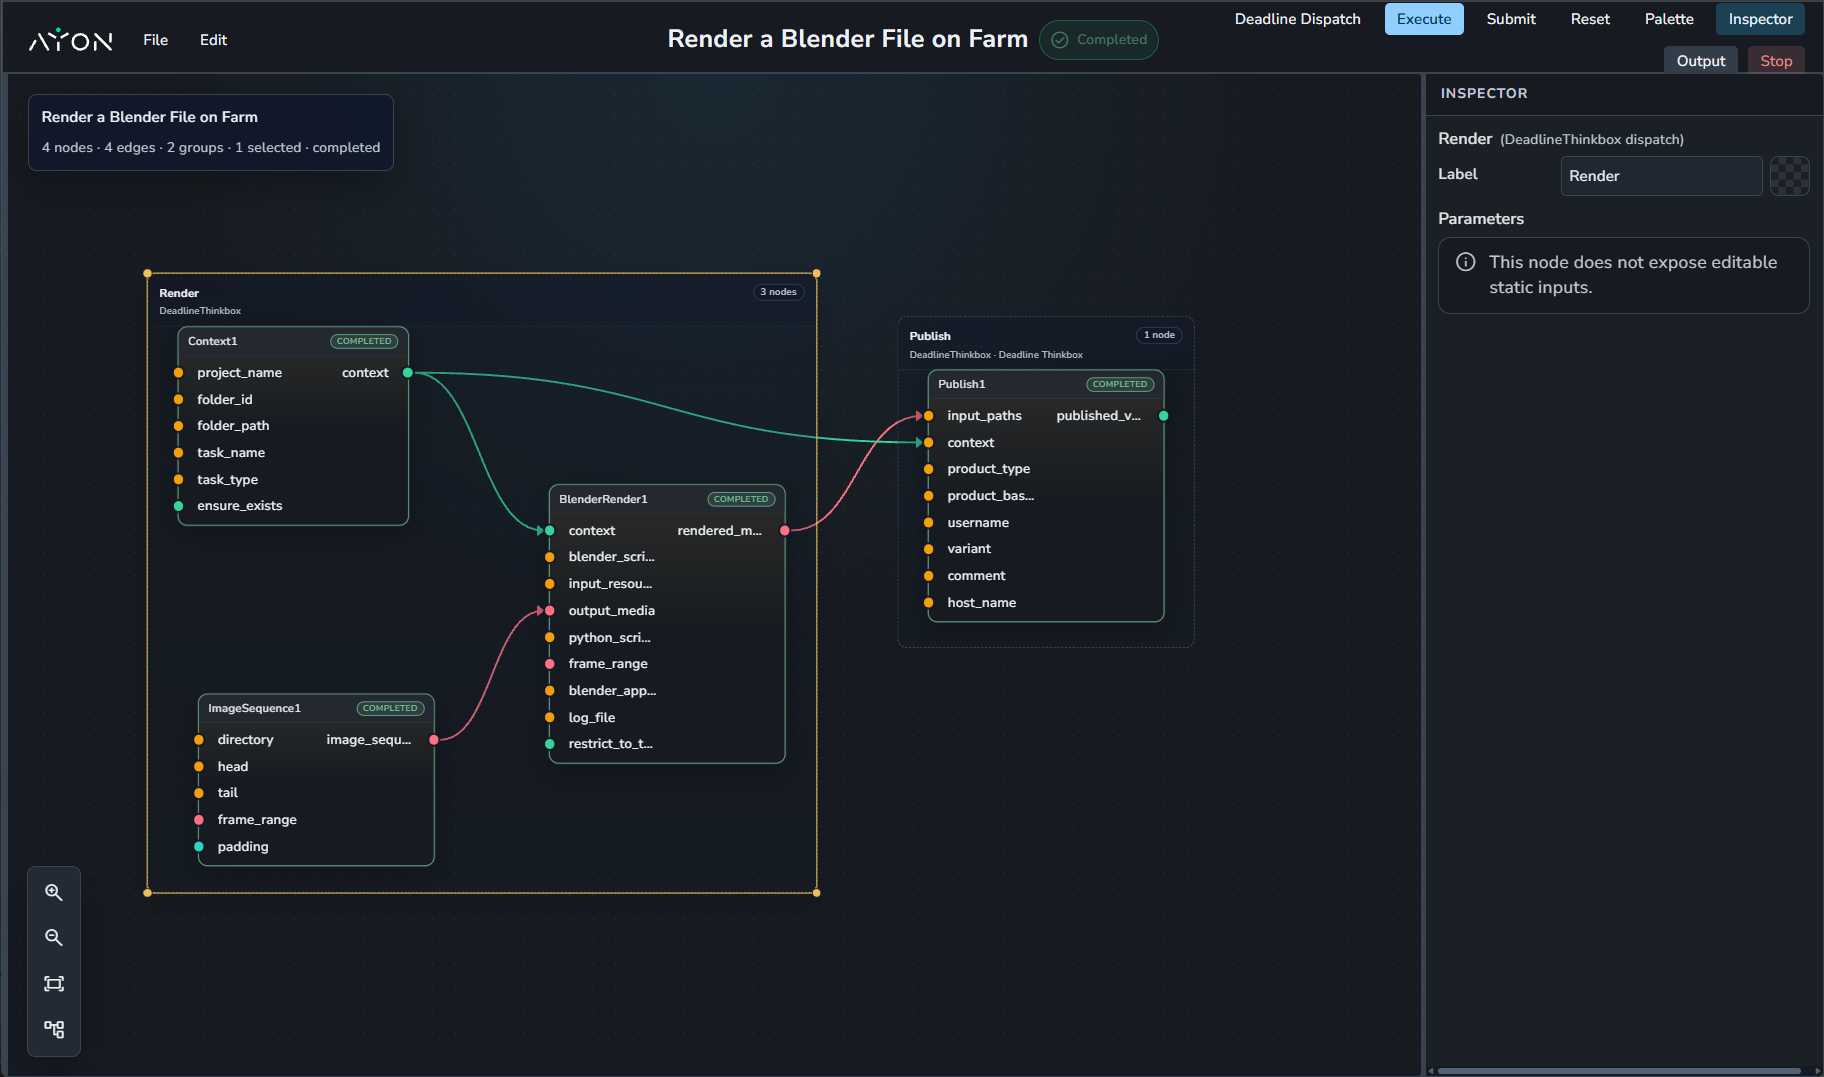
In order to make run on farm, we’ll need to create a dispatch plan by creating groups for nodes. each group represents a job on the render farm. For this example, we’ll create two groups: Render and Publish.
Steps:
Create dispatch: Click
Dispatch Graphin the upper right and selectNew…
Then, you’ll be prompted to pick a name for your dispatch graph and dispatch type. For this example, we will set dispatch type to
DeadlineThinkbox.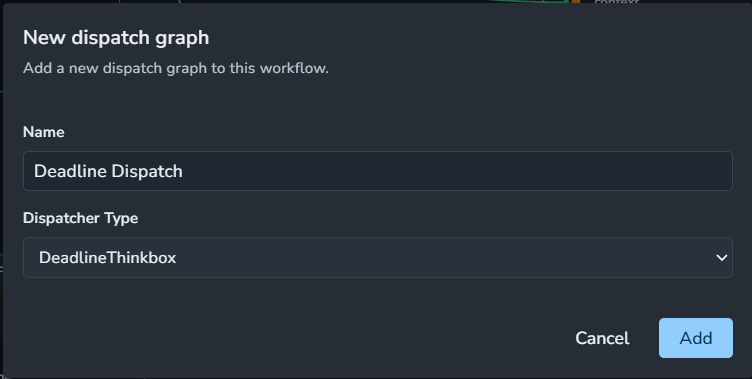
Once added, you’ll notice the dispatch button turned into the dispatch name you chose.

Create groups: let’s create two groups:
Group 1: select “Context”, “Image Sequence”, “Blender Render” and press “Ctrl+G” then select Deadline Thinkbox.
Group 2: select “Publish” and press “Ctrl+G” then select Deadline Thinkbox.
Set parameters: For each group,
Set label for easy identification in the graph
Set the jobname for easy identification in deadline monitor.
For render job, you can set Chunking if you want the render to be rendered in chunks.
Press: “Submit” and it’ll proceed you to pick the location for saving the dispatch data.
Pick a location that is accessible on the farm machine as dispatch data must be accessible on the farm machine running the job.
Go to Deadline monitor and check for the submitted jobs.
You can safely delete the dispatch data once job is done unless you plan on restarting the job on the farm.
Workflow Editor Reference
Workflow Editor Interface
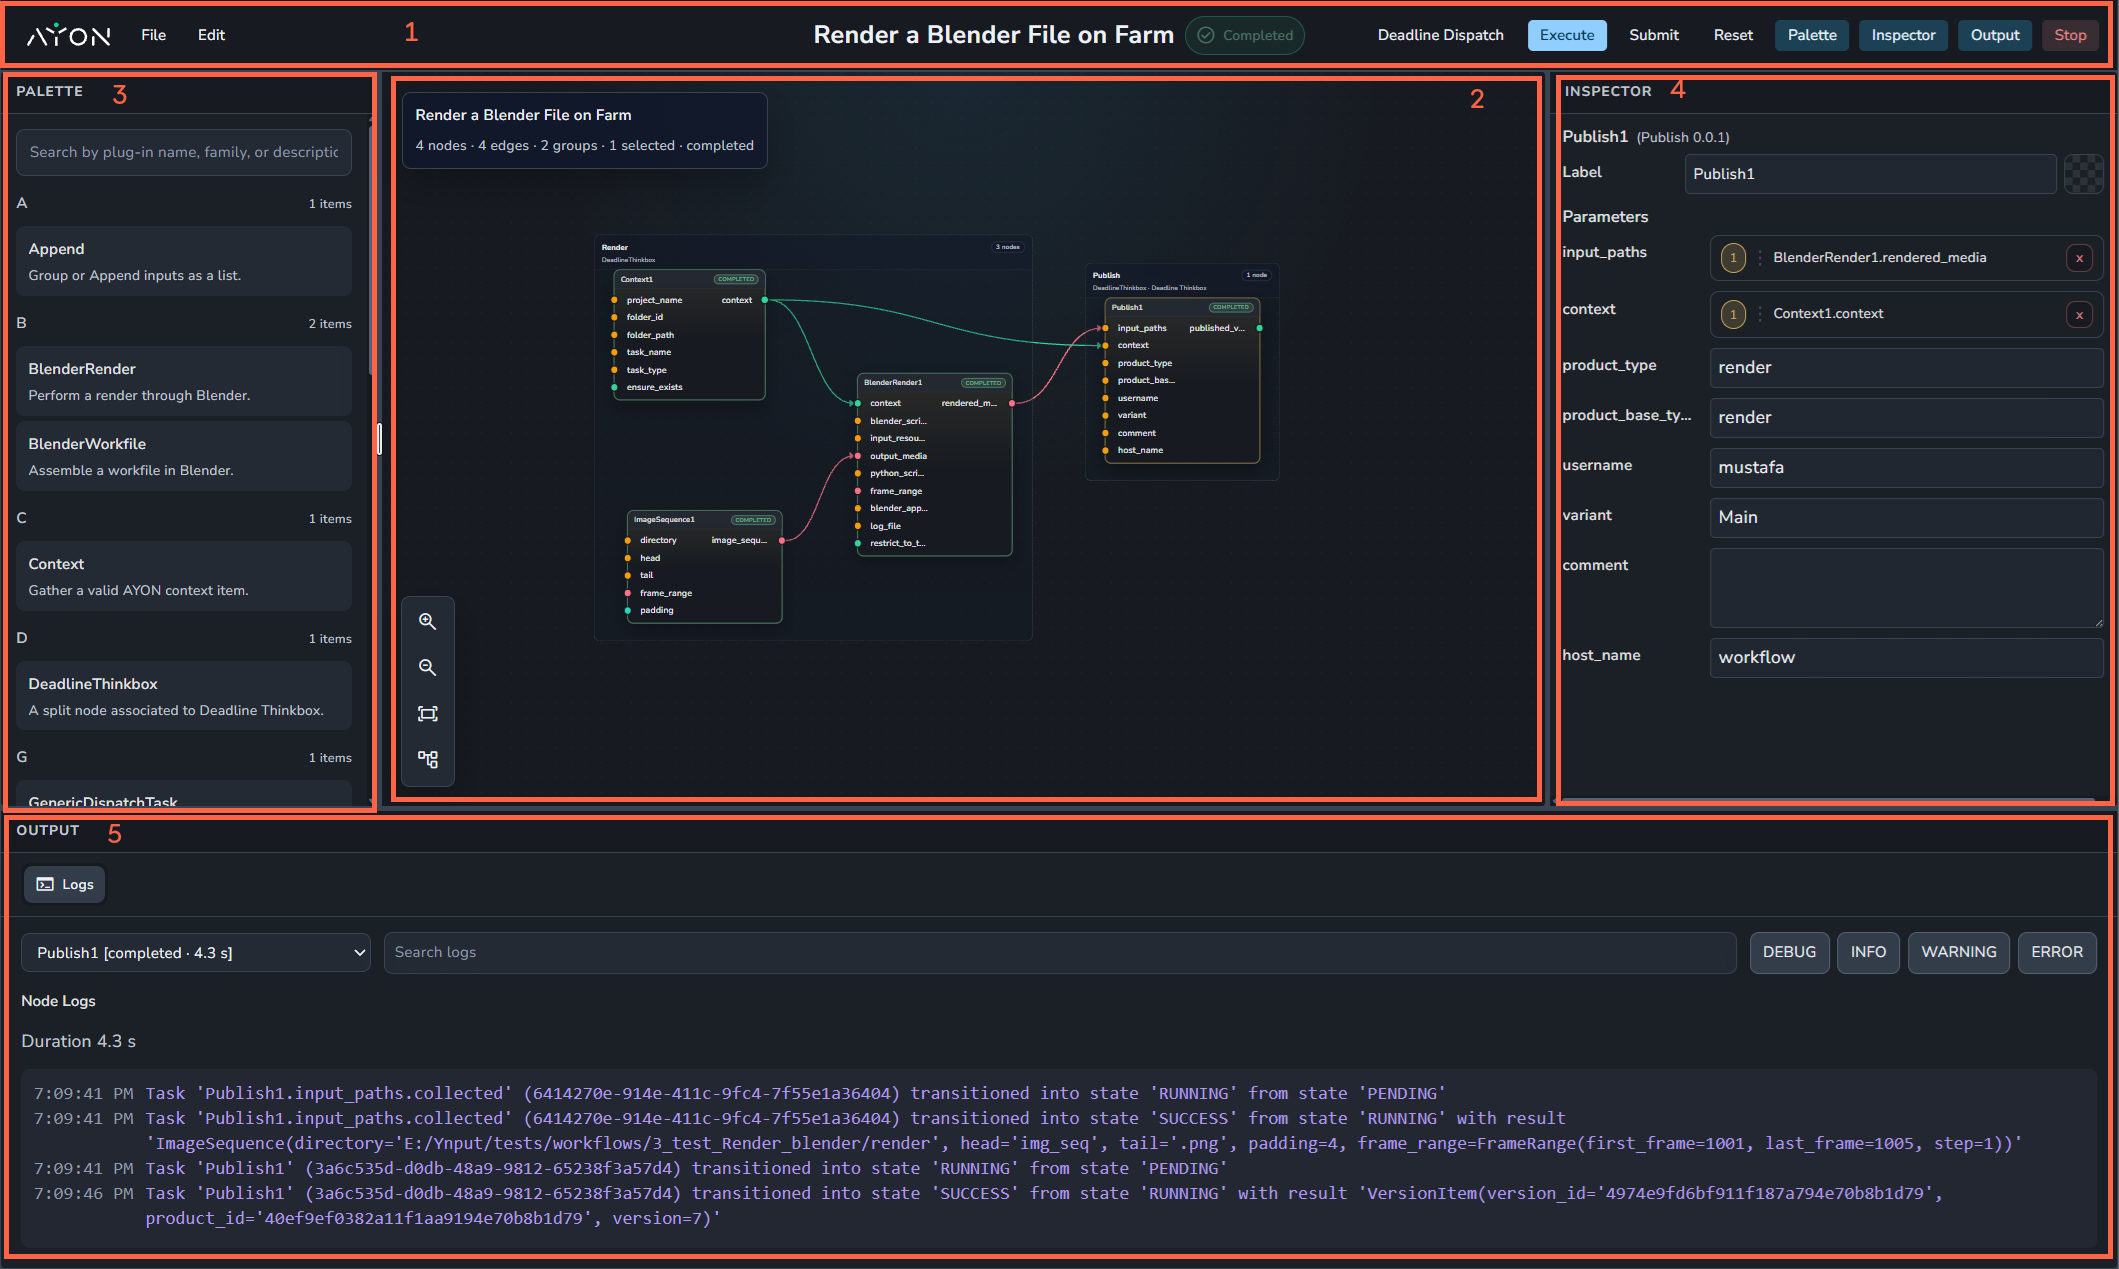
After we got our hands dirty, let’s explore the UI of the workflow editor:
Workflow Editor Header: This is where you will find the menus, workflow name, workflow status (e.g., Running or Complete), and the Dispatch menu. It also includes the execution buttons (Execute, Submit, and Reset), along with toggle buttons to show or hide the Palette, Inspector, and Output Log panels. Additionally, there is a Stop button to terminate the editor backend.
Simply closing the browser tab will not stop the editor's backend process; you must click the Stop button to shut it down completely.
Node editor Panel: It’s where you create nodes and dispatch groups.
Palette Panel: It’s where you find nodes and drag them to the editor.
You can show/hide this panel via the “Palette” button on the top right.
Inspector Panel: It’s where you can modify the parameter for the selected node in the graph.
You can show/hide this panel via the “Inspector” button on the top right.
Output Panel: It’s where you can check the log of the graph or a specific node in the graph.
You can show/hide this panel via the “Output” button on the top right.
Workflow Editor Shortcuts
TAB: for quick-create, or pick a plug-in from the palette and click or drag it onto the graph.
Hold
Cand drag across connections to cut them.Use
Ctrl/⌘+CandCtrl/⌘+Vto copy and paste workflow JSON selections.Press
DeleteorBackspaceto remove selected nodes or links.L: Layout graph
F: Frame all nodes
Ctrl+G: Create group from selection
Del/Backspace: Delete selection
Alt+0 to Alt+9: Switch between recent files
Workflow Nodes
For a list of the available workflow nodes, see Workflow Nodes Reference
Was this helpful?
Still need help? Ask the team