Working with Nuke in AYON
Last updated 8 months ago
AYON supports Nuke version 14.0 and above.
Nuke License Compatibility
The AYON Nuke addon integration is compatible exclusively with the commercial license of Nuke, which provides Full Python API Support and pipeline functionality. Please note that the non-commercial and indie licenses lack full Python API support and, as a result, are not supported by the addon.
For more details, check out the comparison between different Nuke licenses here.
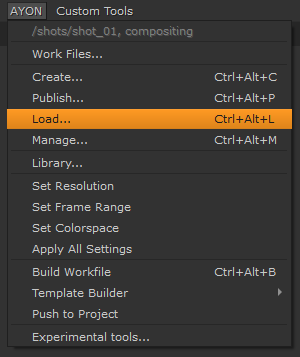
Nuke QuickStart
This is an introduction to what AYON can do for you. It attempts to make an overview for compositing artists, and simplifies processes that are better described in specific parts of the documentation.
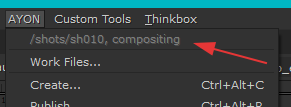
Launch Nuke - Shot and Task Context
Locate AYON Icon in the OS tray (if hidden dive in the tray toolbar), double click it to open ayon Launcher
If you cannot locate the AYON icon, then AYON launcher maybe not probably running so check Getting Started with AYON Pipeline
When Launcher opens you can choose the project to work in from the list.
Then choose the particular shot you want to work on then choose task and finally run Nuke by its icon in the tools.
The list of available projects, assets, shots, tasks and tools will differ according to your Studio and need to be set in advance by supervisor/admin.

Nuke Initial setup
Nuke AYON menu shows the current context.
Launching Nuke with context stops your timer, and starts the clock on the shot and task you picked.
AYON makes initial setup for your Nuke script. It is the same as running Apply All Settings from the AYON menu.
Reads frame range and resolution from Avalon database, sets it in Nuke Project Settings, Creates Viewer node, sets it’s range and indicates handles by In and Out points.
Reads Color settings from the project configuration, and sets it in Nuke Project Settings and Viewer.
Sets project directory in the Nuke Project Settings to the Nuke Script Directory
After Nuke starts it will automatically Apply All Settings for you. If you are sure the settings are wrong just contact your supervisor and he will set them correctly for you in project database.
Save Nuke script – the Work File
Use AYON - Workfiles tool to create a new Nuke script. AYON offers you the pre-configured naming.
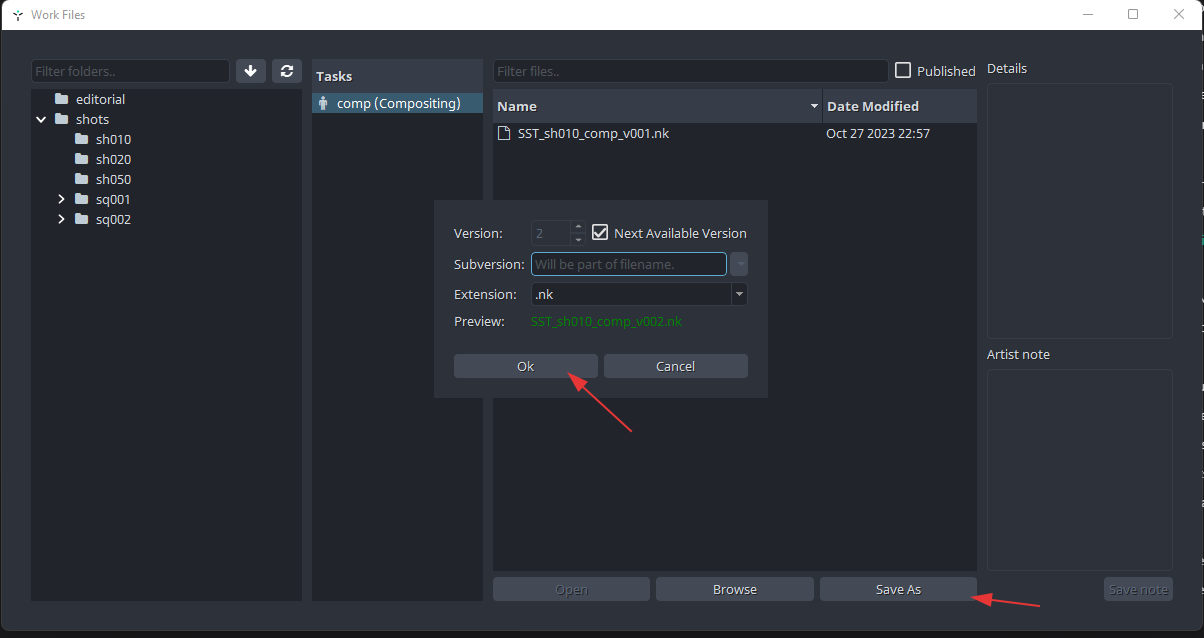
The Next Available Version checks the work folder for already used versions and offers the lowest unused version number automatically.
Subversion can be used to distinguish or name versions. For example used to add shortened artist name.
Workfile naming colorspace settings can be managed by admins.
For more info, check Nuke Workflow Tutorials.
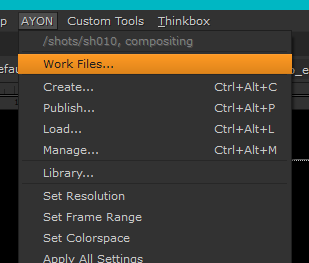
AYON Tools
AYON Global Tools
AYON Nuke Specific Tools
Pipeline Tools
Set Resolution
This menu item will set correct resolution format for you defined by your production.
Result:
creates new item in formats with project name
sets the new format as used
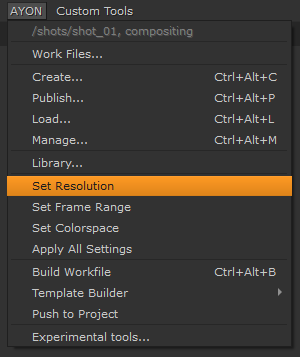
Set Frame Ranges
Use this feature in case you are not sure the frame range is correct.
Result:
setting Frame Range in script settings
setting Frame Range in viewers (timeline)
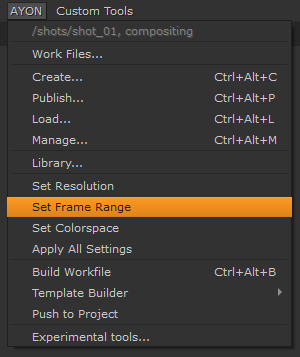

limiting to Frame Range without handles
Input handle on start
Output handle on end
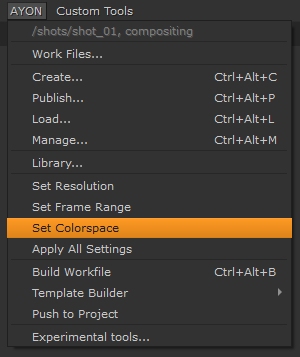
Set Colorspace
This menu item will set correct Colorspace definitions for you. All has to be configured by your production (Project coordinator).
Result:
set Colorspace in your script settings
set preview LUT to your viewers
set correct colorspace to all discovered Read nodes (following expression set in settings)
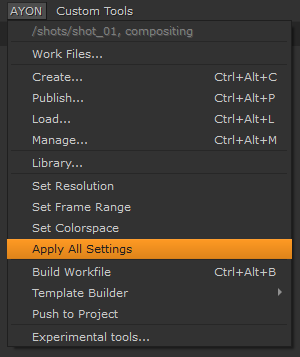
Apply All Settings
It is usually enough if you once per while use this option just to make yourself sure the workfile is having set correct properties.
Result:
set Frame Ranges
set Colorspace
set Resolution
Push to Project
This tool enables you to transfer your workfile to any accessible project. It simplifies packing and moving a workfile to a Library project. Additionally, It's handy when a shot spans multiple projects and requires the same workfile in each. The tool systematically processes all linked resources and relocates them to the new destination within the /resources folder.
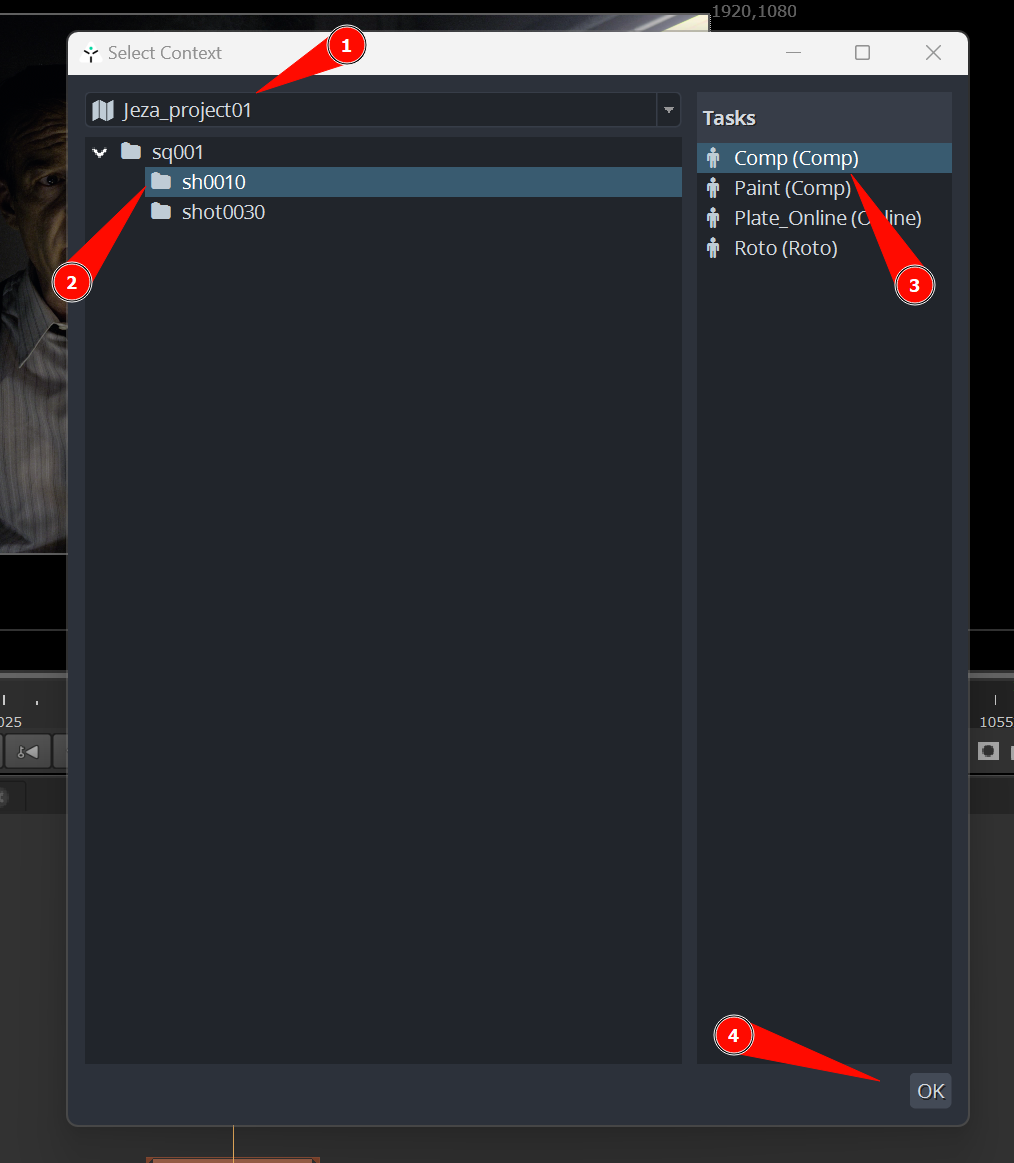
When selecting Push to Project, context selection window pops up allowing you to select the context.
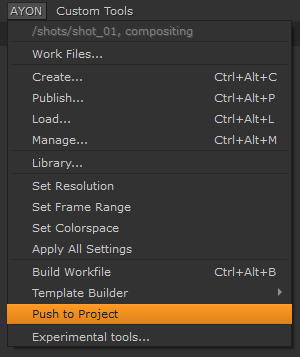
Context Selection
Choose the desired project for the workfile.
Pick the specific folder within the project for the workfile.
Determine the task context.
Click 'OK' and await completion.
A confirmation message will display the workfile's destination path.
Build Workfile
It allows you you build workfile from a template specified in addon nuke settings.
For more info, please refer to How to Use Templated Workfile Builder.
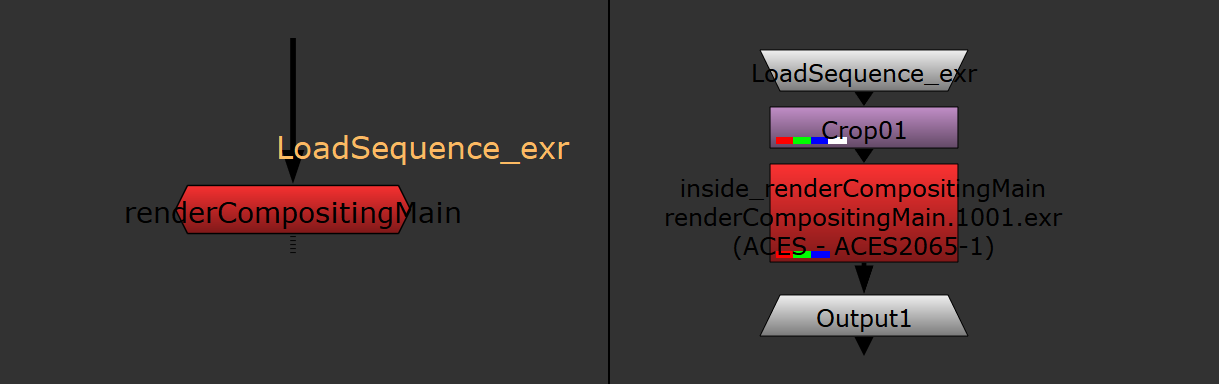
Create Products
Create Write Render
To create AYON managed Write node, select the Read node you just created, from AYON menu, pick Create.


In the Instance Creator, pick a product type to create Render (write), and Create.
This will create a Group with a Write node inside.
Create Prerender Node
Creating Prerender is very similar to creating AYON managed Write node.
What Nuke Publish Does
From Artist perspective, Nuke publish gathers all the stuff found in the Nuke script with Publish checkbox set to on, exports stuff and raises the Nuke script (workfile) version.
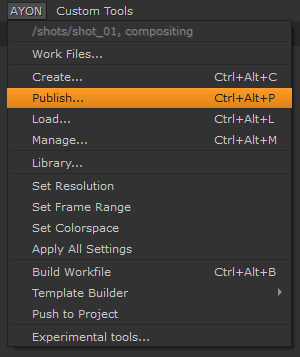
Publish tool is accessed via AYON menu:
AYON > Publish…
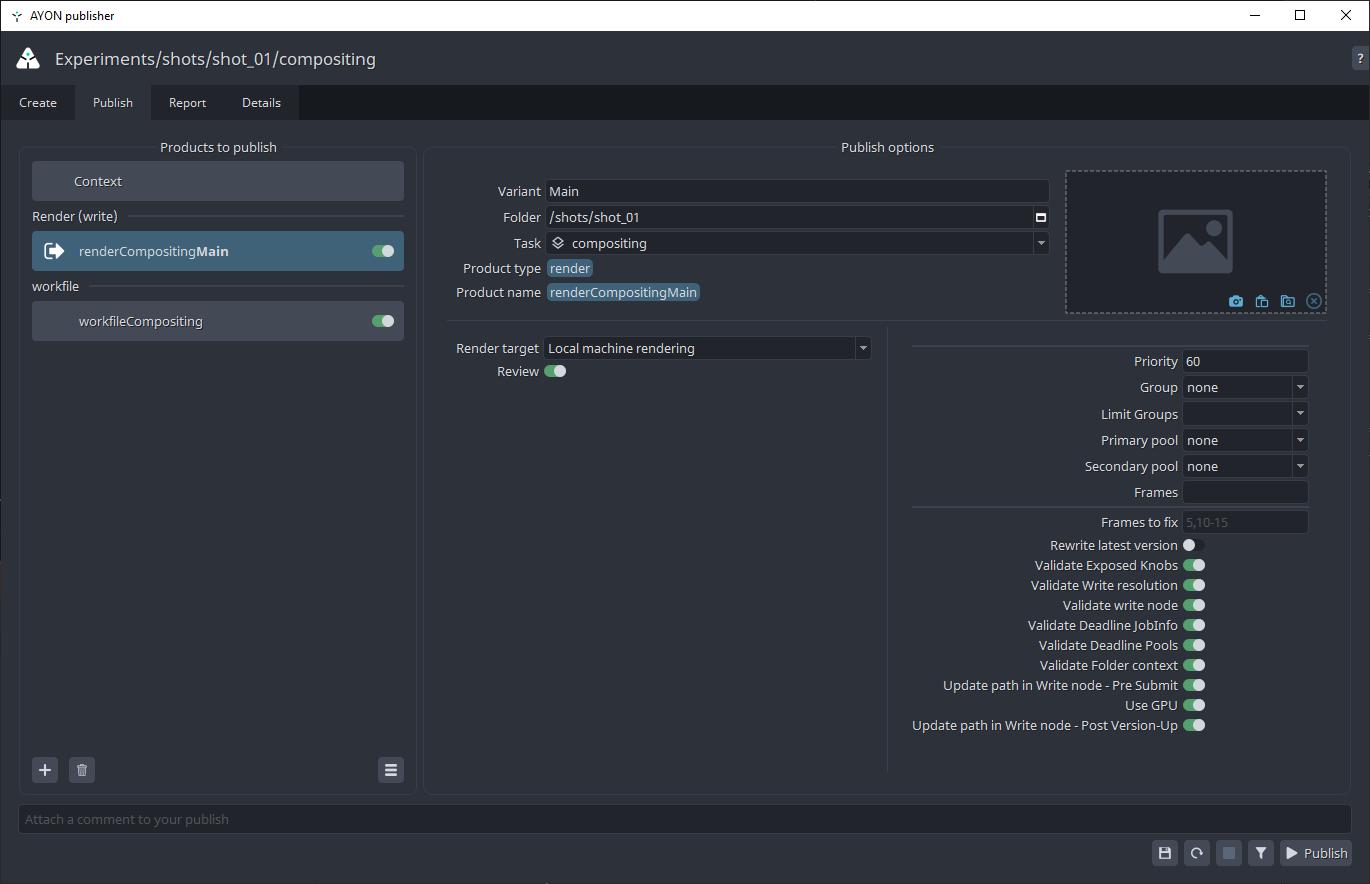
The left column of the publish dialog shows what will be published. Typically it is one or more renders or prerenders, plus work file.
The right hand side shows the publish attributes.
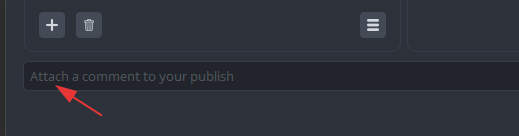
Publish Note
Artist can add Note before firing the publish button. The Note is meant for easy communication between artist and supervisor. After publish, Note can be seen in any integrated Project Management platforms.
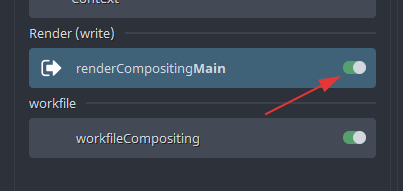
Product publishing activation
If you run the publish and decide to not publish the render product, you can turn it off right in the Publish dialog by clicking on the toggle.
Publish steps
Steps are shown in the details tab.
Each step has a set of plugins.
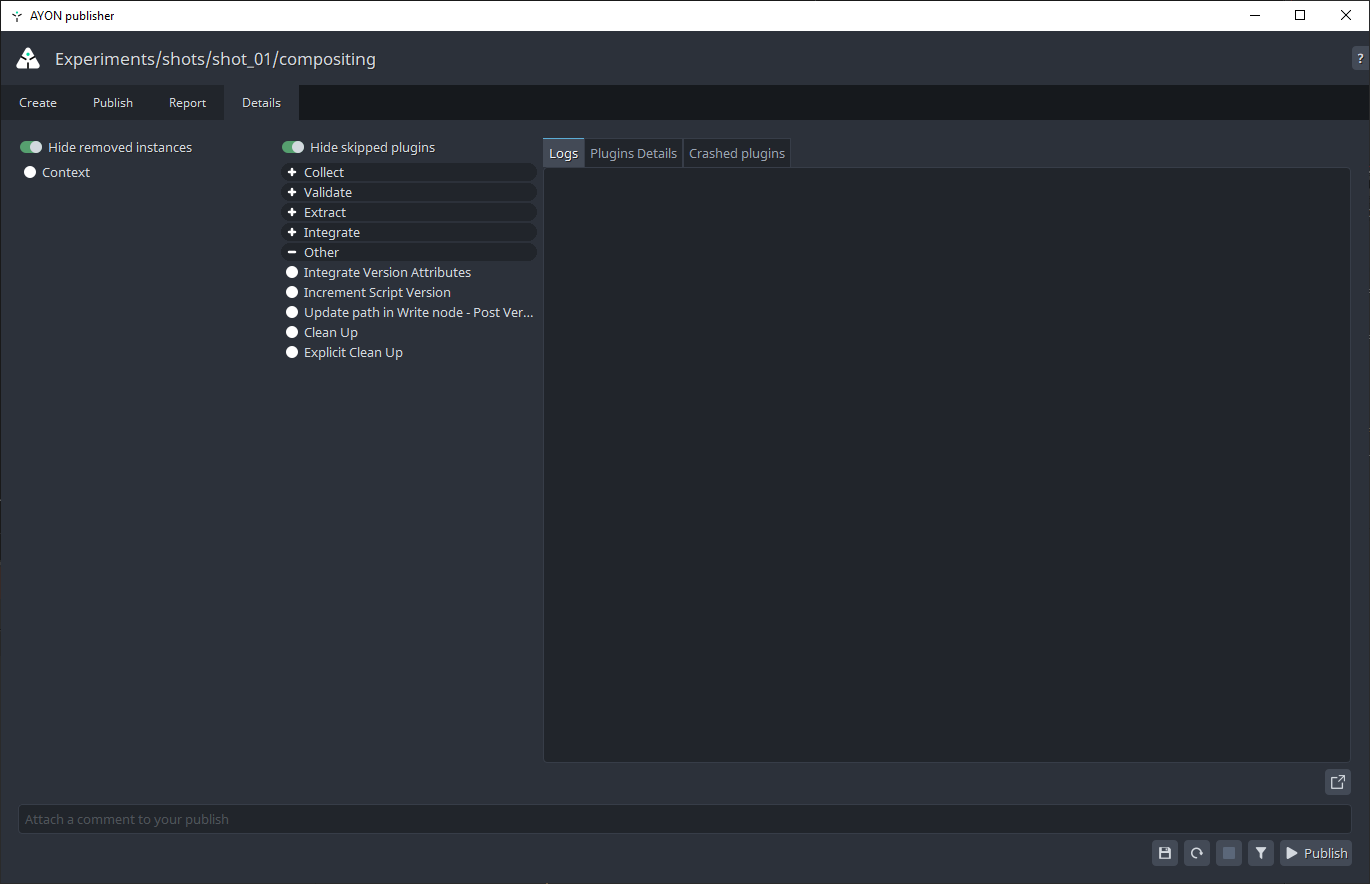
[Implicit Step] Gathers all the stuff found in the Nuke script with Publish checkbox set to on
Collect: Collects all the info (from the script, database…)
Validate: Validators to be run (checks render range and resolution...)
Extract: Extracts data from the script
generates thumbnail
creates review(s) like h264
adds burnins to review(s)
Integrate: Integrator plugins
Copies and renames components like render(s), review(s), Nuke script... to publish folder
writes to database,
sends preview of the render to any connected third party production trackers like ftrack or flow.
Other: Increments Nuke script version, cleans up the render directory
Gathering all the info and validating usually takes just a few seconds. Creating reviews for long, high resolution shots can however take significant amount of time when publishing locally.
More info about Publishing see [What is publihsing].
Review
When you turn the review checkbox on in your AYON write node, here is what happens:
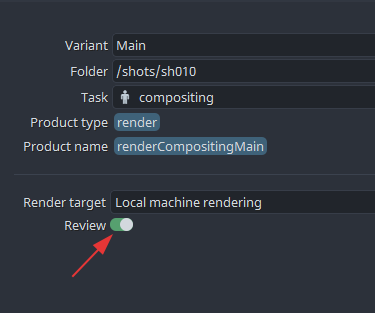
AYON uses the current Nuke script to
Load the render
Optionally apply LUT
Render Prores 4444 with the same resolution as your render
Use Ffmpeg to convert the Prores to whatever review(s) you defined
Use Ffmpeg to add (optional) burnin to the review(s) from previous step
Creating reviews is a part of the publishing process. If you choose to do a local publish or to use existing frames, review will be processed also on the artist's machine. If you choose to publish on the farm, you will render and do reviews on the farm.
So far there is no option for using existing frames (from your local / check render) and just do the review on the farm.
Admin Tip - Configuring Reviews
Check extract Review in Core Addon Settings
Render and Publish
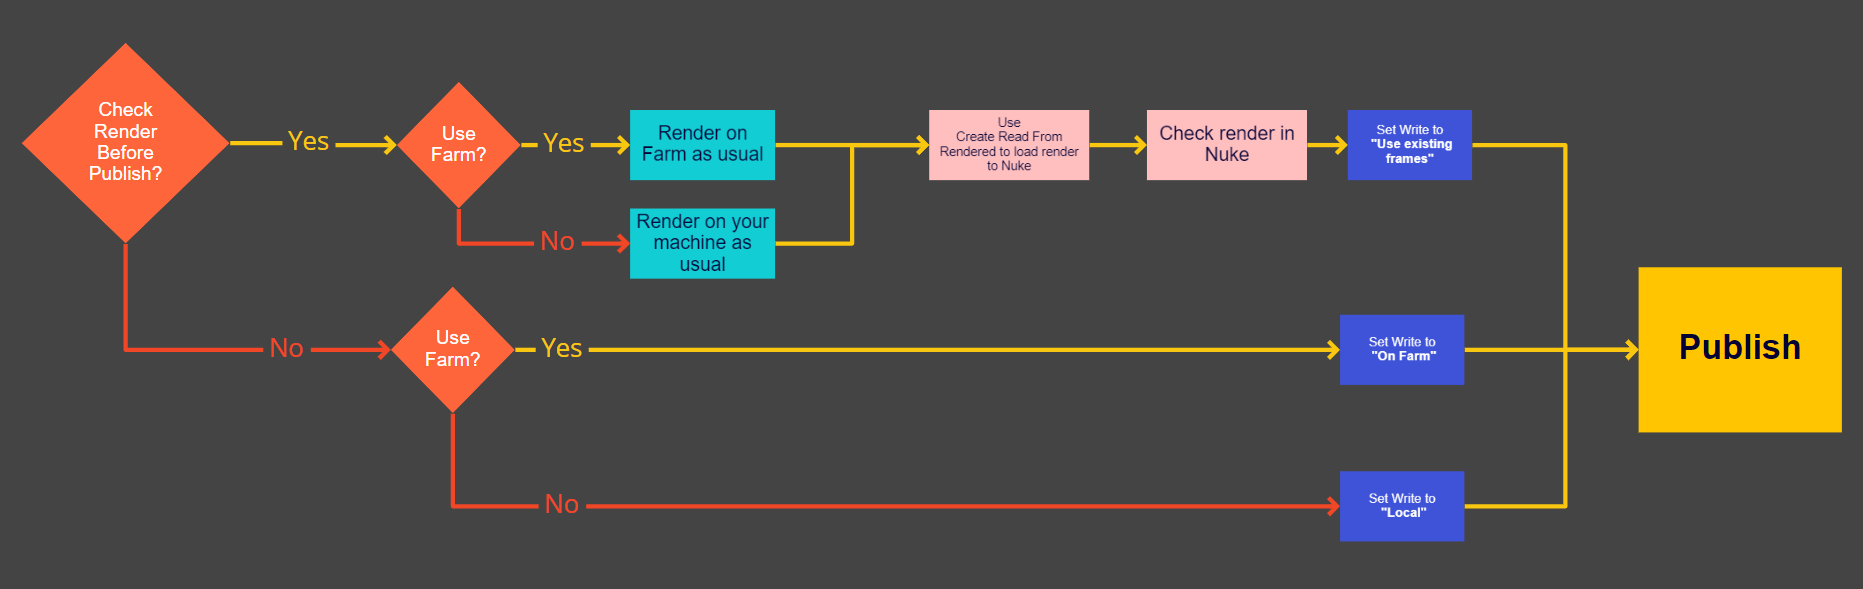
Let’s say you want to render and publish the shot right now, with only a Read and Write node. You need to decide if you want to render, check the render and then publish it, or you want to execute the render and publish in one go.
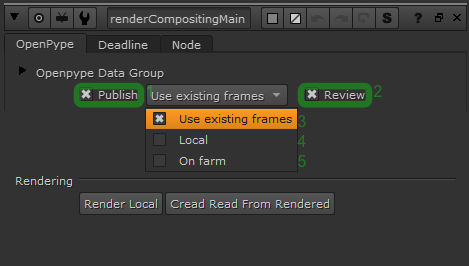
If you wish to check your render before publishing, you can use your local machine or your farm to render the write node as you would do without AYON, load and check your render (AYON Write has a convenience button for that), and if happy, use publish with Use existing frames option selected in the write node to generate the review on your local machine.
If you want to render and publish on the farm in one go, run publish with On farm option selected in the write node to render and make the review on farm.
Render Attributes
Workfile Dependency- when submitting the render to Deadline, the workfile is will added as an asset dependency putting the job in pending state initially. Once the workfile path is available to Deadline, the job will be released.Use Published Workfile- when submitting the render to Deadline, the workfile used for rendering will be the published workfile. If false, the workfile from the work area will be used.
Version-less Render
AYON is configured so your render file names have no version number until the render is fully finished and published.
Main advantage:
You can keep the render from the previous version and re-render only part of the shot. With care, this is handy.Main disadvantage:
You can render only one version of your shot at one time.
Otherwise you risk to partially overwrite your shot render before publishing copies and renames the rendered files to the properly versioned publish folder.
When making quick farm publishes, like making two versions with different color correction, care must be taken to let the first job (first version) completely finish before the second version starts rendering.
Rewrite the Last Published Version
Rendering can be resource-intensive, so re-rendering only the changed frames while reusing existing ones can be a smart approach.
The AYON Nuke integration offers Overwrite the Last Publish feature for local renders.
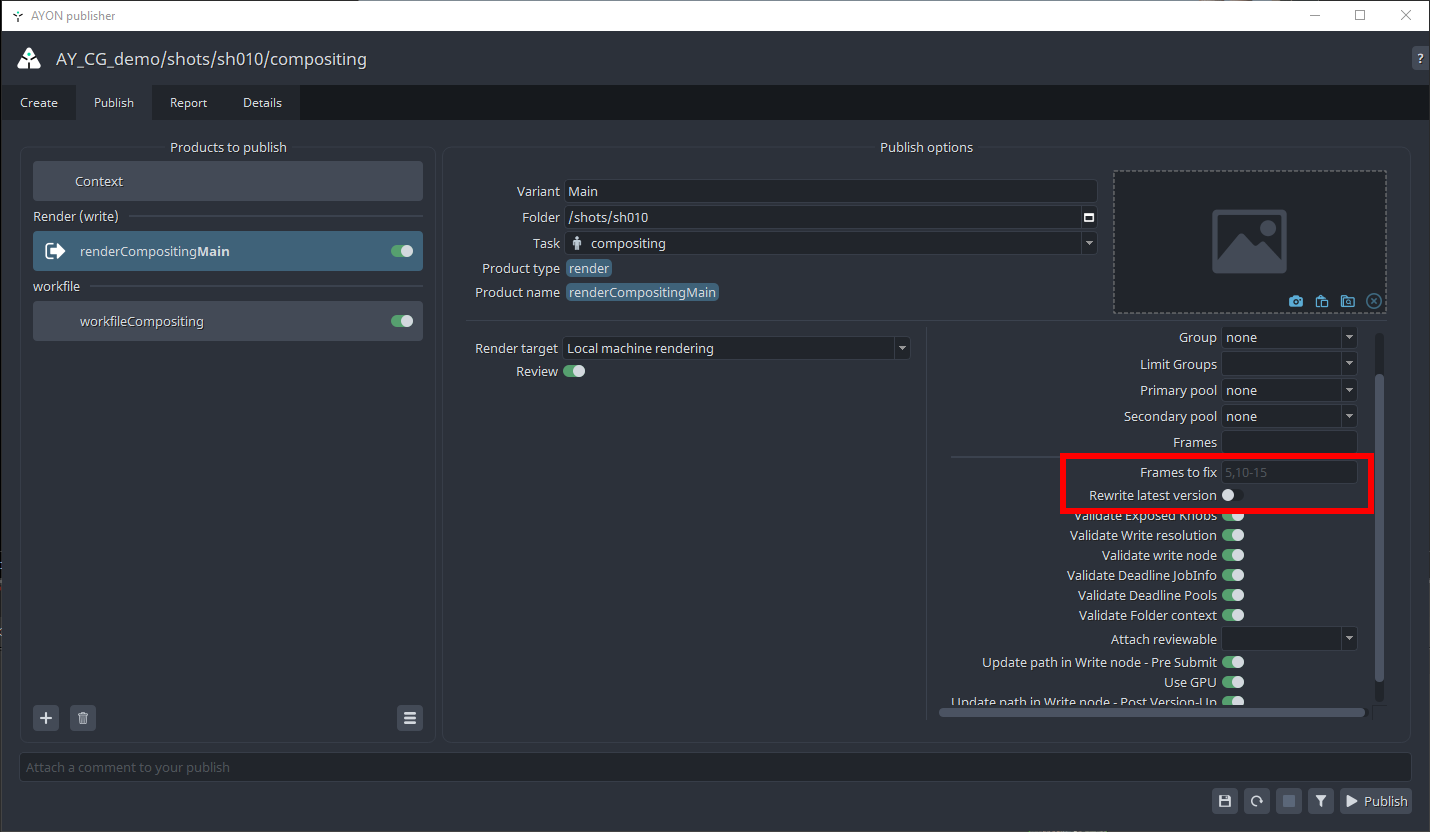
In the Publisher UI, you’ll find these fields:
Frames to Fix: Specify the frame range to re-render, e.g.,
1005,1010-1015.Rewrite Latest Version: Toggle to either overwrite the latest version or create a new version by merging old frames with the newly re-rendered ones.
Load Products
Use Load from AYON menu to load any plates or renders available.
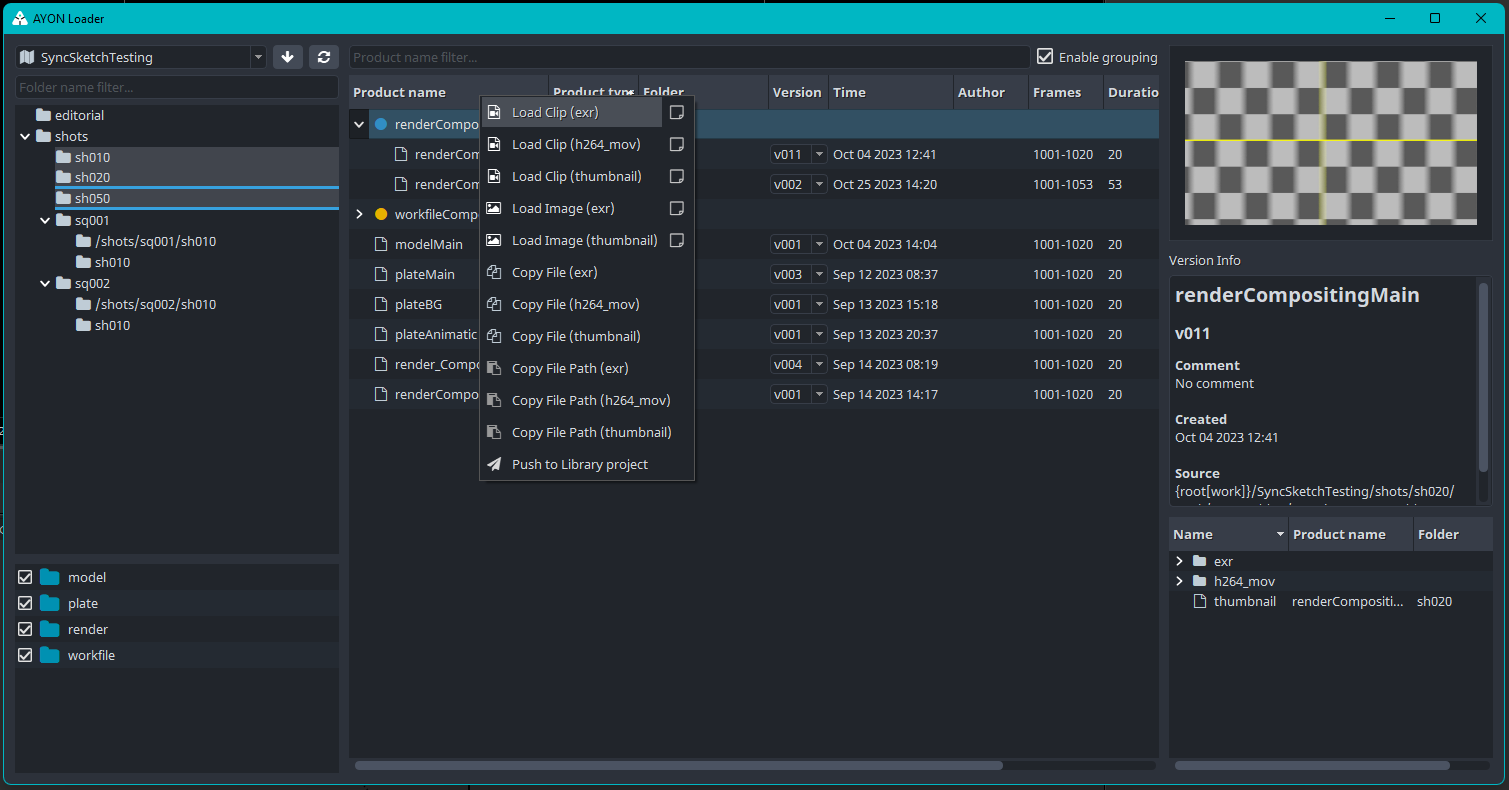
Pick your desired product to load, right click and choose Load Image Sequence to create a Read node in Nuke.
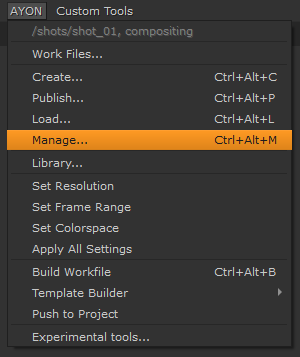
Managing Loaded Products
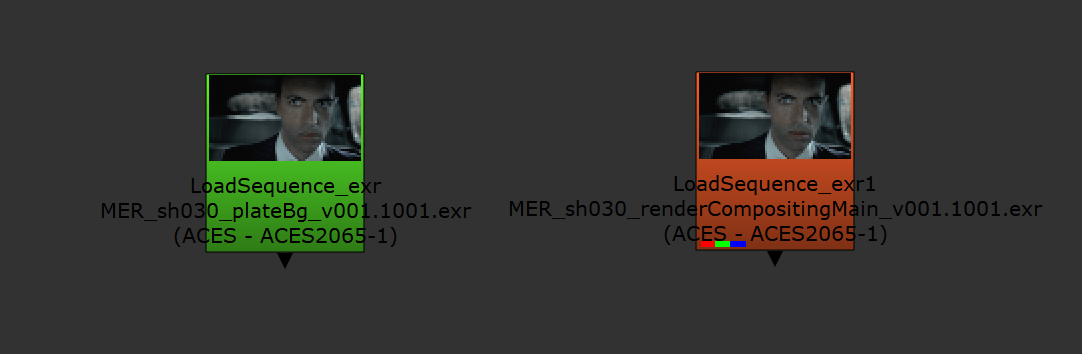
Use Manage to switch versions for loaded assets.
AYON checks all the assets loaded to Nuke on script open. All out of date assets are colored orange, up to date assets are colored green.
Working with Hiero Effects
This video show how to publish effect from Hiero / Nuke Studio, and use the effect in Nuke.
Troubleshooting
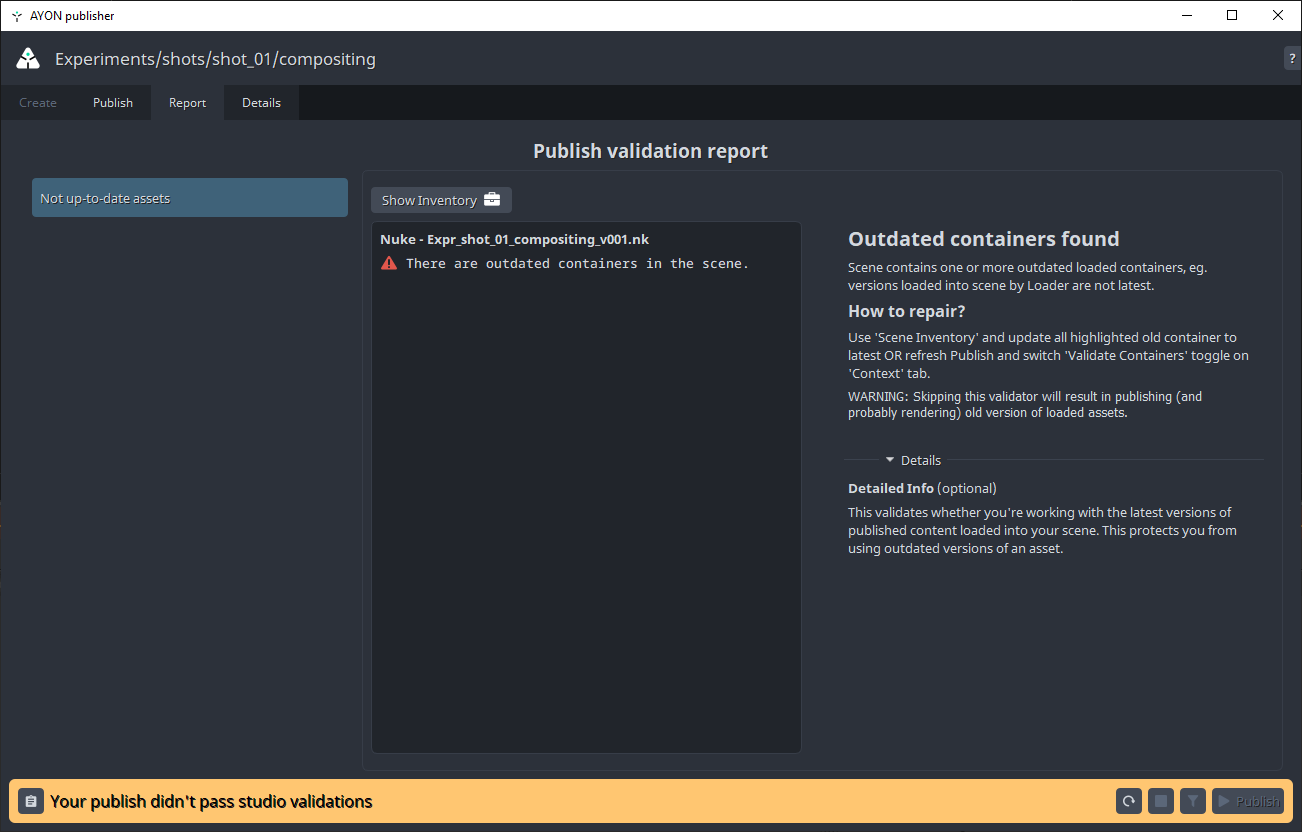
Fixing Validate Containers
If your Pyblish dialog fails on Validate Containers, you might have an old asset loaded. Use AYON - Manage... to switch the asset(s) to the latest version.
Fixing Validate Version
If your Pyblish dialog fails on Validate Version, you might be trying to publish already published version. Rise your version in the AYON WorkFiles SaveAs.
Or maybe you accidentally copied write node from different shot to your current one. Check the write publishes on the left side of the Pyblish dialog. Typically you publish only one write. Locate and delete the stray write from other shot.
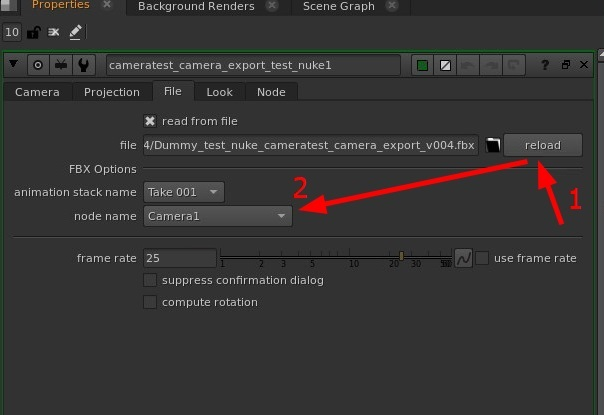
Inconsistent FBX Camera loading
When loading an FBX camera, you may encounter incomplete loading error, particularly if your wokfile already contains Alembic (ABC) data. Although Nuke supports FBX camera imports, the Camera node can sometimes fail to load the FBX file properly.
This issue often arises because ABC and FBX formats seem to share a common loading context, which can lead to conflicts when both are present in the same workfile.
To resolve this:
Try manually reloading the FBX file.
Make sure the
node nameis set to the Camera.
Default FBX Views
views like "Producer Perspective," "Producer Top," and "Producer Bottom" are default FBX views that Nuke adds automatically.