Keycloak
Last updated 6 months ago
This addon requires a valid AYON SSO license. See AYON Subscription for more information.
Introduction
Keycloak addon provides SSO for Ayon using Keycloak. Keycloak is an open-source IAM server supporting Google SSO, LDAP/AD user federation, 2FA, and more.
This guide outlines how to install the addon in your production and the steps to configure a new Keycloak instance for authentication, including realm creation, client setup, and user role management.
Addon Installation
Getting Keycloak addon up and running is a simple two-step process:
Get the addon: Navigate to the Addon Market (M+M) in your AYON Server, Search for
keycloak, and click install.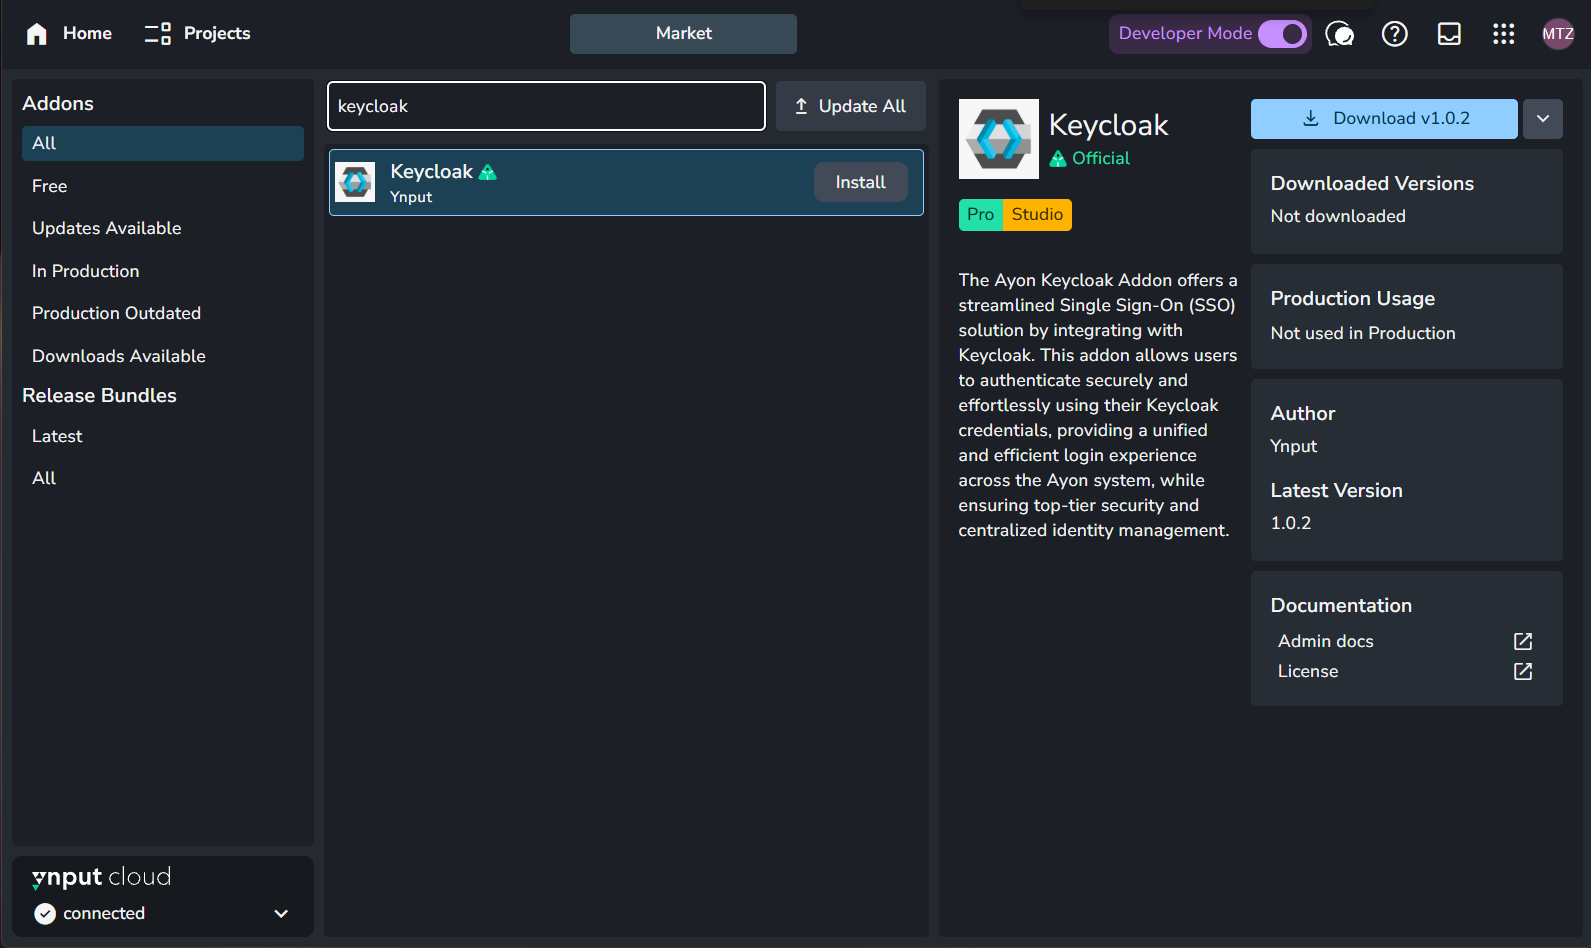
AYON Market with 'keycloak' written in search bar. Admins can click install button next to 'keycloak' to get the addon on their AYON Server. Add it to your production Bundle: Navigate to your bundles (B+B), create and duplicate your production bundle, set Keycloak to the available version on your server. For further info about working with bundles, see Bundles & Addons.
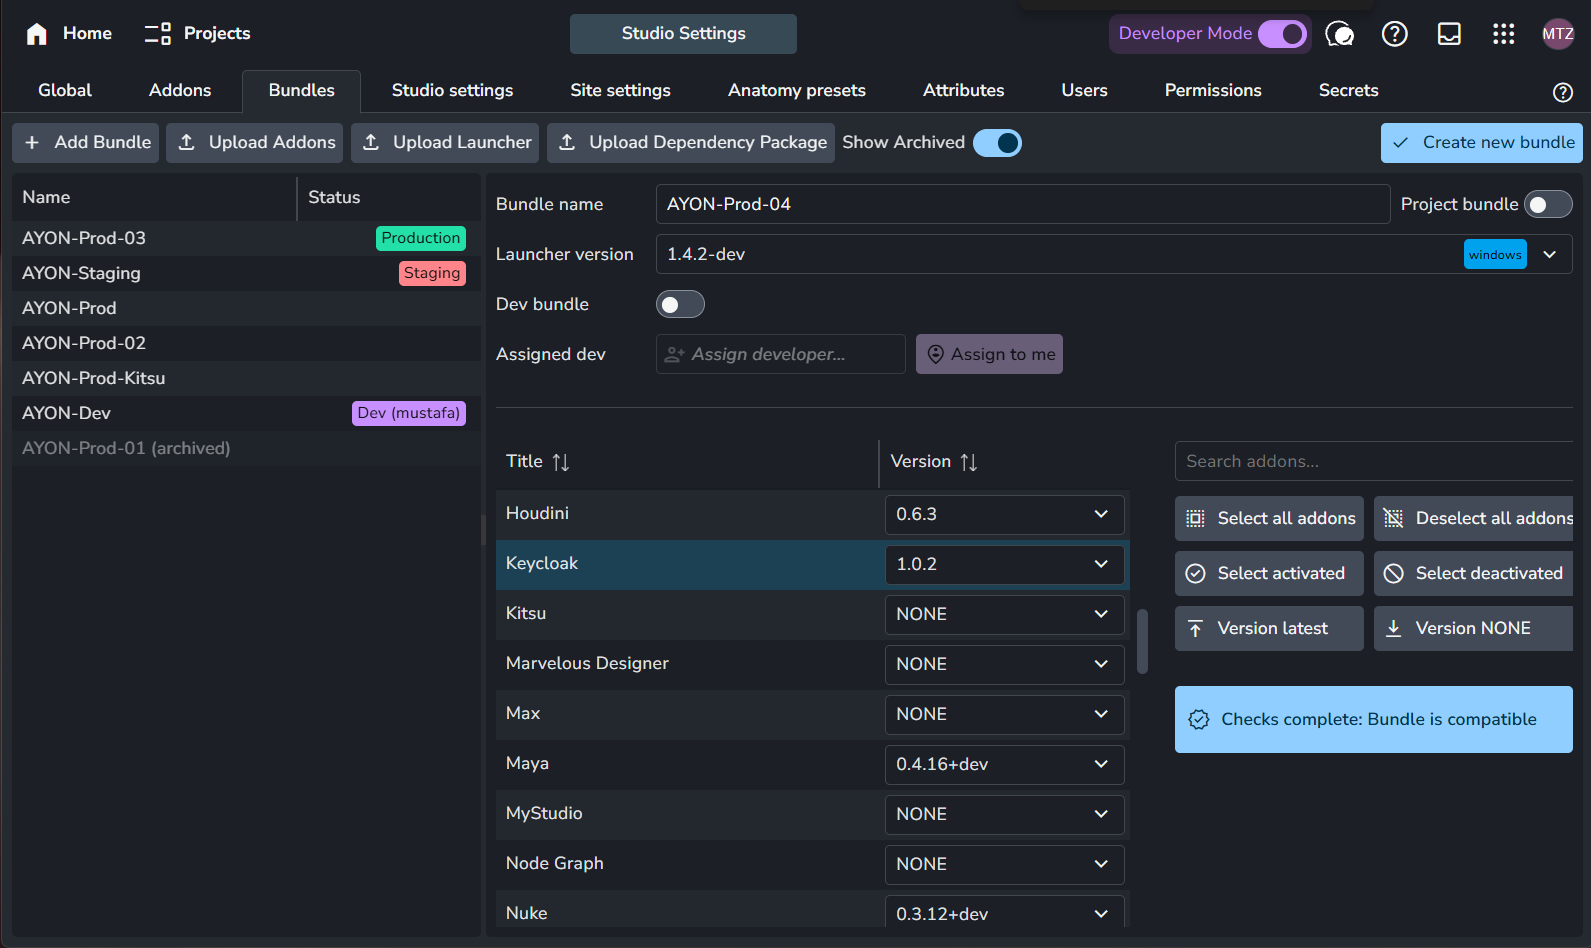
AYON bundles tab where users can duplicate their production bundle and set Keycloak addon to a version to include it in their production.
Setting up Keycloak server
Keycloak URL
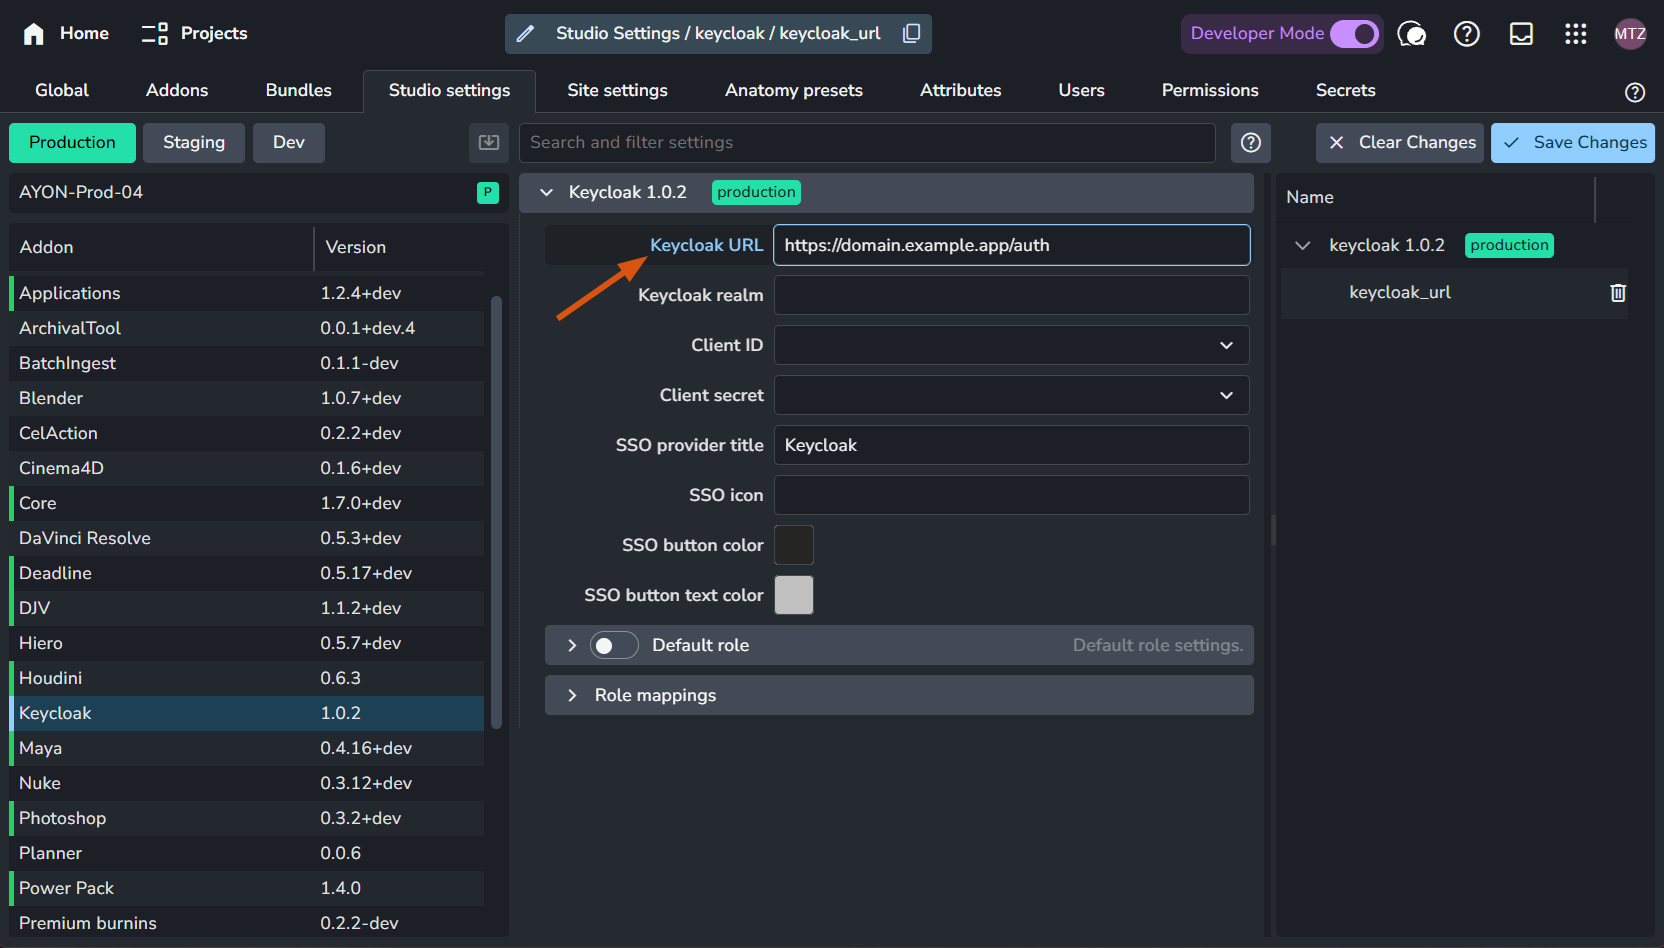
First things first, start by specifying your Keycloak URL in AYON addon settings. e.g.
https://domain.example.app/authYou can use this URI ayon+settings://keycloak/keycloak_url to quickly navigate to the setting.
Create or Re-use a Realm
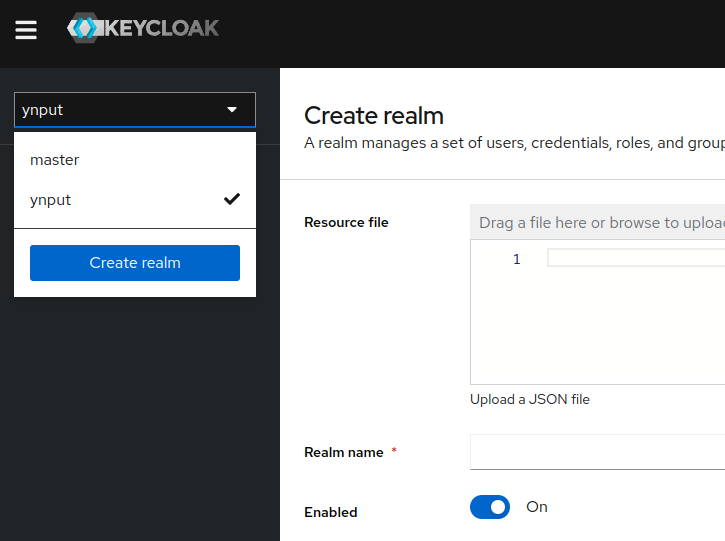
Start by creating a new realm for authentication purposes. If a suitable realm already exists, you can re-use it for this setup.
A realm is a basic organizational unit within Keycloak. As Keycloak supports multi-tenancy, a realm can represent a tenant or an organization. Realms are completely isolated environments, each with its user database and rules. The master realm should be used only for Keycloak administration.
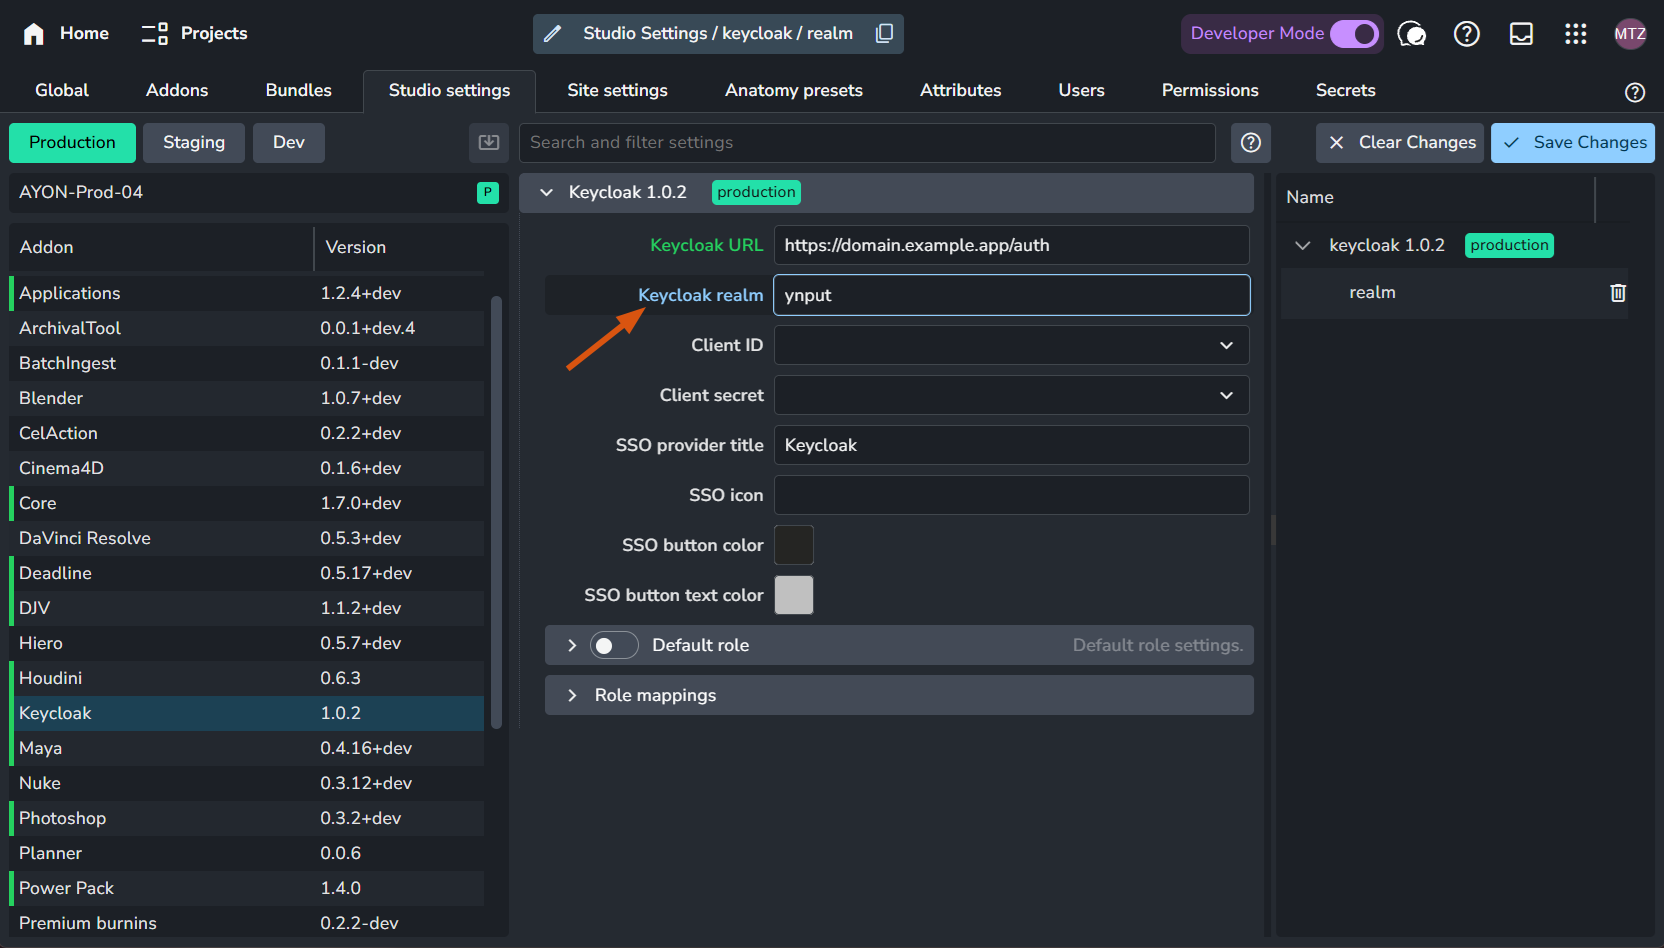
When creating a new realm, you only need to assign it a name.
Once done, on AYON side in keycloak addon settings, set the Keycloak realm to your realm name.
Creating a client
A client is a single application that uses the authentication service. If a realm represents an organization, a client represents an Ayon instance. Multiple clients can be configured within a realm, for production and staging instances, or to hard limit access to a particular instance dedicated to a specific project.
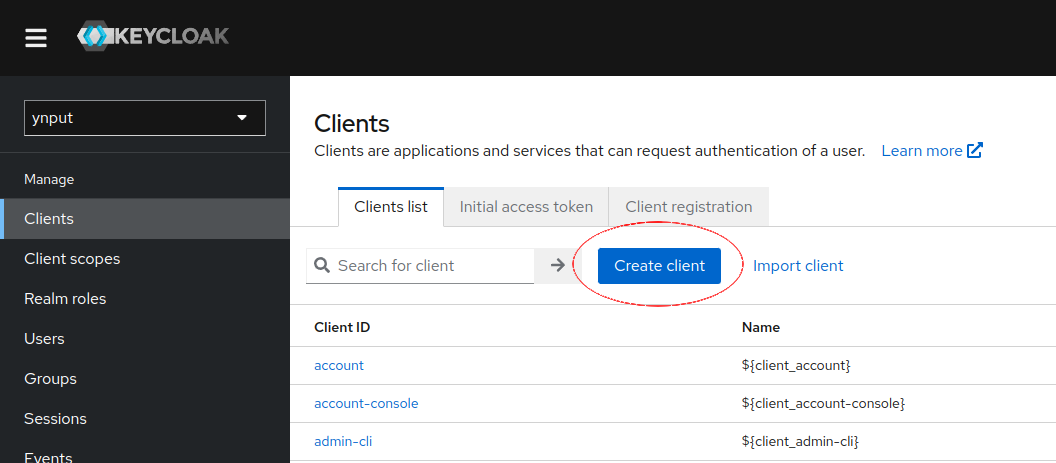
Navigate to the realm's client page and click "Create client".
Select "OpenID Connect" as the "Client Protocol".
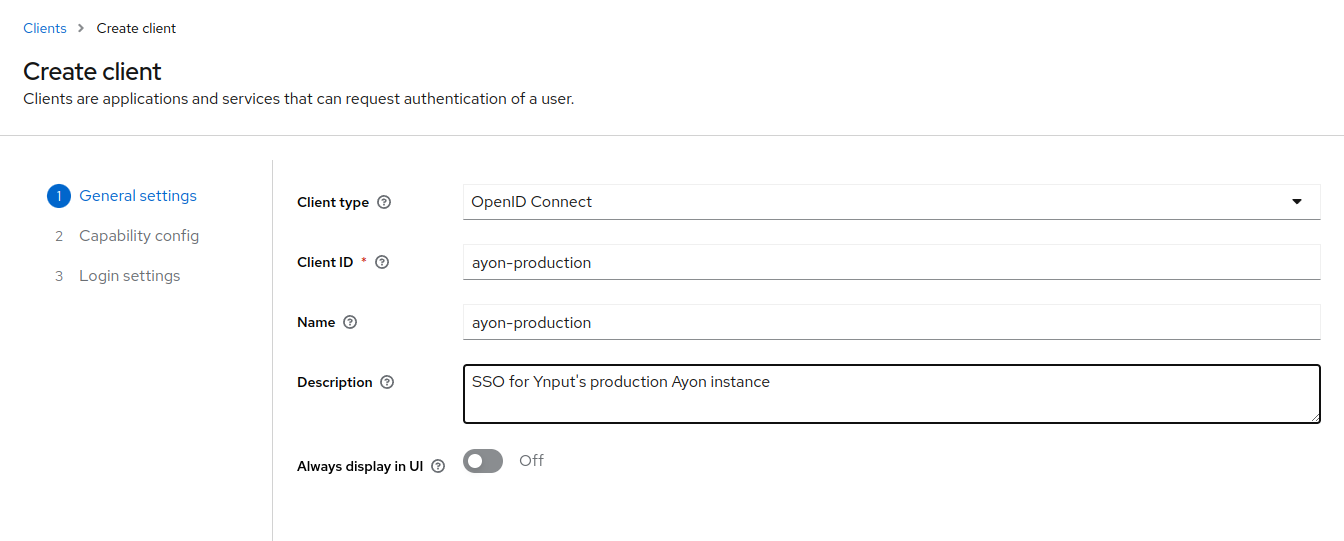
Assign a unique ID to your client in the "Client ID" field. It may be an instance identifier for example.
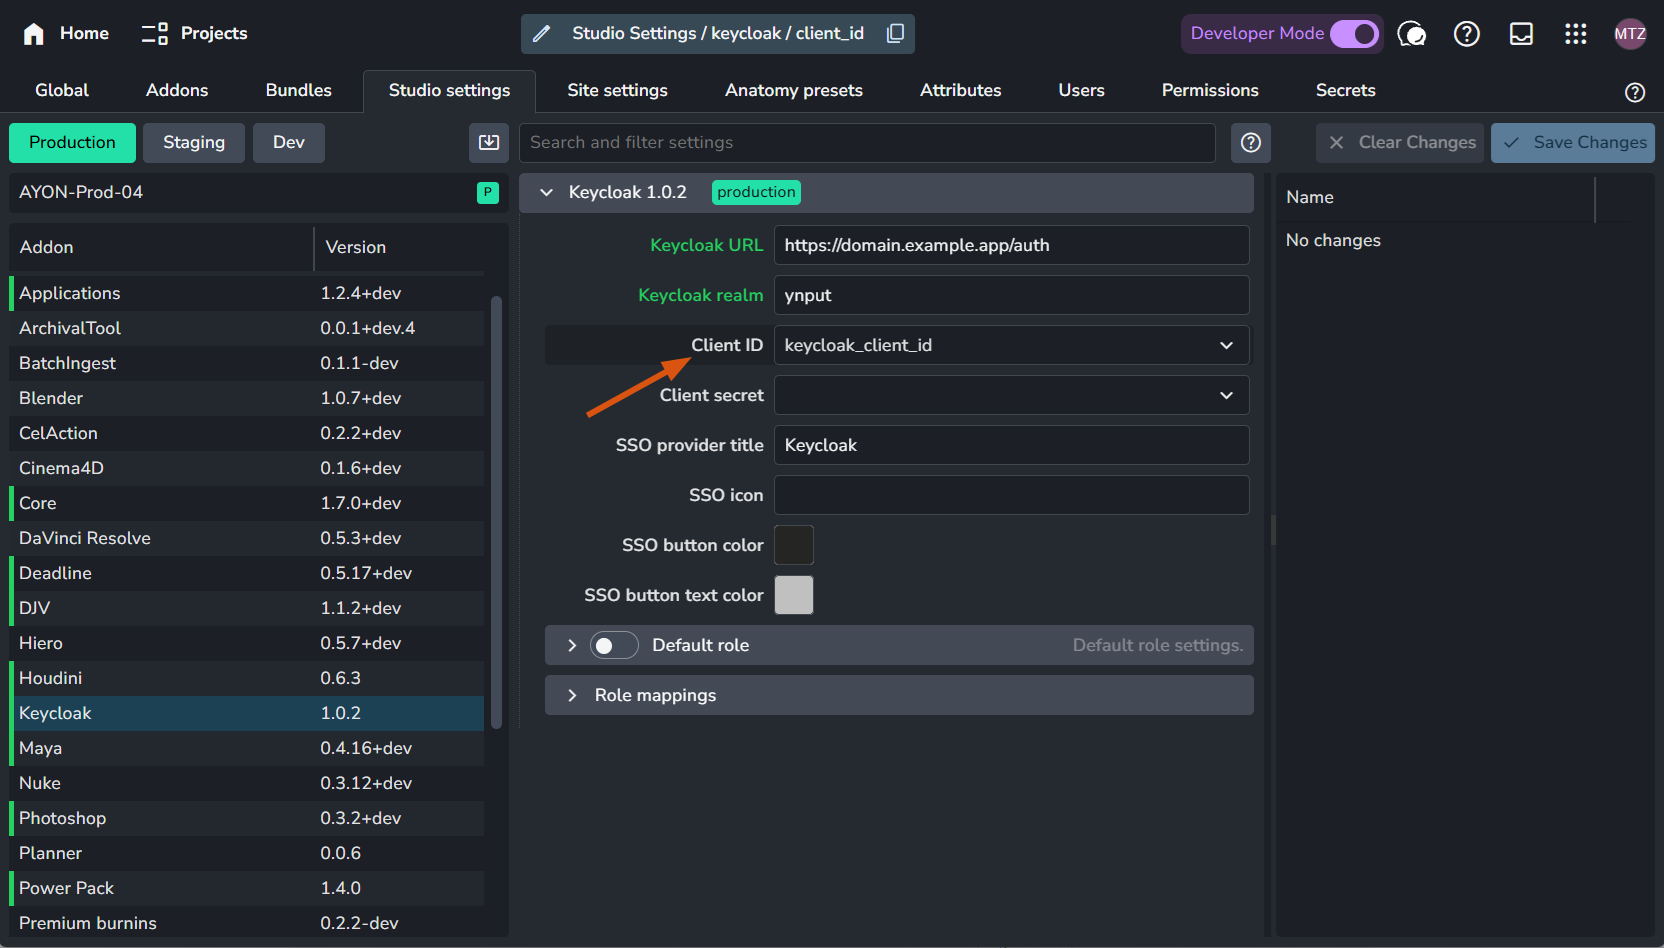
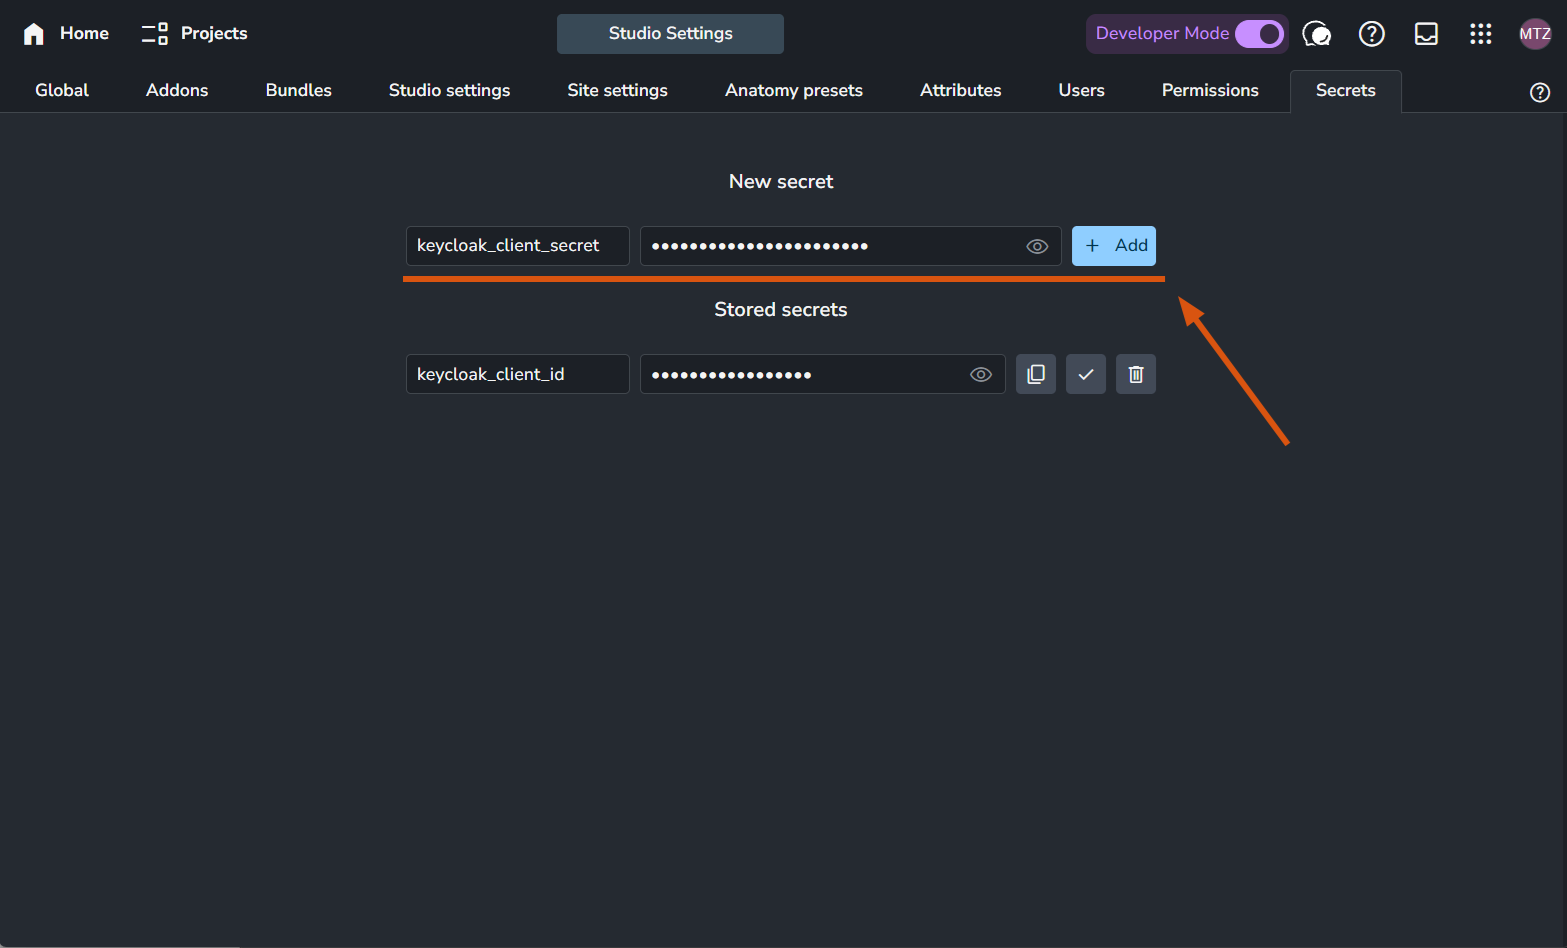
In Ayon, save this value to the secrets as keycloak_client_id , For further info about secrets see AYON Server Secrets.

The in AYON keycloak addon settings, In the Client ID, select ‘keycloak_client_id’ secret from the dropdown menu.
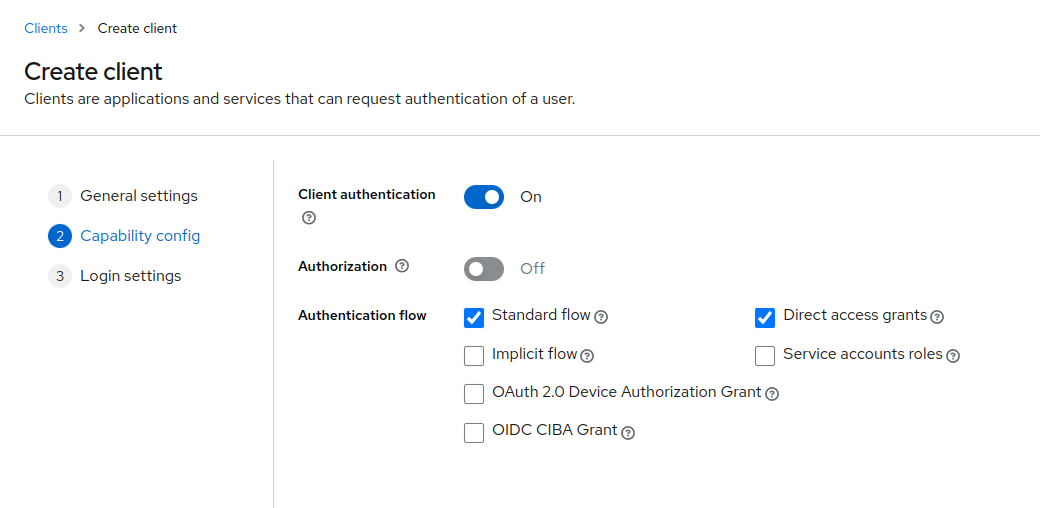
Client configuration
After creating the client, enable "Client Authentication" on the next page. Leave the other settings at their default values unless specific changes are required for your setup.
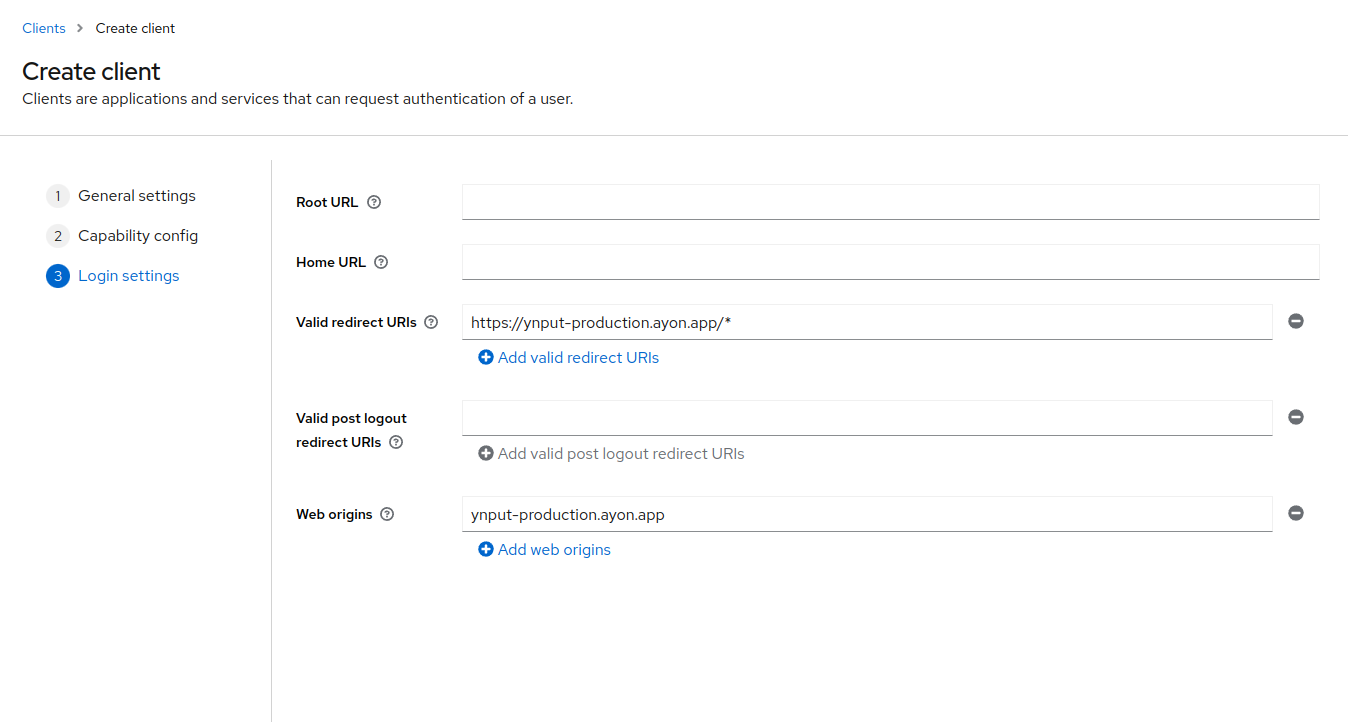
Add http://yourserver/* to the "Valid Redirect URIs" field. This URI is where Keycloak will send the authentication response.
For "Web Origins", enter the host:port format, such as localhost:3000 or mydomain.example.app. This setting specifies the allowed origins for CORS.
Client Authentication and Secrets
After setting up the client, go to the "Credentials" tab and create/copy the client secret. This secret is used to authenticate your client with Keycloak.
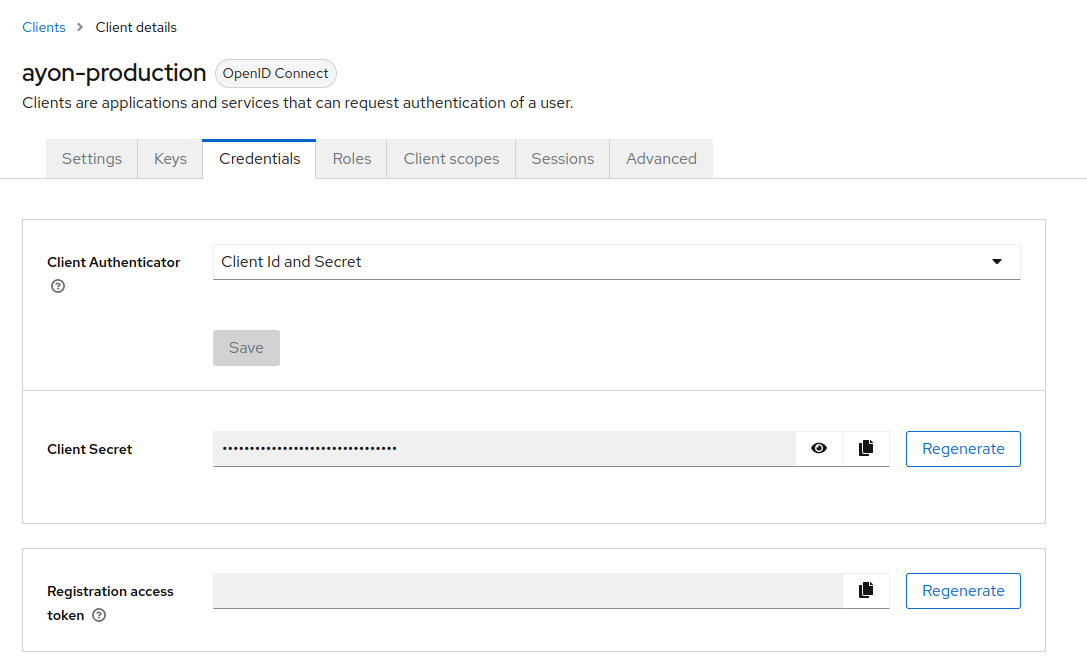
In Ayon, save it to the secrets as keycloak_client_secret

Setting up roles
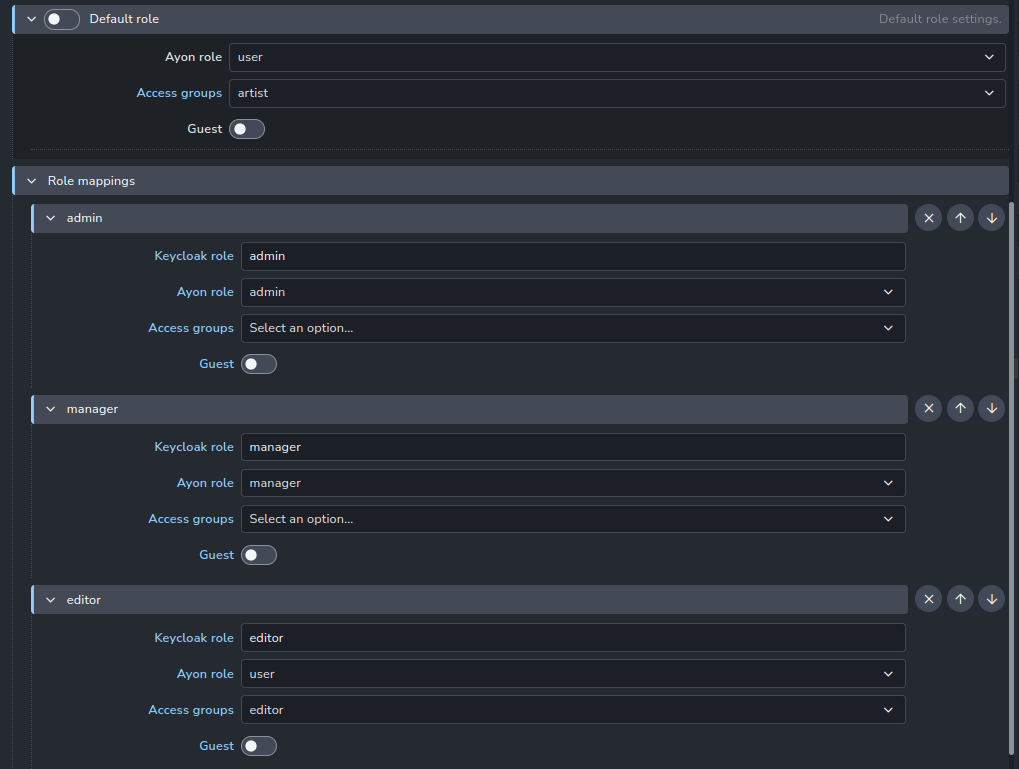
In the "Roles" tab, create roles, that you then be able to map to ayon user levels and access groups
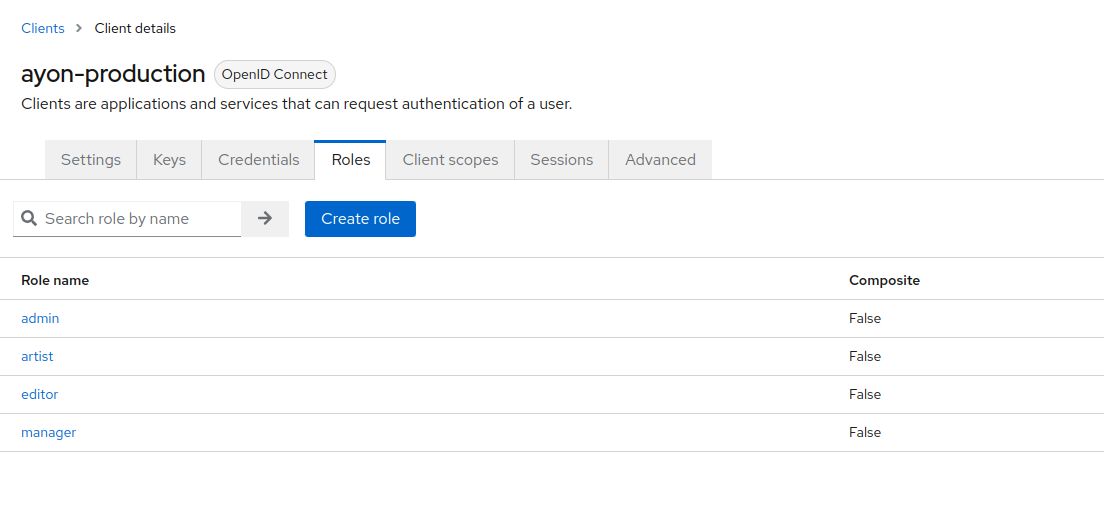
When user logs in, assigned client roles in Keycloak are matched to role mapping settings of the addon and if there is a match, Ayon role and Access groups are assigned to the user. If no Keycloak role matches and "Default role" is enabled, the user is assigned the default one. If "Default role" is disabled, the user is denied access to Ayon.
Users are matched using their email address. If the user with the same email already exists in Ayon, the existing account will be used and access rights updated according to Keycloak addon rules. Otherwise, a new user is created and the first part of the email address (before @) will be used as their username.
Roles are re-applied every time the user logs in.
Identity Providers and User Federation
Configure any identity providers (e.g., Google, Facebook) or user federation (e.g., LDAP, Active Directory) for your realm as needed. This allows for authentication using external user databases or social logins.
Please refer to Keycloak documentation for more information on configuring identity providers and their mapping to client roles.
After restarting the server and logging out, you will see a new "Log in using Keycloak" button on the login page.
Future Roadmap
It’s considered to include the keycloak SSO provider to the SSO addon instead of having it in a separate addon.