Single Sign-On
Last updated 10 months ago
SSO addon is a premium addon and it requires an AYON Subscription.
The SSO Addon offers seamless single sign-on capabilities, allowing users to access the AYON Server with their existing accounts from various service providers. it can also create a new user If the user doesn't exist.
We currently support several providers, but thanks to the addon's modular design, integrating additional providers is straightforward. This ensures easy scalability to meet evolving user needs.
It's important to note that user levels and default access groups are assigned only once to new users when the SSO addon first maps their roles. Therefore, an administrator has the flexibility to modify a user's role within AYON's user management system. Subsequent logins by the user will reflect their updated role.
Supported Providers
Authentik
Authentik SSO Settings
Settings Location:
ayon+settings://sso/authentik
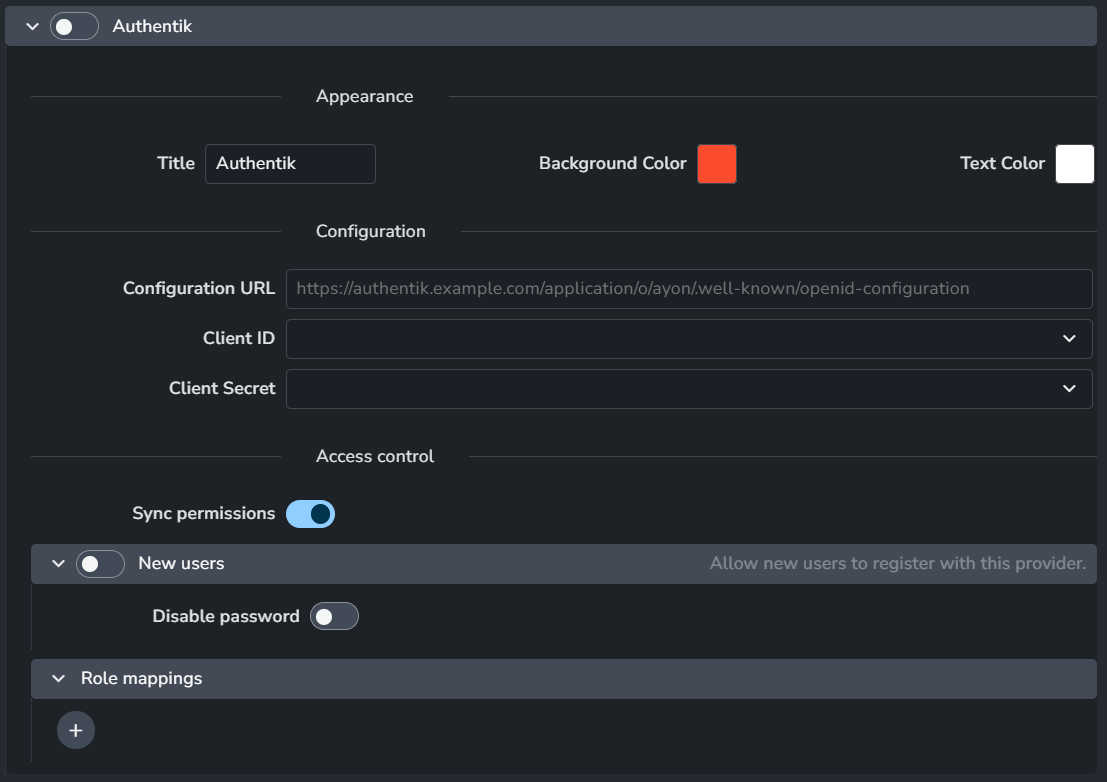
The Authentik SSO provider can be configured with the following settings:
Enable: Activates the Authentik SSO provider.
Appearance: Customizes the look of the Authentik SSO provider button.
Title: The title that appears on the SSO button.
Background: A color picker to set the button's background color.
Text Color: A color picker to set the button's text color.
Configuration
Configuration URL: The configuration URL for the Authentik SSO provider.
Client ID: The client ID of the Authentik SSO provider. This is selected from a dropdown menu of available secrets in AYON Secrets.
Client Secret: The client secret of the Authentik SSO provider, also selected from a dropdown menu in AYON Secrets.
Sync Permissions: Synchronizes user permissions from the Authentik provider to AYON.
New Users
Enable: When enabled, a new AYON user is automatically created if they do not already exist. This allows new users to register with this provider.
Disable Password: If enabled, new users will not be able to set a password.
Role Mappings: Each profile in this section includes:
Role name: The role name to map from Authentik.
AYON role: The AYON role or access level to map to.
Access groups: Project access group.
Guest: Enables marking the user as a guest (this setting is obsolete).
Discord
Prepare Discord Provider
Basic Configuration in Discord
Start a new Discord application and create an OAuth2 client and secrets.
Add
https://your-ayon-server/login/discordto the list of valid redirect URLs.
Set Up Discord Provider in AYON:
Store client id and client secret in AYON Secrets as shown in AYON Server Secrets.
In SSO Addon Discord settings, turn on "Discord" and set the Client ID and Client Secret.
After restarting the server and logging out, you will see a new "Log in using Discord" button on the login page.
Due to privacy concerns, Discord only supports sign-in for users that already exist in AYON. Users are matched by their email address, and their profiles are not updated in any way.
Discord SSO Addon Settings
Settings Location:
ayon+settings://sso/discord

Enable: Activates the Discord SSO provider.
Client ID: The client ID of the Discrod SSO provider. This is selected from a dropdown menu of available secrets in AYON Secrets.
Client Secret: The client secret of the Discord SSO provider, also selected from a dropdown menu in AYON Secrets
Microsoft Entra
Prepare Microsoft Entra Provider
Basic Configuration in Entra
Create an app registration in Entra.
Obtain the Application ID (Client ID) and Directory ID (Tenant ID).
In the Certificates & secrets section, obtain a Client Secret.
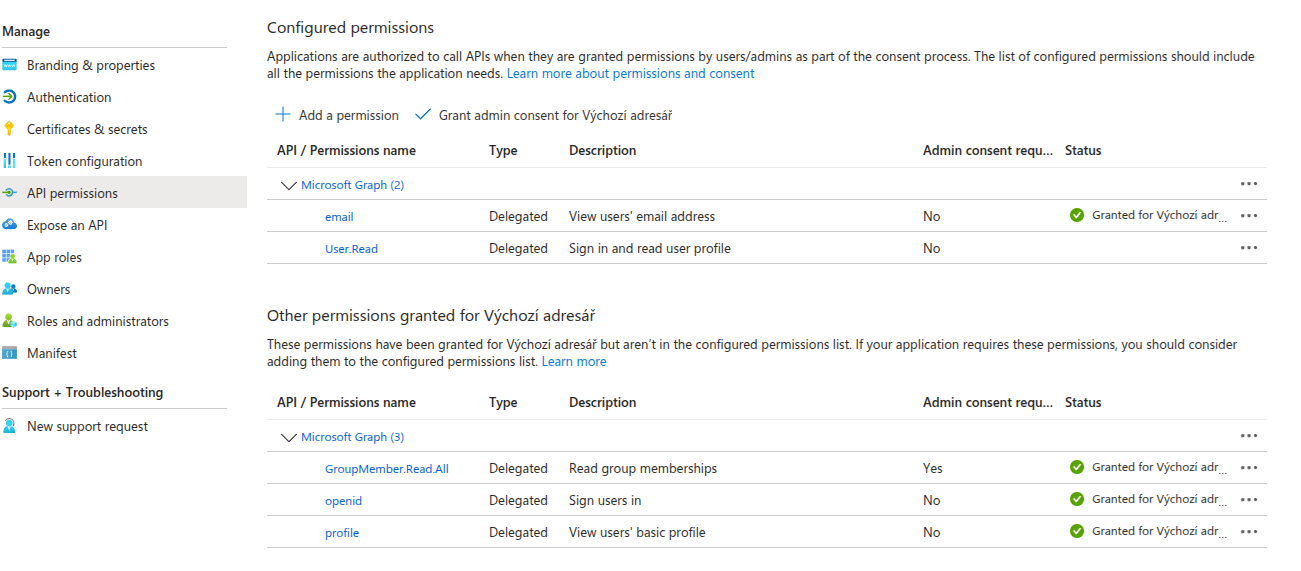
On the Authentication page, set the redirect URL to
https://your-ayon-server/login/entra.Ensure these necessary permissions are granted in the API permissions section.
Access Control
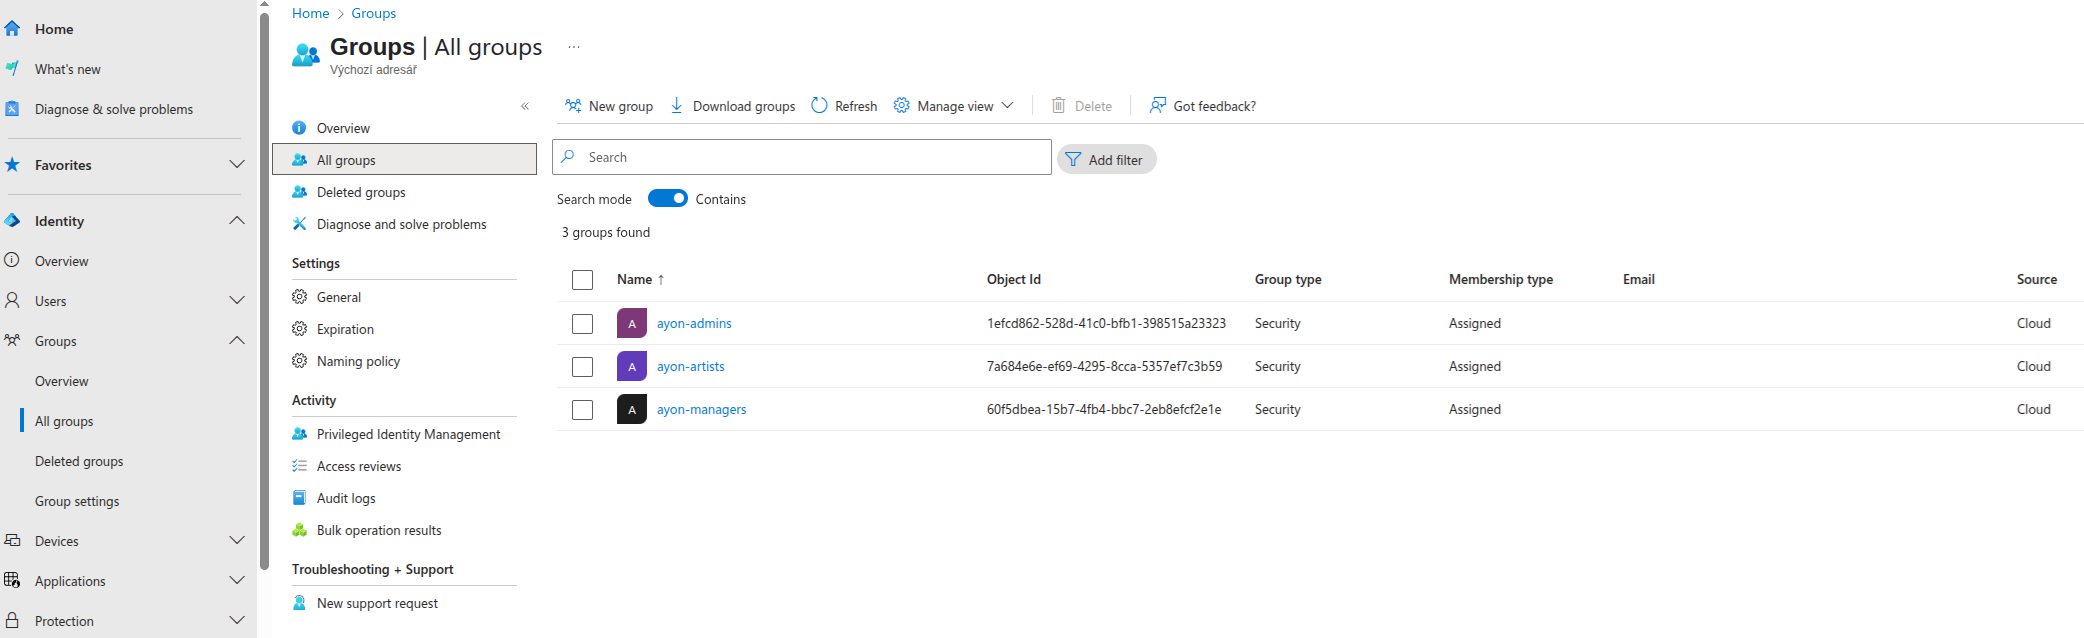
Create groups in Entra and add your users to them.
Setup Entra Provider in AYON
Store the Client ID, Directory ID, and Client Secret in AYON Secrets, as outlined in AYON Server Secrets.
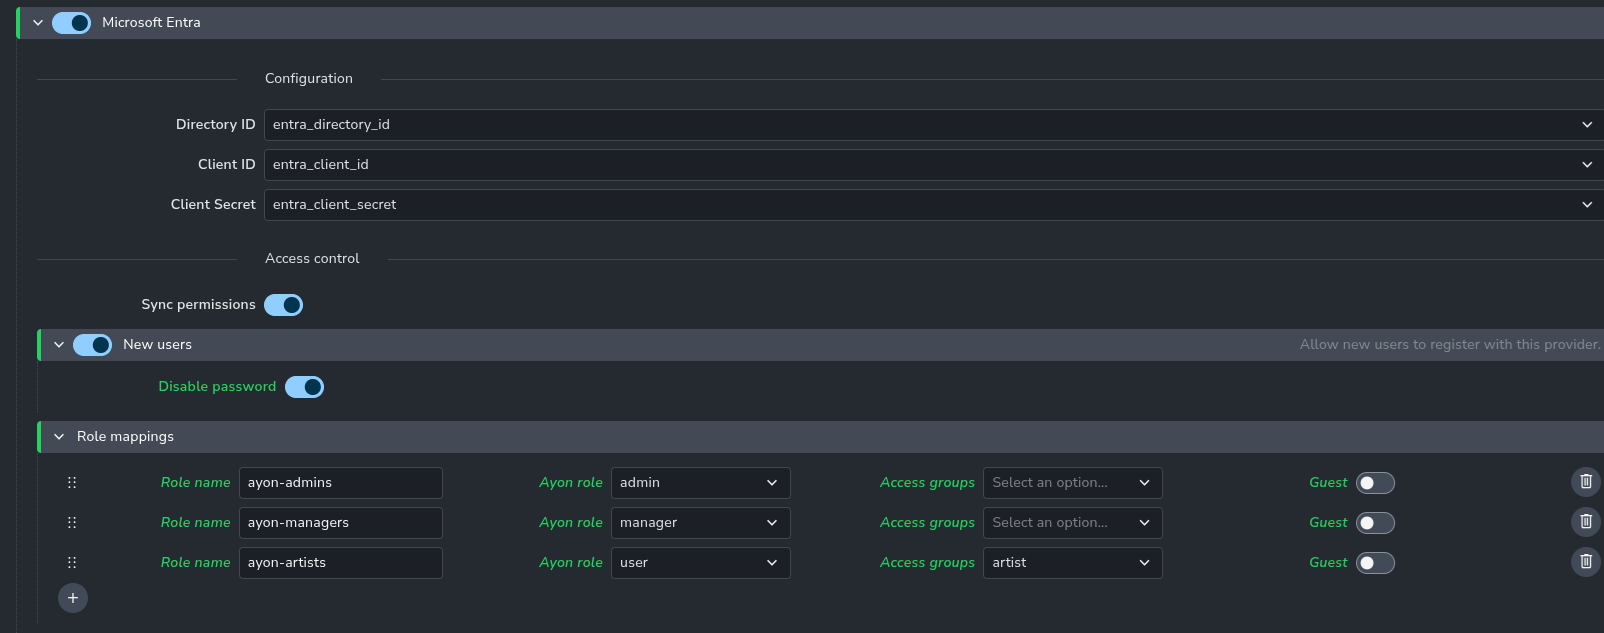
In Microsoft Entra SSO Addon Settings:
Enable the Entra provider and select your Entra keys.
Map the Entra groups to AYON roles using the Entra role mappings settings.
Microsoft Entra SSO Addon Settings
Settings Location:
ayon+settings://sso/entra
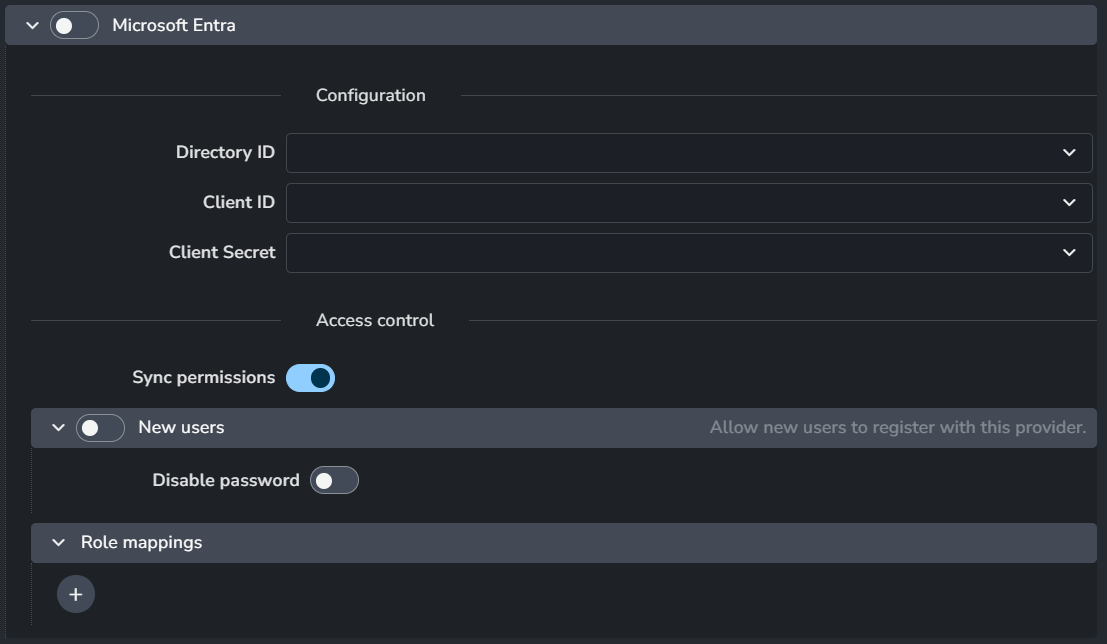
Enable: Activates the Microsoft Entra SSO provider.
Configuration
Directory ID: The Directory ID of the Entra SSO provider. This is selected from a dropdown menu of available secrets in AYON Server Secrets .
Client ID: The client ID of the Entra SSO provider. This is selected from a dropdown menu of available secrets in AYON Secrets.
Client Secret: The client secret of the Entra SSO provider, also selected from a dropdown menu in AYON Secrets.
Sync Permissions: Synchronizes user permissions from the Entra provider to AYON.
New Users
Enable: When enabled, a new AYON user is automatically created if they do not already exist. This allows new users to register with this provider.
Disable Password: If enabled, new users will not be able to set a password.
Role Mappings: Each profile in this section includes:
Role name: The role name to map from Entra.
AYON role: The AYON role or access level to map to.
Access groups: Project access group.
Guest: Enables marking the user as a guest (this setting is obsolete).
Prepare Google Provider
Basic Configuration in Google
To authenticate using Google, you'll need to create OAuth2 credentials in the Google Cloud Console.
In your project's APIs & Services page, select Credentials from the sidebar.
Create credentials with an OAuth Client ID.
Set the Application type to "Web application."
Set a name and add
https://your-ayon-serverto the list of Authorized JavaScript origins.Add
https://your-ayon-server/login/googleto the list of Authorized redirect URIs.If needed, configure the OAuth consent screen. In most cases, you can use "Internal" mode.
For more information, refer to Manage OAuth Clients.
Finally, obtain the Client ID and Client Secret.
Set Up Google Provider in AYON
Store the Client ID and Client Secret in AYON Secrets, as outlined in AYON Server Secrets.
In the Google SSO addon settings:
Enable the Google provider and add your domain to the Allowed domains list.
Activate the New Users setting to enable the automatic creation of user accounts.
Map the Google roles to AYON roles.
After restarting the server and logging out, you will see a new "Log in using Google" button on the login page.
Google SSO Addon Settings
Settings Location:
ayon+settings://sso/google
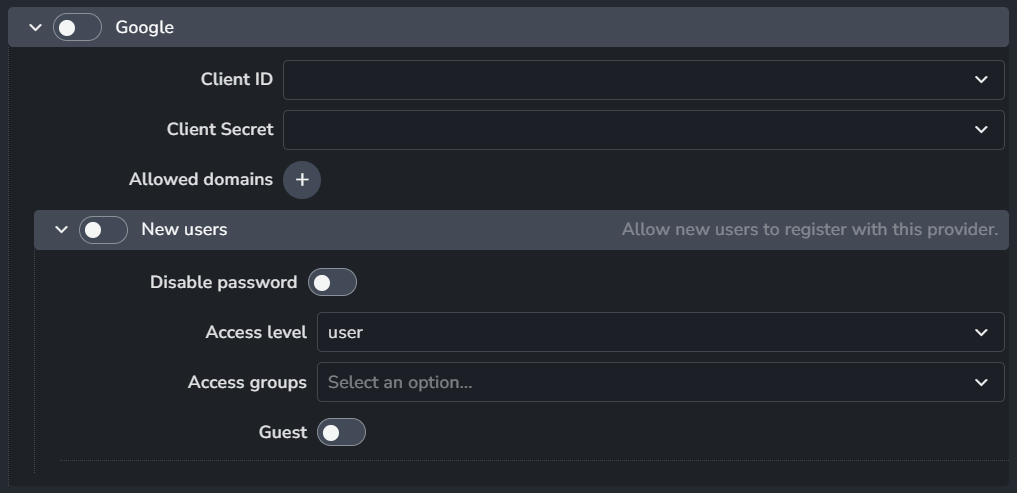
Enable: Activates the Google SSO provider.
Client ID: The client ID of the Google SSO provider. This is selected from a dropdown menu of available secrets in AYON Secrets.
Client Secret: The client secret of the Google SSO provider, also selected from a dropdown menu in AYON Secrets.
Allowed domains: Only allow users with these domains to login.
New Users
Enable: When enabled, a new AYON user is automatically created if they do not already exist. This allows new users to register with this provider.
Disable Password: If enabled, new users will not be able to set a password.
Acess level: The AYON access level.
Access groups: Project access group.
Guest: Enables marking the user as a guest (this setting is obsolete).
OKTA
Prepare OKTA Provider
Basic Configuration
In the Okta Admin Console, go to Applications > Applications.
Click "Create App Integration".
Select "OIDC - OpenID Connect" as the sign-in method and click "Next".
Choose "Web Application" as the application type and click "Next".
Fill in the application settings:
App name:
AYONSign-in redirect URIs:
https://your-ayon-server/login/oktaTrusted Origins:
https://your-ayon-server
After creation, get the "Client ID" and "Client Secret" from the application settings.
In "Okta API Scopes", add the following scopes:
okta.myAccount.email.readokta.myAccount.profile.read
Configure Groups in OKTA
Create groups: In the Admin Console, go to Directory > Groups. Click Add Group to create the necessary groups (e.g.,
ayon-adminsandayon-users).Assign group members: Click the group name, then click the People tab, and then click Assign people.
Create a groups claim for the OpenID Connect client app: This allows AYON to receive group information.
In the Admin Console, go to Applications > Applications.
Select the OpenID Connect client app you configured.
Go to the Sign On tab and click Edit in the OpenID Connect ID Token section.
In the Group claim type section, leave Filter selected.
In the Group claims filter section, leave the default name
groupsand add the appropriate filter. For this example, select Matches regex and enterayon.*to return the user's groups.Click Save.
Click the Back to applications link.
From the More button dropdown menu, click Refresh Application Data.
Set Up OKTA Provider in AYON
Store the Client ID and Client Secret in AYON Secrets, as outlined in AYON Server Secrets.
In the OKTA SSO addon settings:
Enable the OKTA provider and select your OKTA secrets.
Set "Entrypoint" to
https://your-okta-domain.okta.comMap the OKTA groups to AYON roles in the OKTA role mappings.
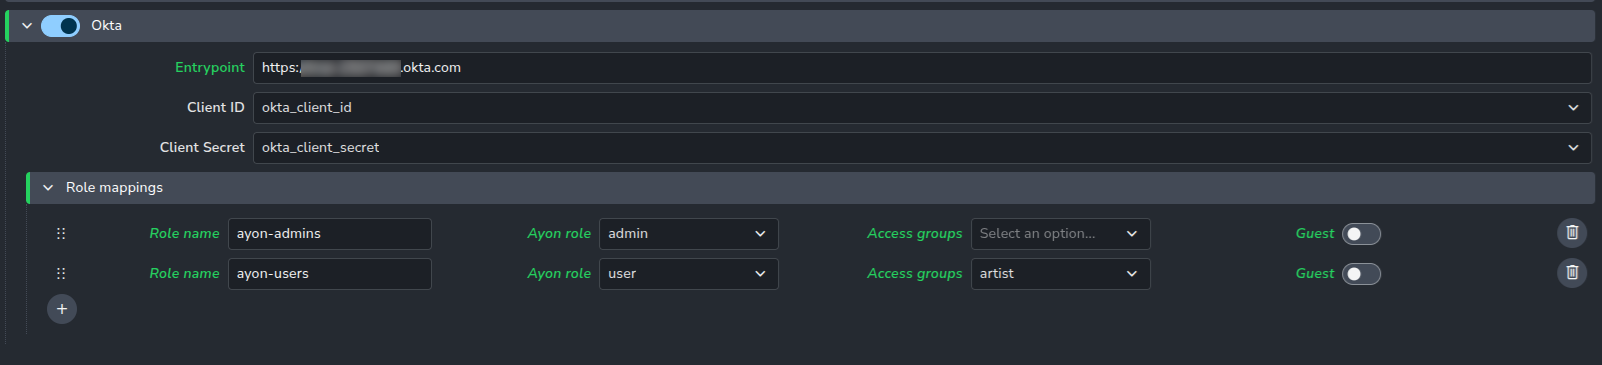
OKTA SSO Addon Settings
Settings Location:
ayon+settings://sso/okta
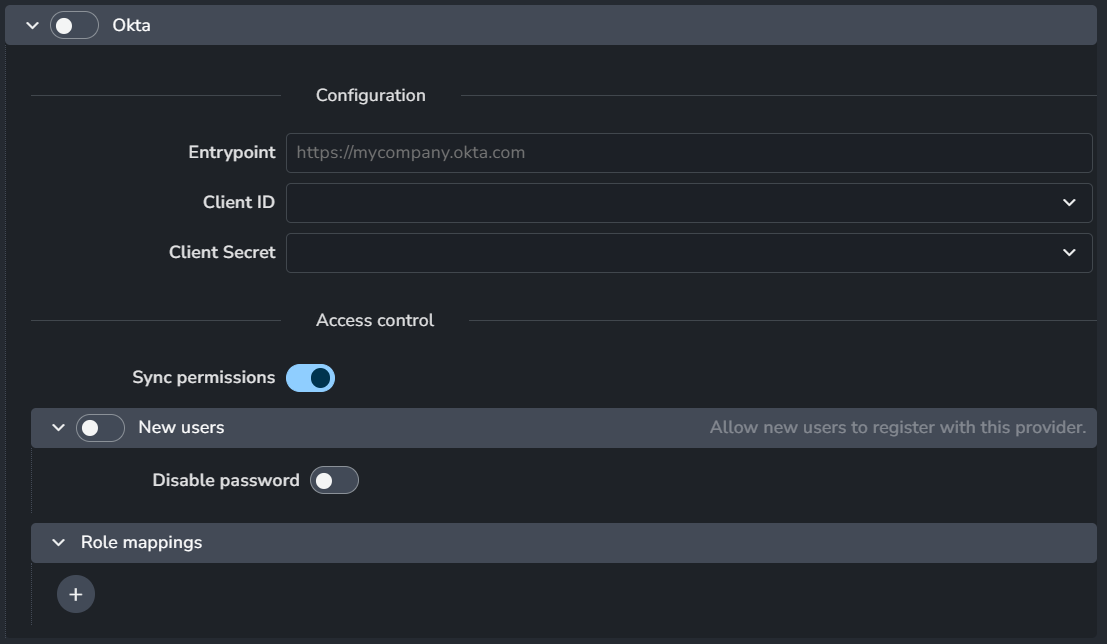
The Authentik SSO provider can be configured with the following settings:
Enable: Activates the Authentik SSO provider.
Appearance: Customizes the look of the Authentik SSO provider button.
Title: The title that appears on the SSO button.
Background: A color picker to set the button's background color.
Text Color: A color picker to set the button's text color.
Configuration
Configuration URL: The configuration URL for the Authentik SSO provider.
Client ID: The client ID of the Authentik SSO provider. This is selected from a dropdown menu of available secrets in AYON Secrets.
Client Secret: The client secret of the Authentik SSO provider, also selected from a dropdown menu in AYON Secrets.
Sync Permissions: Synchronizes user permissions from the Authentik provider to AYON.
New Users
Enable: When enabled, a new AYON user is automatically created if they do not already exist. This allows new users to register with this provider.
Disable Password: If enabled, new users will not be able to set a password.
Role Mappings: Each profile in this section includes:
Role name: The role name to map from Authentik.
AYON role: The AYON role or access level to map to.
Access groups: Project access group.
Guest: Enables marking the user as a guest (this setting is obsolete).