Working with Photoshop in AYON
Last updated About 1 year ago
Overview
The Photoshop AYON integration allows you to:
Manage your Photoshop work files using correct naming, version and save location with ease
Produce / Automate Image Assets creation which can be easily shared across production environment
Make Reviews acting as a thumbnail / preview for production management software like Ftrack, Kitsu etc. so everyone being aware of the newest version available
Loading / Managing asset versions in PS work files within the project
Photoshop Extension Installation
Once your admin activates Photoshop in the production bundle under Applications and Tools settings, you need to run the AYON Launcher at least once. This ensures the launcher downloads the addon to the correct location on your computer. The launcher will then automatically install the extension for your convenience, as outlined in the Automated Installation section. If it fails, refer to the Manual Installation instructions.
Automated Installation
This could be handled by auto_install set up by your TD / Admin already. Please check with them, or if you are feeling adventurous just try to open Premiere via AYON directly.
If you see there AYON Menu or you find AYON option in Windows > Extensions, you are in luck and extension is installed. No need to install it manually and you can skip next section.
Manual Installation
Windows
Use your favorite app to install extensions. We recommend using Anastasyi's Extension Manager.
Locate and install the
extension.zxpfile. You can find it in theAppDatafolder, typically atc:\Users\YOUR_USER\AppData\Local\Ynput\AYON\addons\photoshop_X.X.X\ayon_photoshop\api\extension.zxp.
Windows:
You can quickly navigate to the local app data using the environment variable shortcut: %LOCALAPPDATA%. For example, using %LOCALAPPDATA%\Ynput\AYON\addons as path to see your installed addons.
Linux
Use your favorite app to install extensions.
Locate and install the
extension.zxpfile. You can find it in the user data folder, typically at~/.local/share/Ynput/AYON/addons/photoshop_X.X.X/ayon_photoshop/api/extension.zxp.
MacOS
Use your favorite app to install extensions. We recommend using Anastasyi's Extension Manager.
Locate and install the
extension.zxpfile. You can find it in theApplication Supportfolder, typically at~/Library/Application Support/Ynput/AYON/addons/photoshop_X.X.X/ayon_photoshop/api/extension.zxp.
AYON Tools
Once everything is set up, when launching PS via AYON launcher, you’ll be able to find and use AYON tools.
AYON Global Tools
AYON Pipeline Tools
On newer MacOS you need to:
go to
Applications/Adobe Photoshop XXXXright clicking on the
Adobe Photoshop XXXX.appthen
Get Info, checkOpen using Rosetta
Quick Start
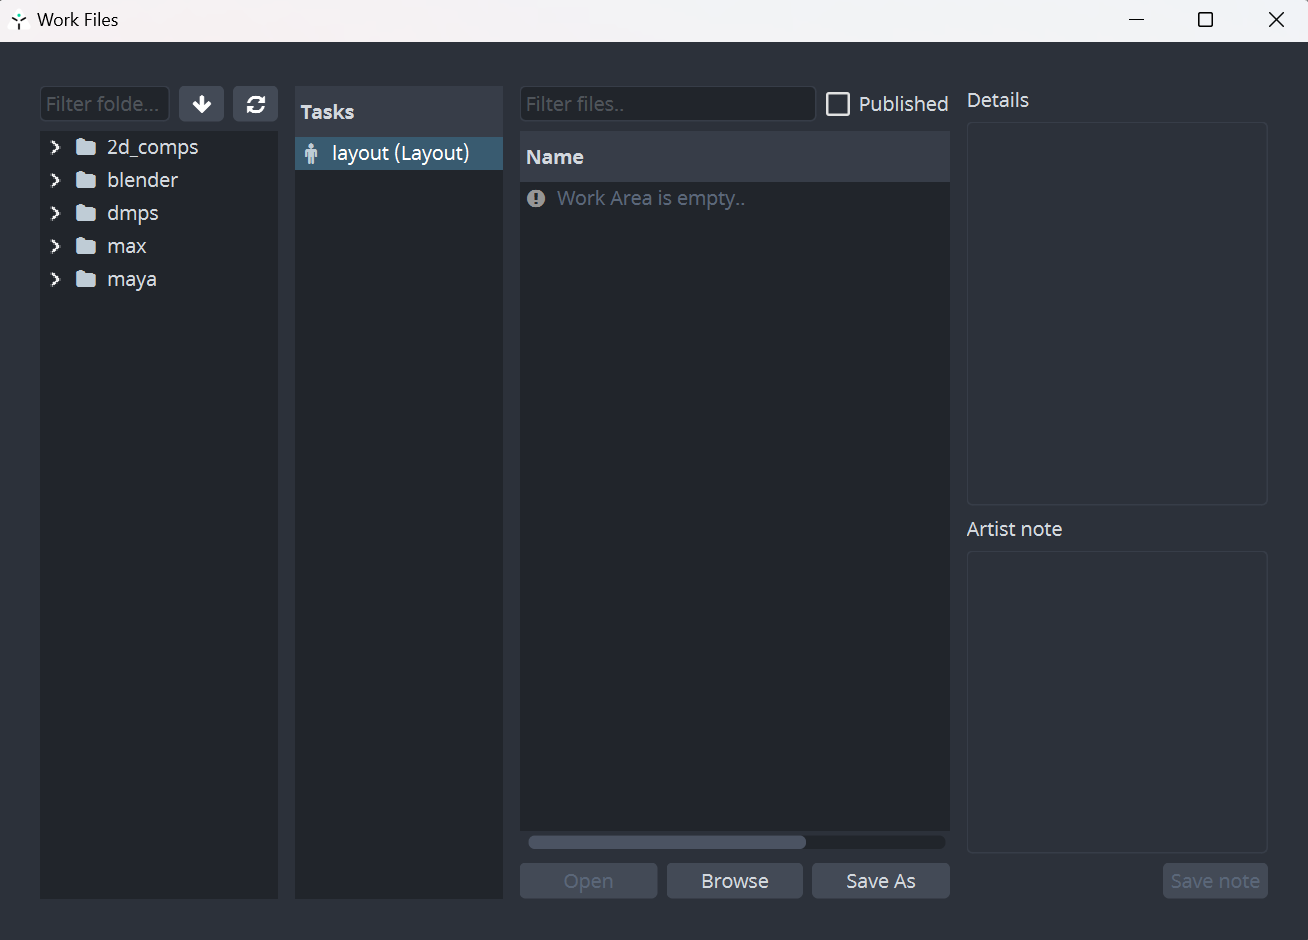
When you launch Photoshop you will be met with the floating Workfiles window. If you don't have any previous workfiles, you can just close this window right away.
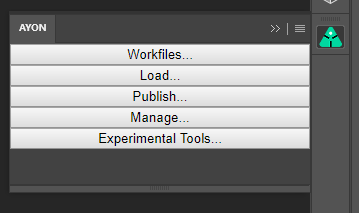
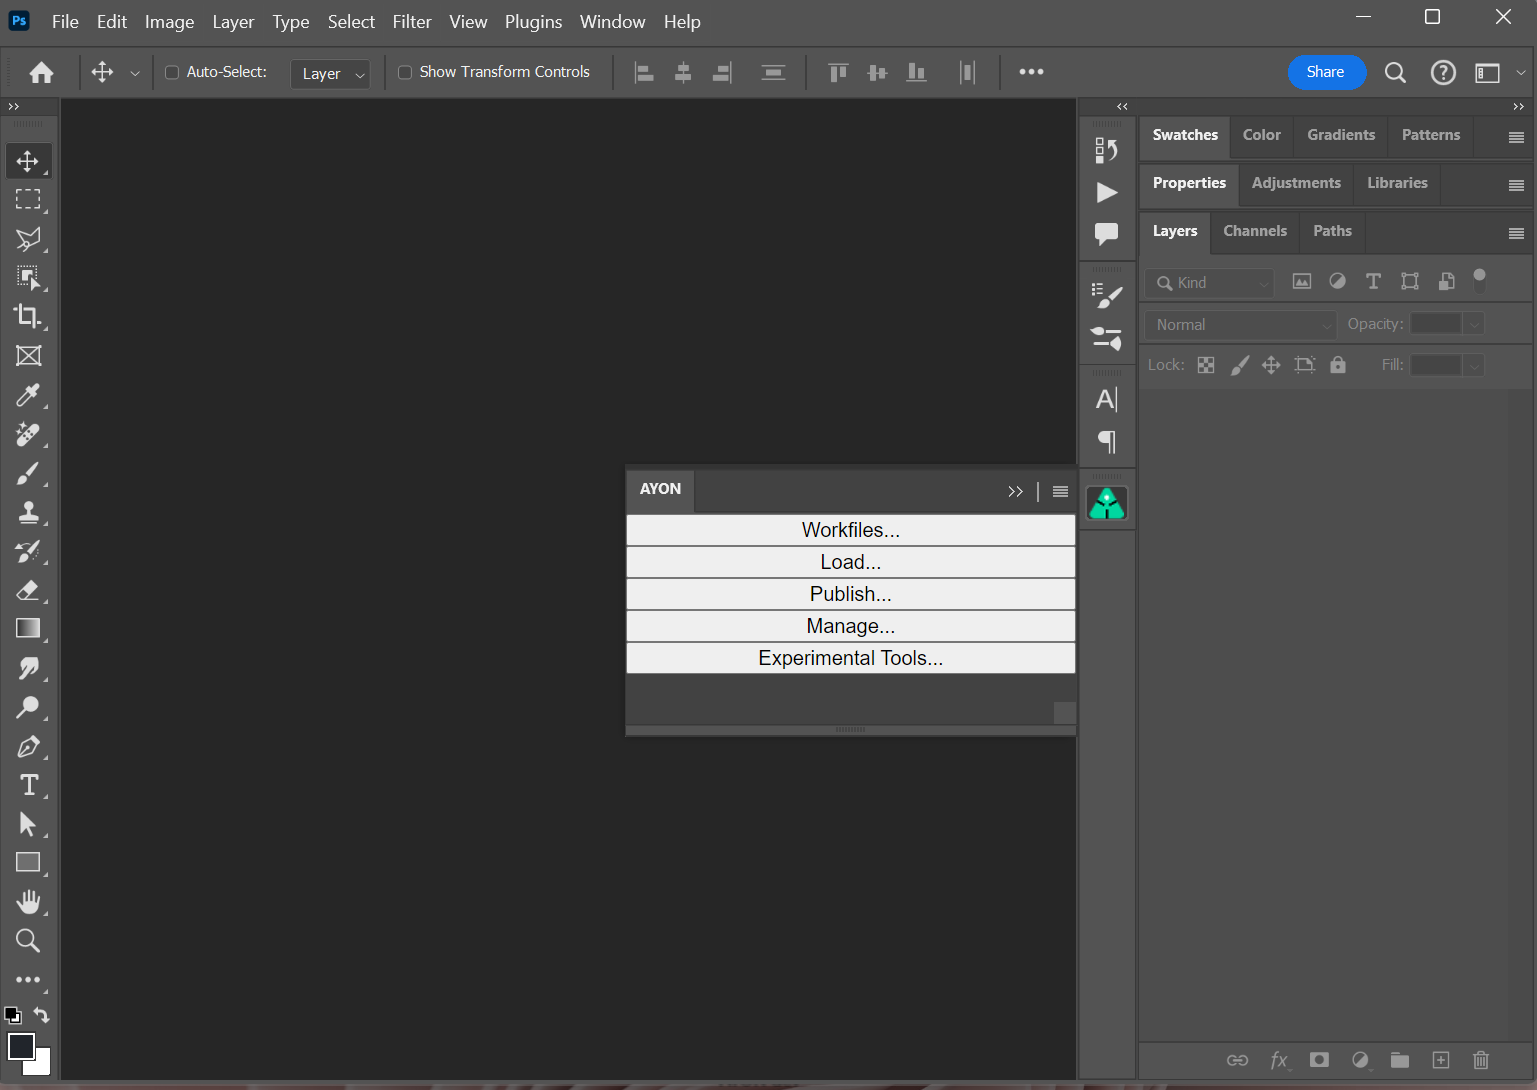
After that you will be introduced to AYON toolset on the right side of the Photoshop UI next to its icon.
You can also locate the extension panel in Photoshop Menu by going to Window > Extensions > AYON if necessary or collapse the menu by hitting the AYON icon next to it.
You can show the extension panel by going to Window > Extensions > AYON.
Work Files Management
Create or open any valid Photoshop file which will act as your Workfile from now on.
Navigate to the AYON tools and trigger Workfiles and hit Save As.

Navigate to the AYON tools and trigger Workfiles and hit Save As. Your document will be properly named and versioned following rules set for the active project and saved to the correct folder location automatically.Think of this tool as a substitude for classic File>Save and File>Open as you will use it exclusively when in AYON Photoshop mode.
Even though classic File>Open and File>Save being available to you, use AYON>Workfiles instead as you will get proper naming and file destination automatically without need to worry about any of these! However you can trigger classic CTRL+S anytime too for quick saving of your progress as you would normally do.
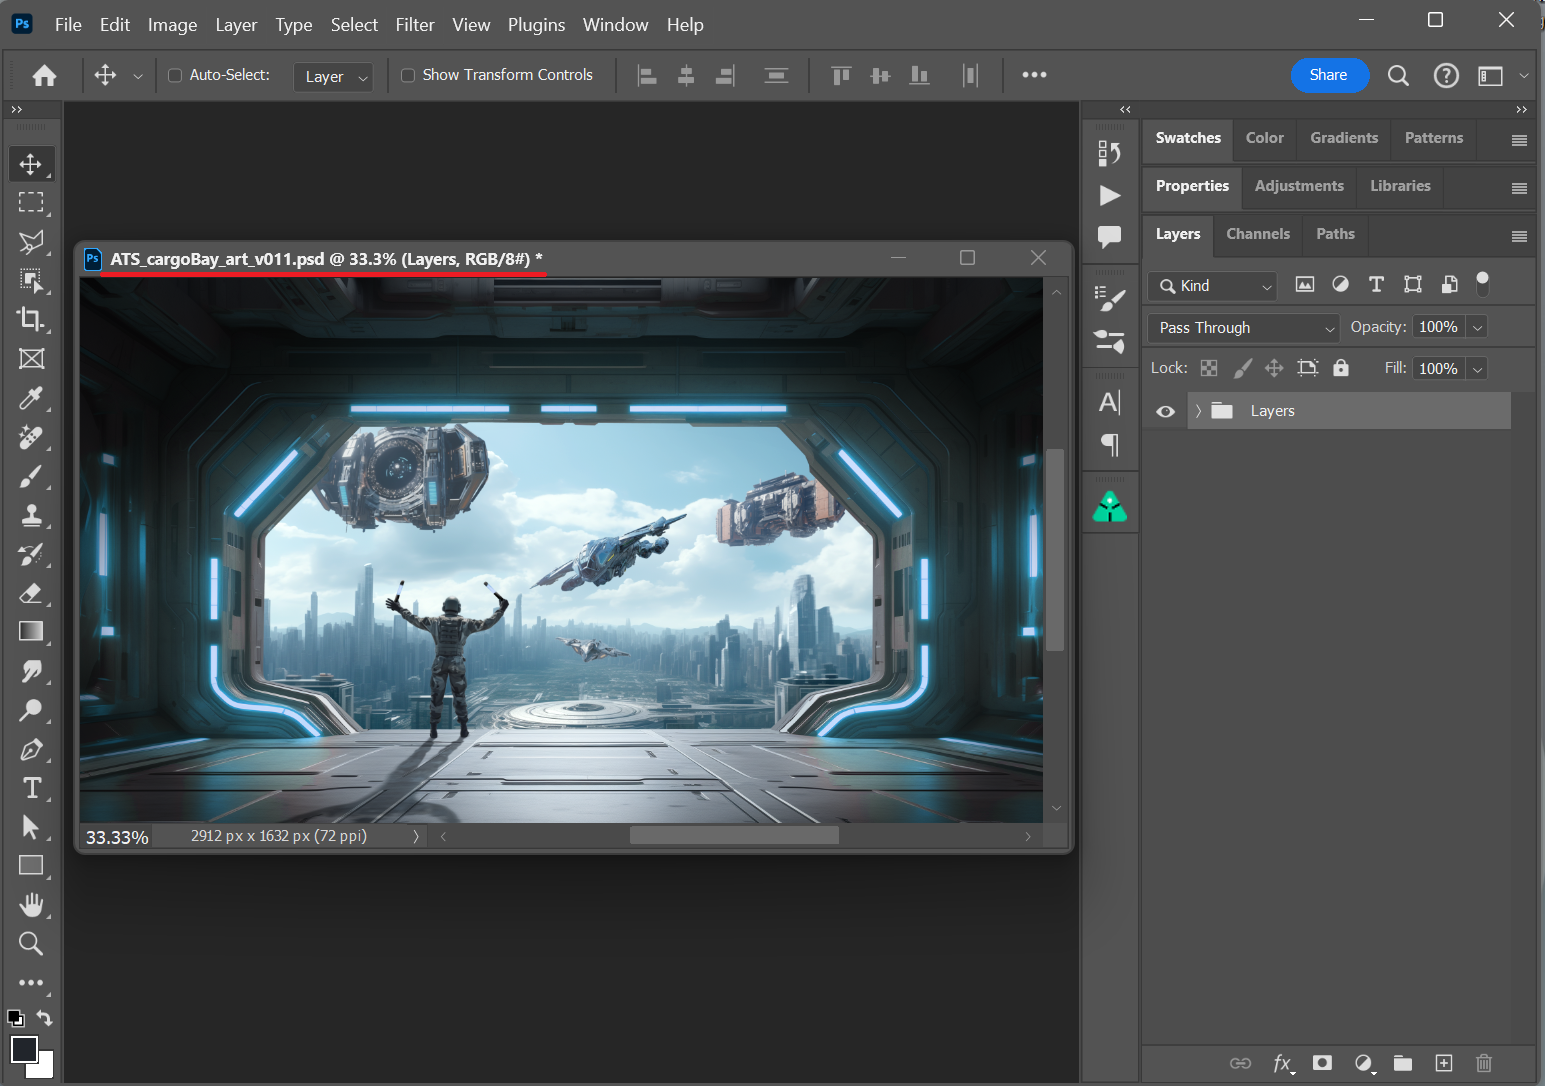
In the above picture you can see my Workfile being properly named and versioned and its a clear indication of correctly saved document.
Publish
When you are ready to share your work with rest of the team, you will need to publish it first. Publish action does produce an asset, saved in separate publish folder and written into project database and being instantly available for loading as an Image asset into desired destination.
This is done by opening the Creator / Publisher tool through the Publish... menu entry in the AYON toolset.
Publisher shows up allowing you to produce your very first Image asset for production. We will briefly inspect Publisher components first.
It consists of multiple tabs at the very top Create Publish Report Details, each for a different occasion during publishing process as the naming suggests. We skip Create and head to Publish tab as we should have already products ready for publishing and no need to create those manually.
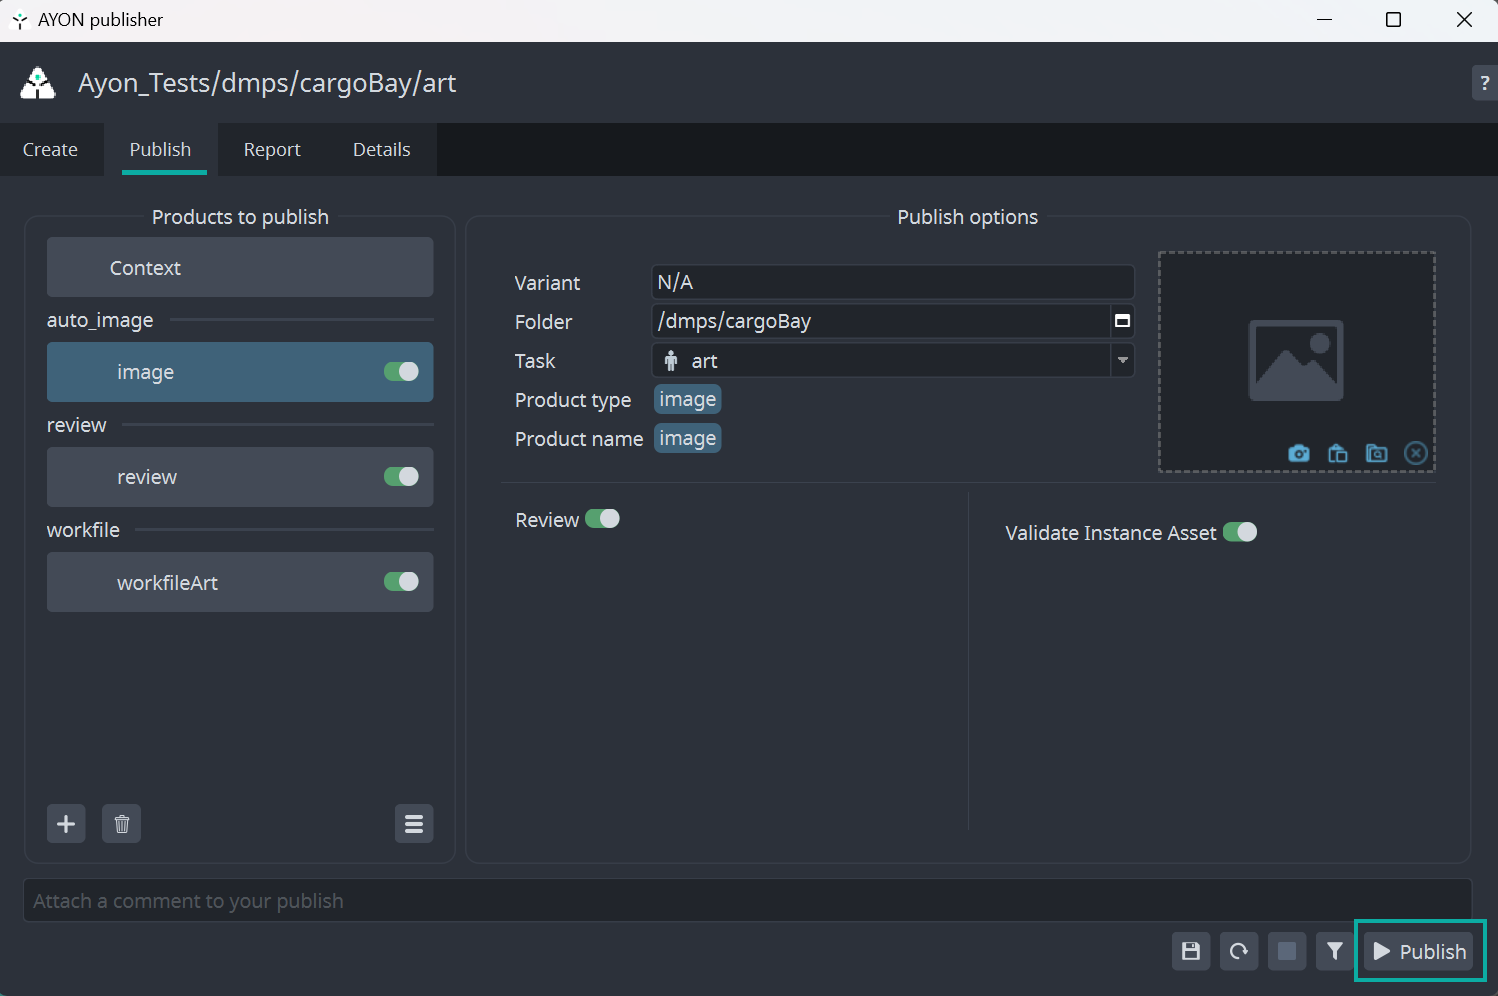
If not already, switch to Publish tab now (you should see it as picture above).
On the left side there is list of Products to publish. These widgets represents assets which will be produced when the publishing finnishes also having knobs for enabling/disabling publishing next to each, namely image , review and workfile. The Context type can be ignored for now as it is implicit widget and does not produce any asset to worry about.
Imagerepresents your artwork aka asset for publishingReviewrepresents preview of yourImageasset usually as a JPG with smaller sizeWorkfileacting like backup file copied together with yourImageasset to separate publish folder
Disable any product type if needed and when ready, go and hit Publish button at the very bottom right.
Your assets just have been publicly available within the project and can be loaded via Load action from AYON menu.
To summarize it, you can enable or disable any publish product and repeat publishing over and over producing new version of the asset each time if desired.
The list of available products for publishing can differ in yours as it is depedent on AYON settings by studio TDs
Create
When using Creator / Publisher, you are able to populate your workfile with new publish type besides the already present ones. You are free to add/remove any of those which gives you a lot of possibilities in terms of publishing full photoshop document or just particular layer(s).
There is just Image product type available to you in the Photoshop which produces 2d pixel image acting for example as a layer in AE composition or as a reference imagePlane in Maya or image in Nuke compostion.
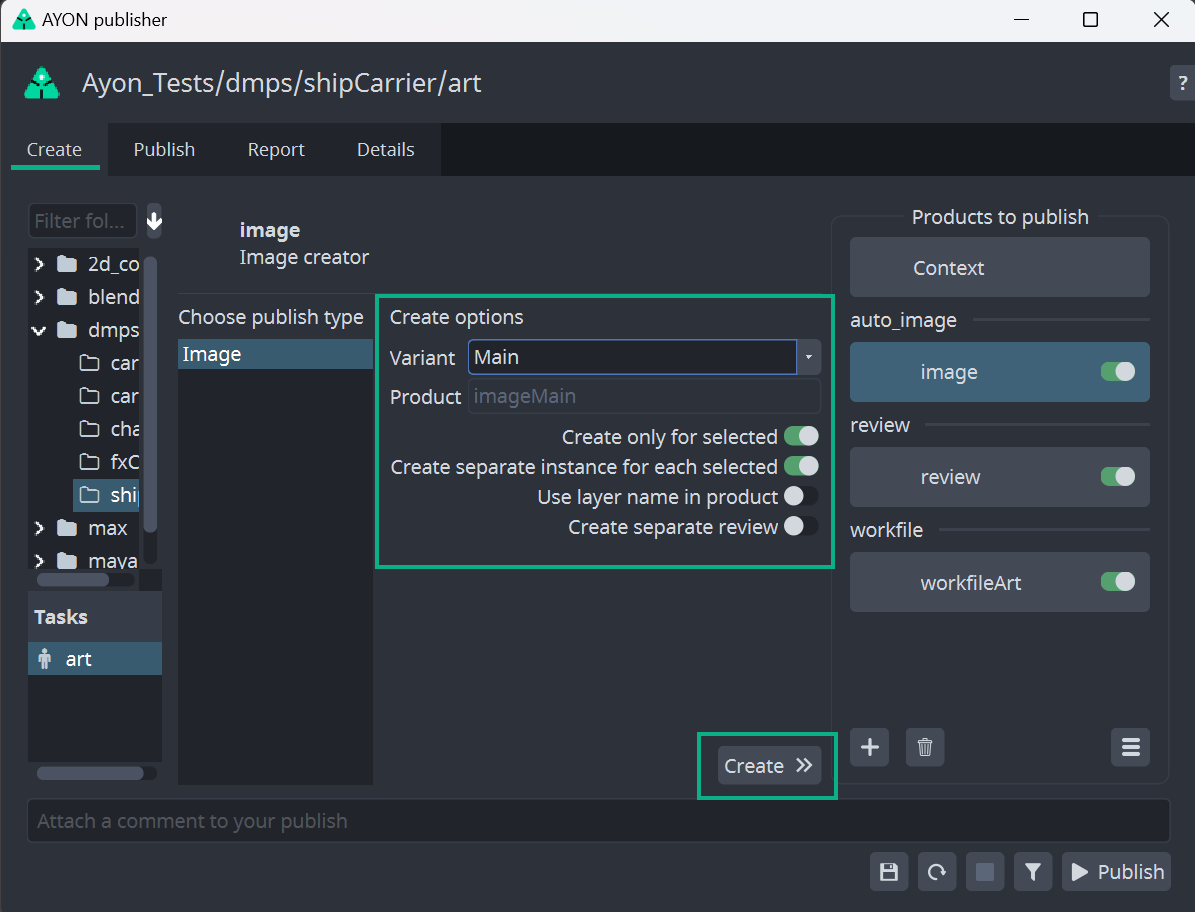
Image creator has multiple options for tweaking its output and way the data being produced.
Create only for selected- createsImagejust for selected layer(s)Create separate instance for each selected- createsImagefor each layer in your selection of layersUse layer name- appends the layer name to theImageproductCreate separate review- createsReviewproduct besides the implicit one as a separate product for eachImage
In most cases you would like to keep Create only for selected toggled ON and select exact Photoshop layer(s) which you would like to publish. When this option being OFF than there is no need to select anything and Image being created for all the visible layers in the active workfile similar to Flatten Image.
When multiple layers selected and Create separate instance for each selected toggled ON you will get Image for each layer separately.
For example when selecting Layer01 , Layer02 and Layer03 then it will produce these product types
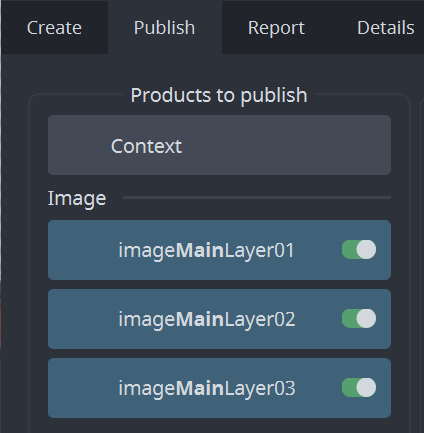
and also marks actual Photoshop layers with ℗ icon standing for publishing
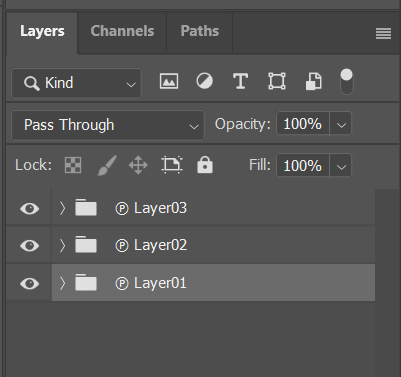
With Create separate instance for each selected toggled OFF it will create only single publishable instance which will wrap all selected layers into single Group again marked with ℗ icon.
Name of publishable instance (eg. product name) can be configured by studio admin TD with a template in project_settings/global/tools/creator/product_name_profiles.
Trash icon under the list of instances allows to delete any selected image instance.
Workfile instance will be automatically recreated though. If you do not want to publish it, use pill toggle on the instance item.
If you would like to modify publishable instance, click on Publish tab at the top. This would allow you to change name of publishable instances, disable them from publishing, change their task etc.
Publisher allows publishing into different context, just click on any instance, update Variant, Asset or Task in the form in the middle and don't forget to click on the 'Confirm' button.
Validate
If you would like to run validation rules set by your Studio, click on funnel icon at the bottom right. This will run through all enabled instances, you could see more information after clicking on Details tab.
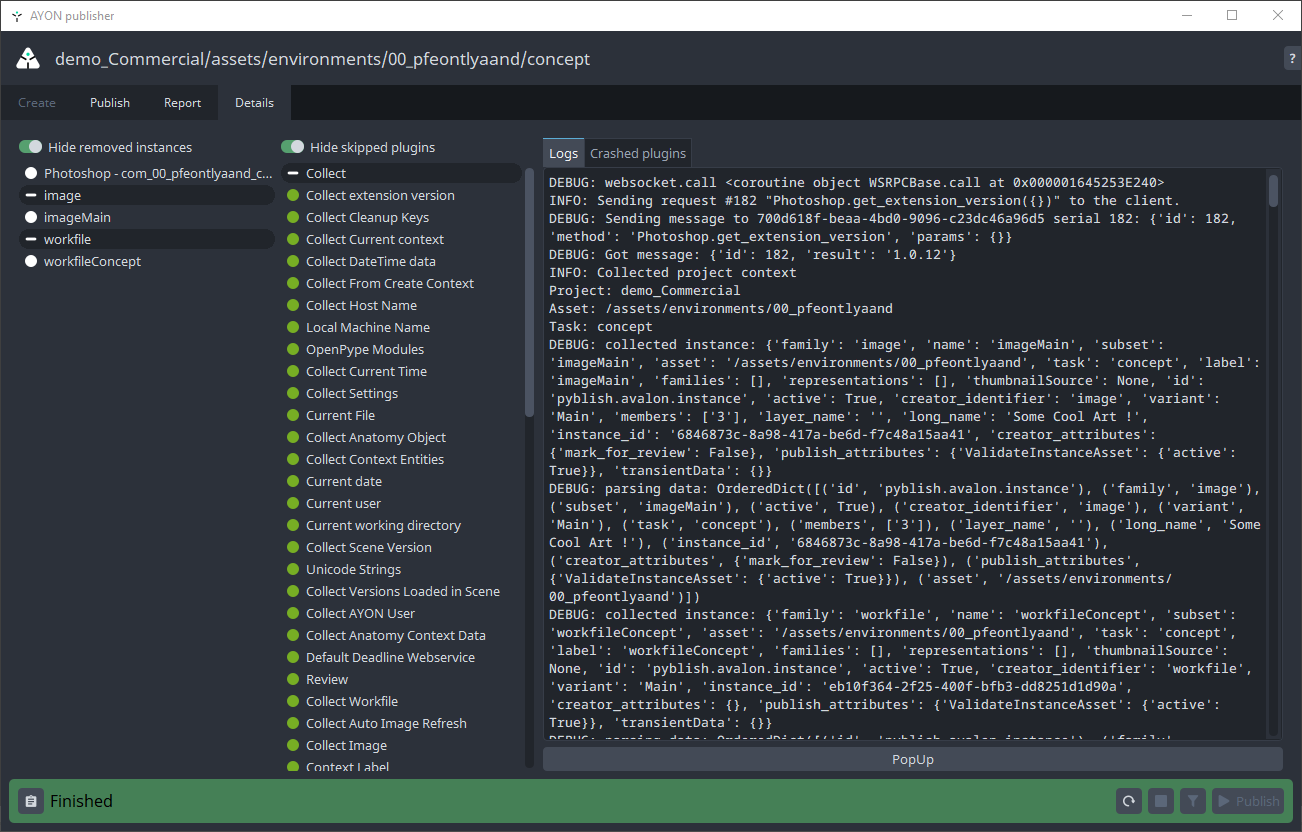
In this dialog you could see publishable instances in left column, triggered plugins in the middle and logs in the right column.
In left column you could see that review instance was created automatically. This instance flattens all publishable instances or all visible layers if no publishable instances were created into single image which could serve as a single reviewable element (for example in Ftrack).
Creation of Review could be disabled in project_settings/photoshop/publish/CollectReview.
If you are satisfied with results of validation phase (and there are no errors there), you might hit Publish button at bottom right. This will run through extraction phase (it physically creates images from image instances, creates review etc) and publishes them (eg. stores files into their final destination and stores metadata about them into DB). This part might take a while depending on amount of layers in the workfile, amount of available memory and performance of your machine.
You may encounter issues with publishing which will be indicated with red squares. If these issues are within the validation section, then you can fix the issue. If there are issues outside of validation section, please let the AYON team know.
You can always start new publish run with a circle arrow button at the bottom right. You might also want to move between phases (Create, Update etc) by clicking on available tabs at the top of the dialog.
Simplified publish
There is a simplified workflow for simple use case where only single image should be created containing all visible layers. No image instances must be present in a workfile and project_settings/photoshop/publish/CollectInstances/flatten_product_template must be filled in Settings. Then artists just need to hit 'Publish' button in menu.
Repair Validation Issues
If there is some issue in validator phase, you will receive something like this:
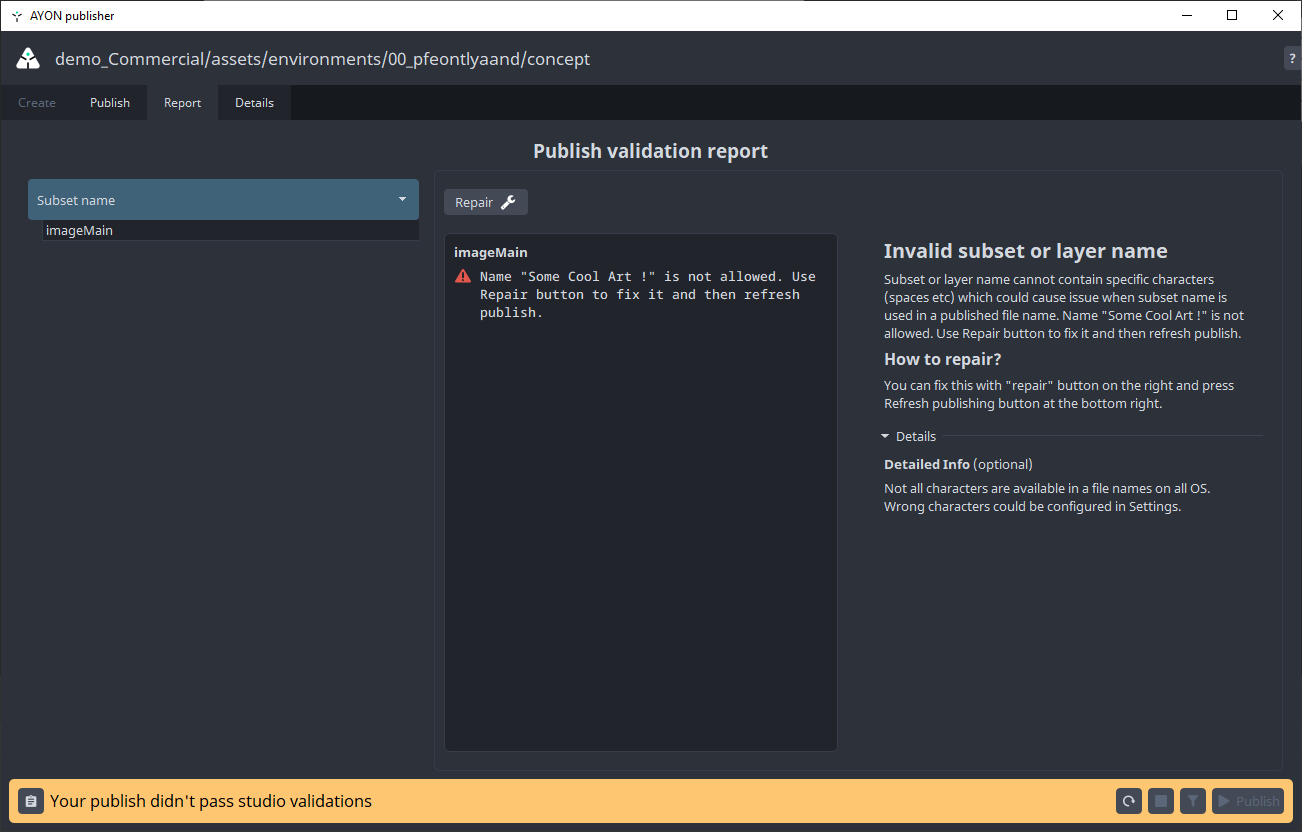
All validators will give some description about what the issue is. You can inspect this by clicking on items in the left column.
If there is an option of automatic repair, there will be Repair button on the right. In other case you need to fix the issue manually. (By deleting and recreating instance etc.)
Buttons on the bottom right are for:
Refresh publishing- set publishing process to starting position - useful if previous publish failed, or you changed configuration of a publishStop/pause publishing- if you would like to pause publishing process at any timeValidate- if you would like to run only collecting and validating phases (nothing will be published yet)Publish- standard way how to kick off full publishing process
Load
When you want to load existing published work, you can load in smart layers through the Loader.You can reach it through the extension's Load button.
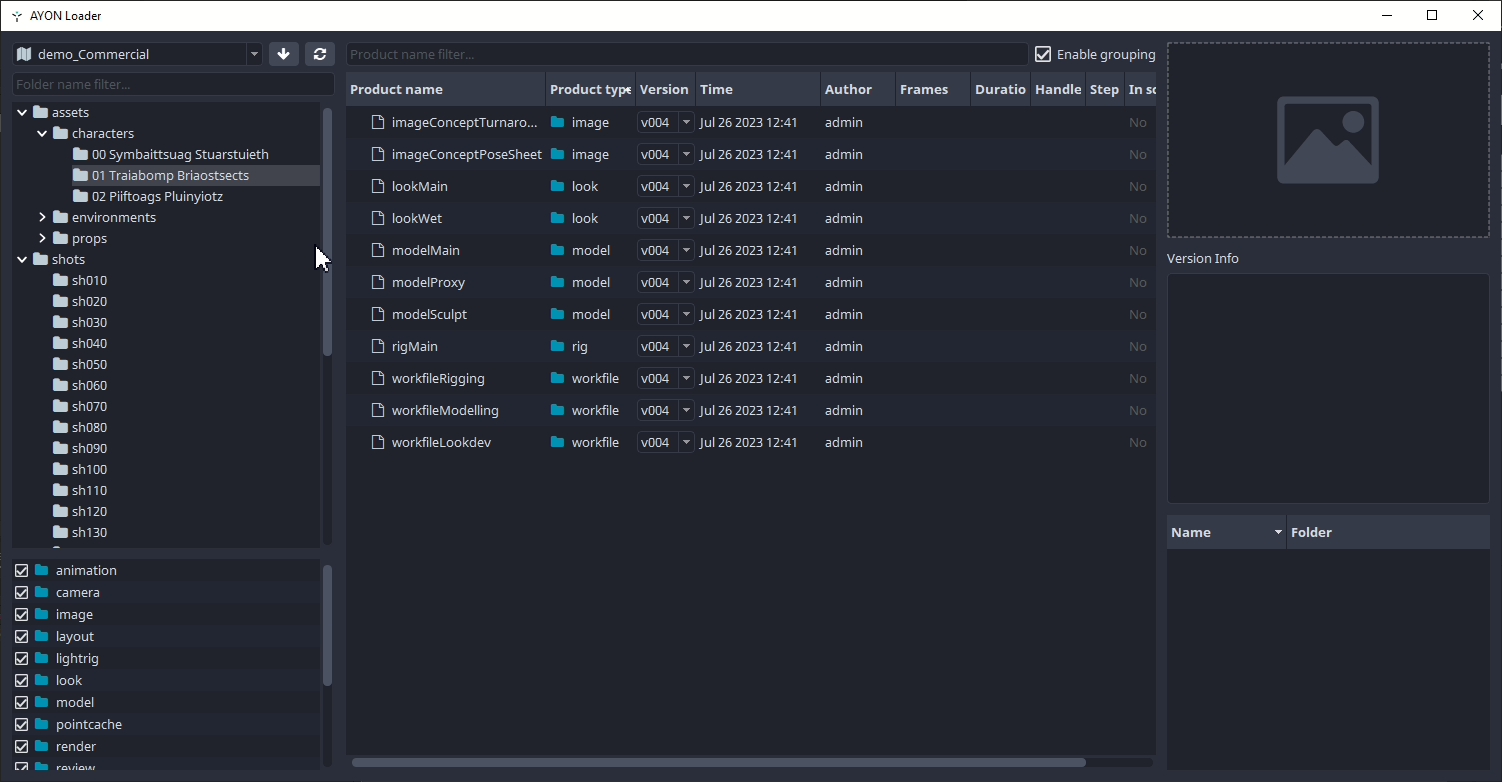
The supported product type for Photoshop being
image
To load an image, right-click on the product you want and choose a representation:
Manage
Now that we have some images loaded, we can manage which version is loaded. This is done through the Scene Inventory. You can reach it through the extension's Manage button.
Loaded images has to stay as smart layers in order to be updated. If you rasterize the layer, you cannot update it to a different version.
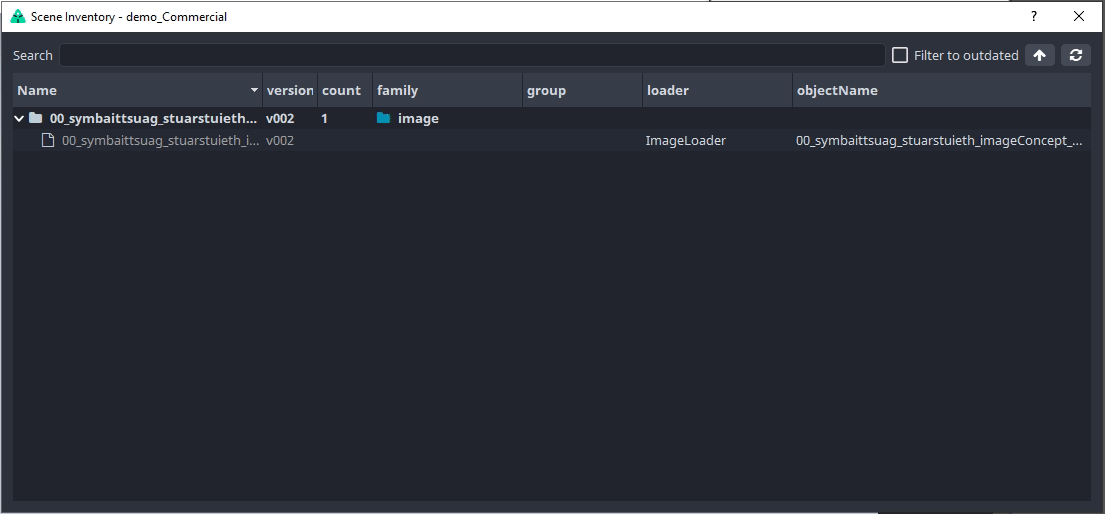
You can switch to a previous version of the image or update to the latest.
Troubleshooting
If you would like to ask for help admin or support, you could use any of the three options on the Note button on bottom left:
Go to details- switches into a more detailed list of published instances and plugins.Copy report- stash full publishing log to a clipboardExport report- save log into a file for sending it via mail or any communication tool
If you are able to fix the workfile yourself, use the first button on the right to set the UI to initial state before publish. (Click the Publish button to start again.)
Legacy Publish Instances
All screenshots from Publish are from updated dialog, before publishing was being done by regular Pyblish tool. New publishing process should be backward compatible, eg. if you have a workfile with instances created in the previous publishing approach, they will be translated automatically and could be used right away.
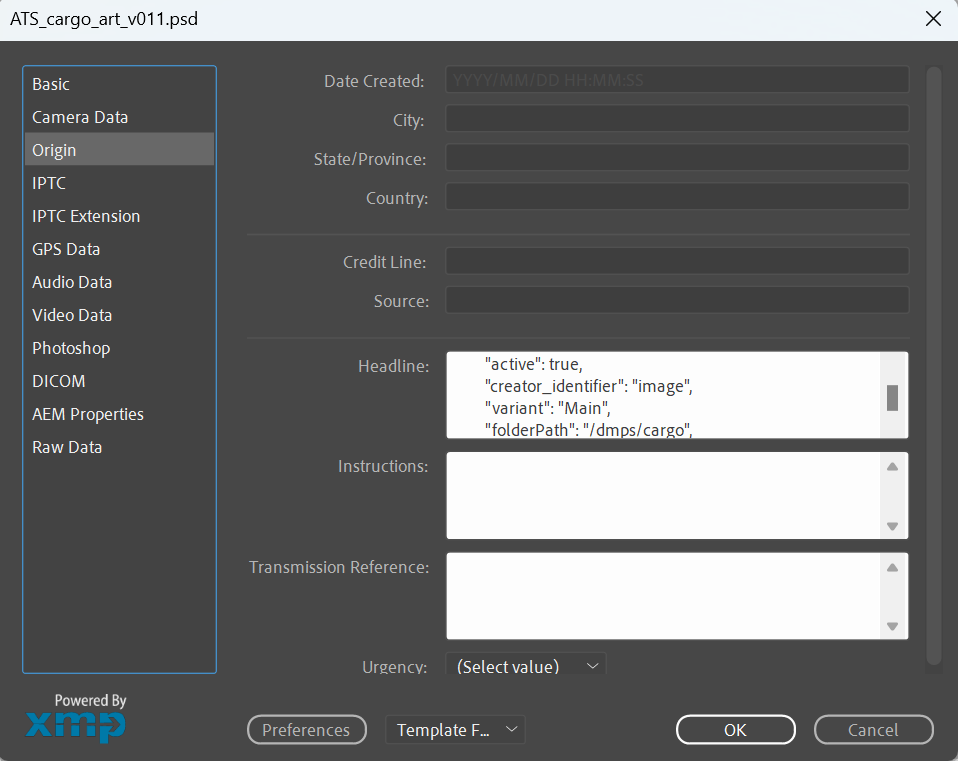
Removing AYON metadata from the document
If you hit on unexpected behaviour with old instances, contact support first, then you could try to delete and recreate instances from scratch. Nuclear option is to purge workfile metadata in File > File Info > Origin > Headline. This is only for most determined daredevils though!