Setup Unreal Addon
Last updated About 1 year ago
This page provides further information for admins about setting up Unreal to work with AYON as well as some extra tips.
Setting the AYON Unreal Plugin Path
The AYON Unreal Plugin can be set up in a few different ways, depending on your studio's workflow and deployment needs. Follow the steps below to configure the plugin path:
1. Plugin Availability
The plugin is available on the Unreal Marketplace, allowing artists to download and install it directly.
Alternatively, the plugin is included with the AYON Unreal Addon for convenience.
2. Studio-Wide Deployment
Admins can configure the plugin path for a studio-wide setup to ensure consistency across all users. Use the following environment variables:
AYON_UNREAL_PLUGIN: Set this path to the source code of the plugin.AYON_BUILT_UNREAL_PLUGIN: Set this path to the compiled version of the plugin.
There are several ways to set environment variables in AYON. For detailed instructions, please refer to this step-by-step community guide:
3. Automatic Plugin Setup
If no usable plugin is found, AYON will attempt to build the plugin included within the AYON Unreal Addon. This ensures that the plugin is always available when launching Unreal App.
Deadline Support
AYON Unreal integration supports render on farm via our custom Unreal Deadline plugin.
Please refer to Configure Deadline Addon for more information about setting up deadline addon.
Manually installing Qt bindings
It might happen that automatic installation of th Qt bindings into Unreal fails. It that case here are manual steps that can be taken to amend it:
Option A (preferred)
Using Unreal's Python interpreter (located on a path like Engine\Binaries\ThirdParty\Python3\Win64 depending on the platform):
python -m pip install pyside6Option B (unsupported)
You can run following python code either directly from Unreal or using Unreal's Python interpreter:
import pip
pip.main(["install", "pyside6"])
Be aware that calling pip like so is deprecated by pip itself and might not work in newer versions.
For Unreal Engine versions >= 5.4, use pyside6 with version 6.7.x. For earlier versions, use pyside2.
Early releases of PySide6 6.8.x has shown issues/crashes. As such, we recommend using 6.7.x releases for the time being in the hope that future releases of 6.8 become more stable.
Set UAsset Product Publish Template
Currently, publishing the uasset product uses the default publish template, which changes the filenames of uasset and umap for the published product. This causes errors when loading the uasset product via the AYON Loader.
To fix this, you need to set a custom publish template for the uasset product to preserve its original filename during publishing.
Setting the UAsset product publish template involves two steps:
Adding an anatomy publish template to your project anatomy settings (
a+a).Assigning the anatomy publish template to the
uassetproduct.
Unfortunately, it's challenging to ship AYON with this fix because we cannot guarantee that users have applied the publish template to their project anatomy and assigned it to the uasset product.
1. Add Anatomy Publish Template
For AYON server versions 1.5.0 and later, the unrealuasset publish template is included in the default anatomy preset. This template will automatically be added when creating new projects from the default preset.
If the unrealuasset publish template is not available, you can create one by following these steps:
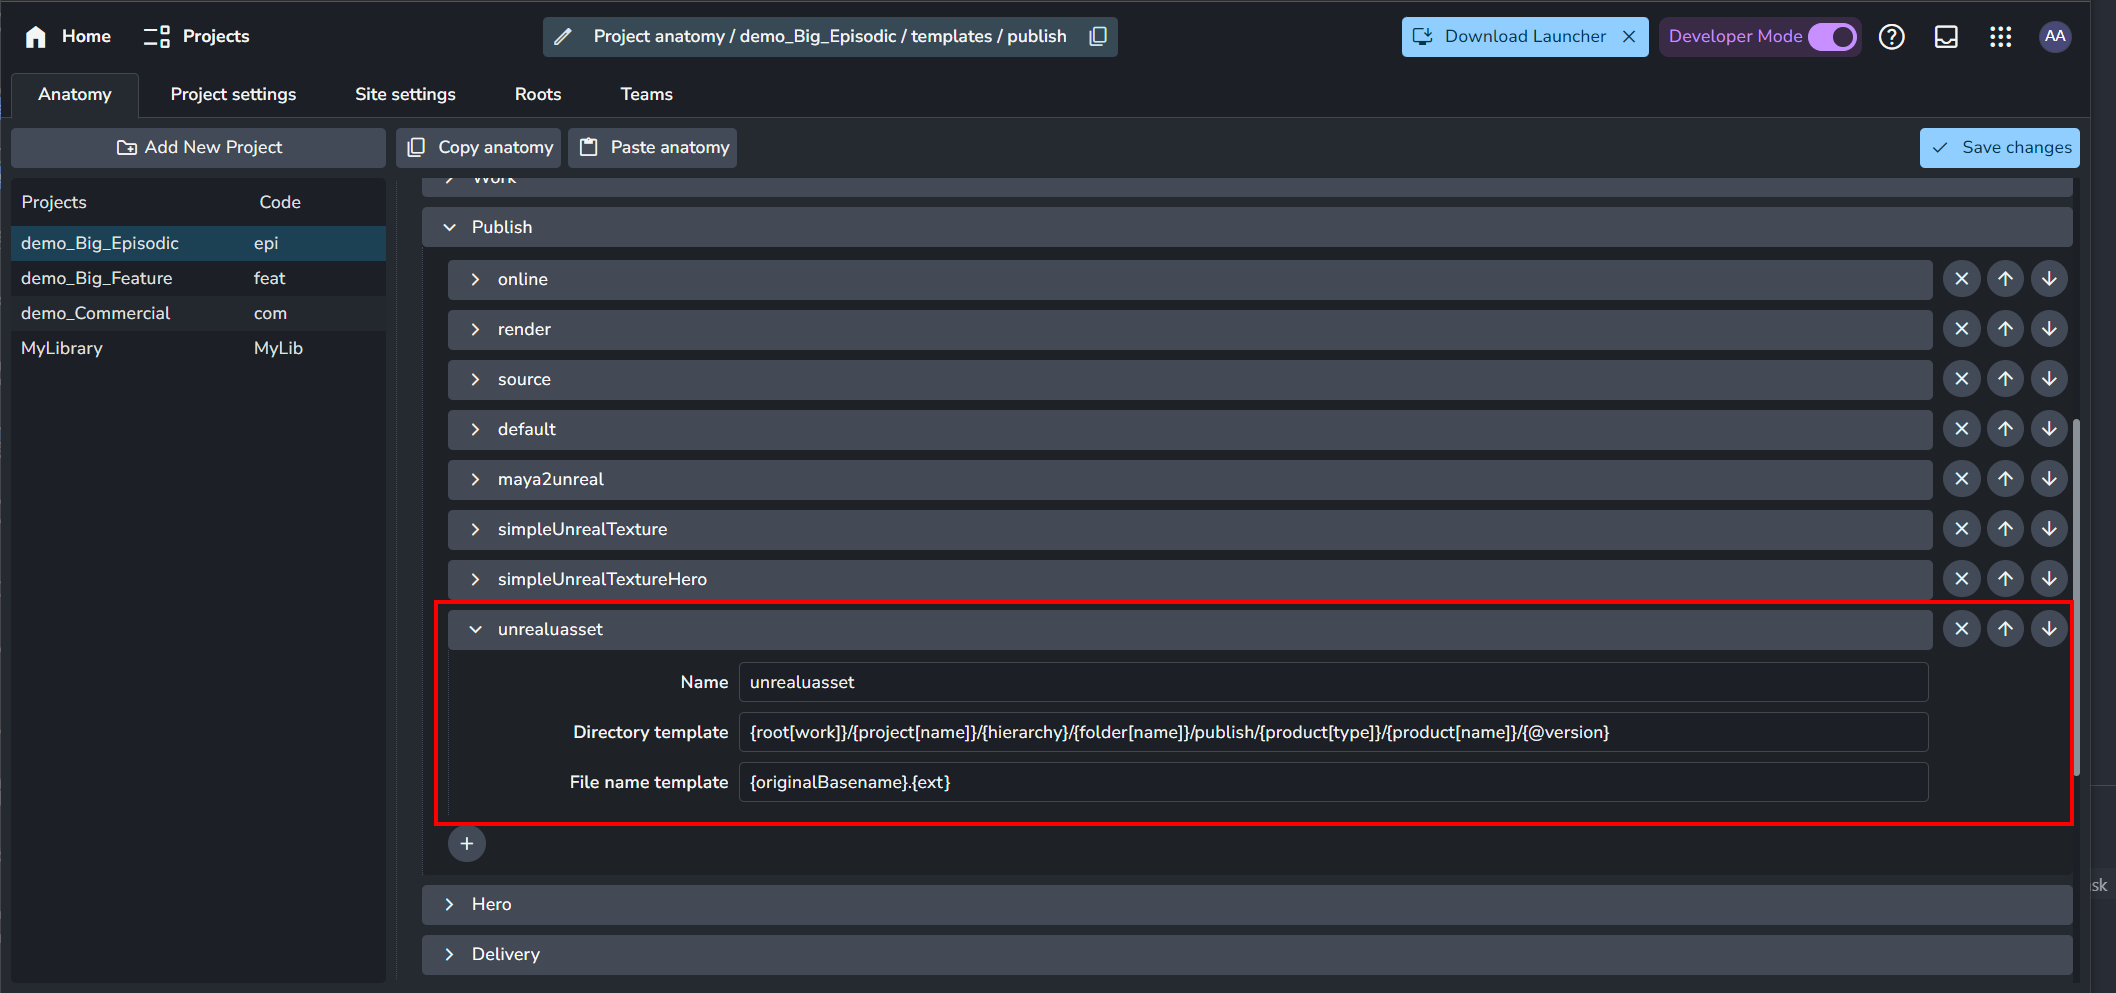
Open Project Anatomy Settings (shortcut:
A + A).Choose your project.
Locate the publish template settings at:
ayon+anatomy://{project_name}/templates/publish.Add a new publish template by clicking the
+icon.Fill in the details for the
unrealuassetpublish template or copy and paste the following template:{ "name": "unrealuasset", "directory": "{root[work]}/{project[name]}/{hierarchy}/{folder[name]}/publish/{product[type]}/{product[name]}/{@version}", "file": "{originalBasename}.{ext}" }Save your changes.
You can name the publish template anything you like, but make sure to remember the name for the next step.
2. Assign Anatomy Publish Template to uasset Product
To assign the publish template to the uasset product, follow these steps:
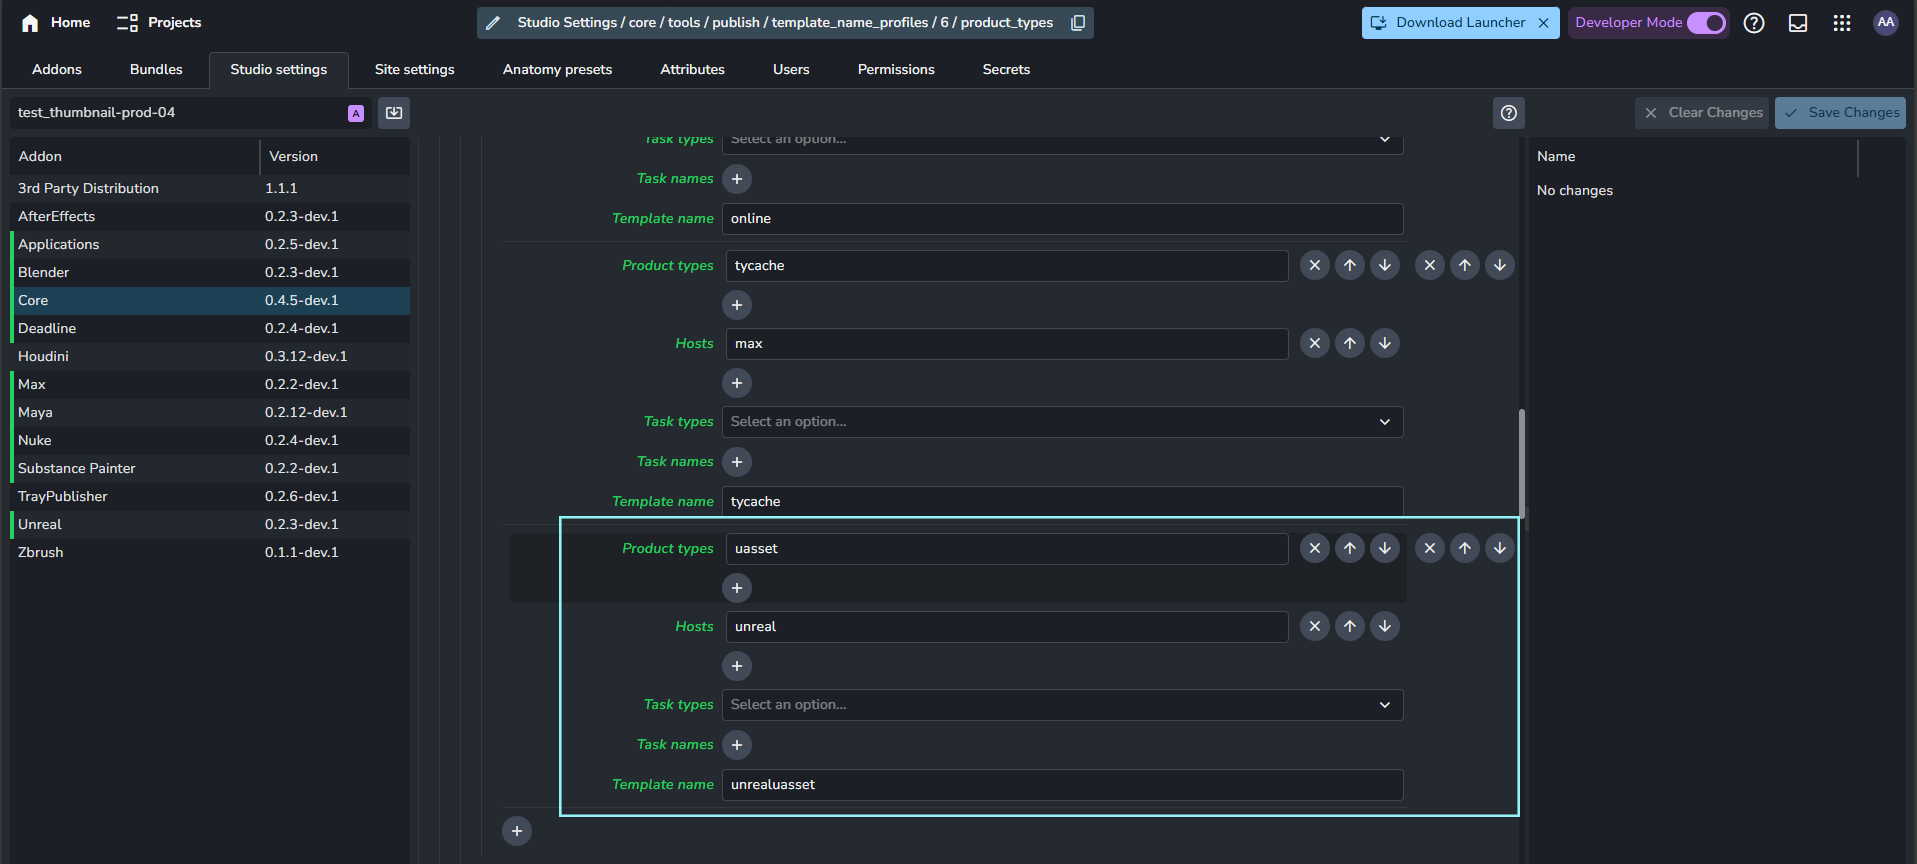
Navigate to Core Addon Settings under
ayon+settings://core/tools/publish/template_name_profiles.Add a new profile for
uassetby clicking the+button (if one does not already exist).Enter the publish template name you created earlier, e.g.,
unrealuasset.