Batch Delivery Configuration
Last updated 4 months ago
Overview
The Batch Delivery addon offers a comprehensive and flexible configuration set, giving you full control over every stage of the delivery and transcoding process.
Configuration Overview
Configuring the Batch Delivery addon is broken down into five key areas:
Transcoding Presets: The heart of the addon. These define how files are converted and can be used as standalone actions or referenced by Delivery Presets.
Delivery Anatomy Templates: Define the file paths on disk and the naming conventions for your deliverables.
Delivery Presets: Configure the delivery logic and select the associated transcoding process.
Deadline Parameters: Specify the farm parameters (pools, groups, priority) for jobs submitted by the addon.
Delivery Anatomy Template Keys: A reference list of the specific anatomy variables provided by the addon.
Additional Settings
Beyond the core setup, the addon includes settings to bridge Batch Delivery with the rest of your pipeline:
Transcode Submission on Publishing: Configure the
Integrate Enroll Offloaded Transcodeplugin to automate conversions directly from the AYON Publisher.ftrack Delivery Submission: Manage how the Batch Delivery action behaves within the ftrack web interface.
Transcoding Presets
Transcoding presets are the heart of the Batch Delivery addon. This is where the "reprocessing" happens, ensuring delivered files follow studio or client standards such as color conversions, resizing,

To create a new preset, click the + button in the Transcoding Presets list. For this example, we will name our preset simple_transcoding.
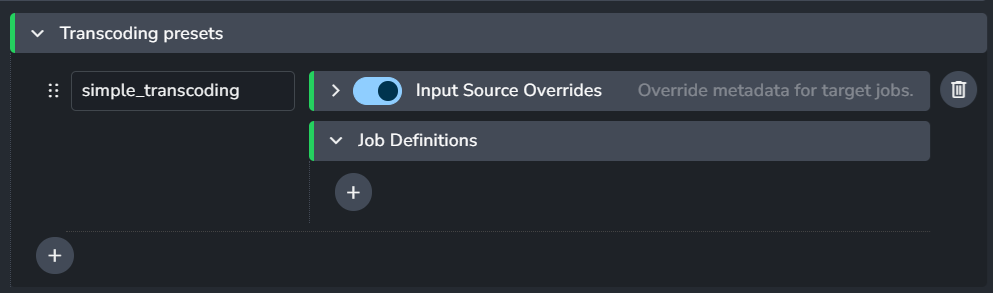
Each transcoding preset include two sections of settings: “Input source overrides” and “Job Definitions“.
1. Input Source Overrides
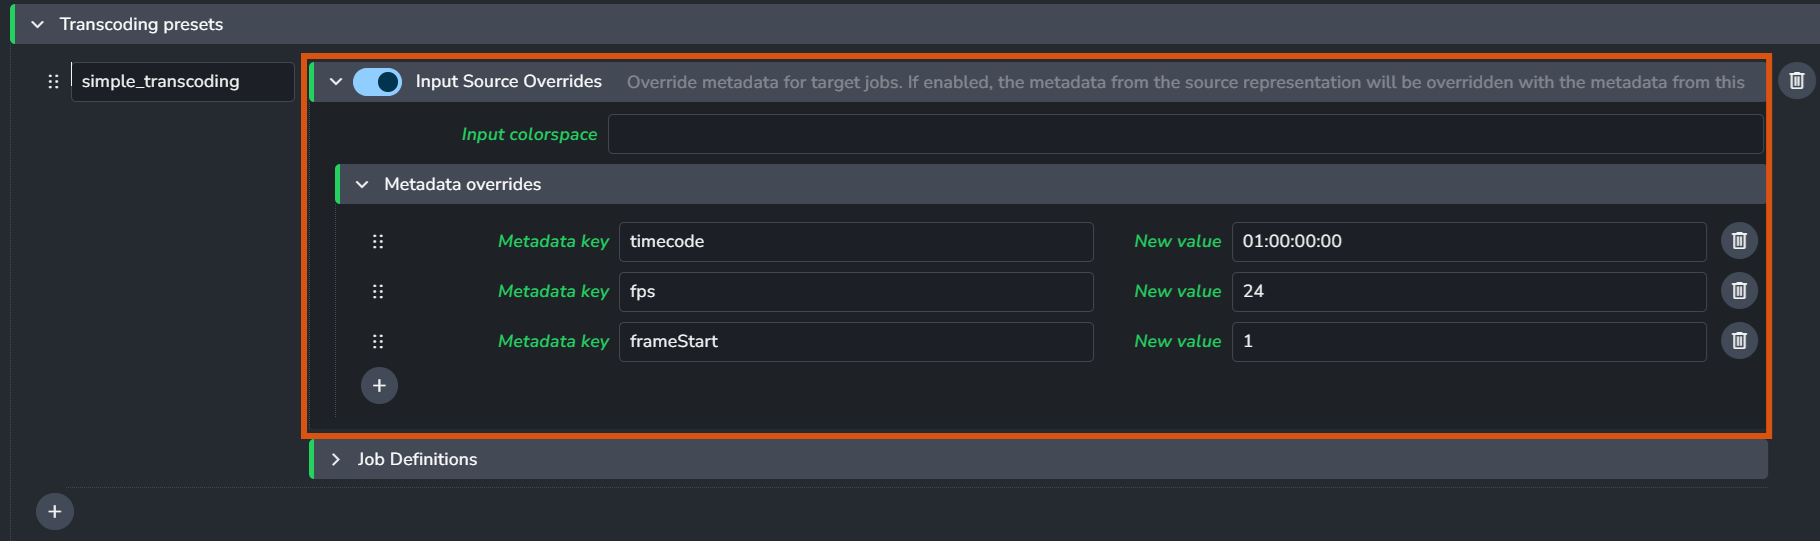
This section allows you to override the metadata of the source representation before it enters the transcoding engine.
Colorspace Override: Force an input colorspace
Metadata Overrides: Manually override attributes like timecode or fps.
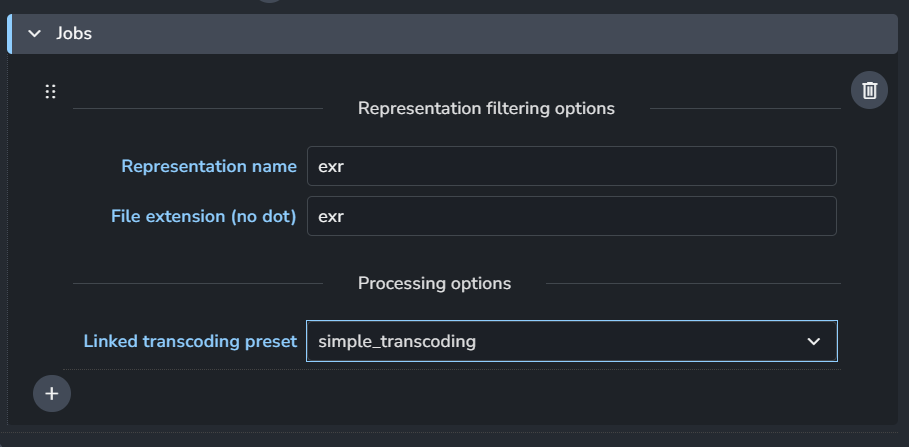
2. Job Definitions
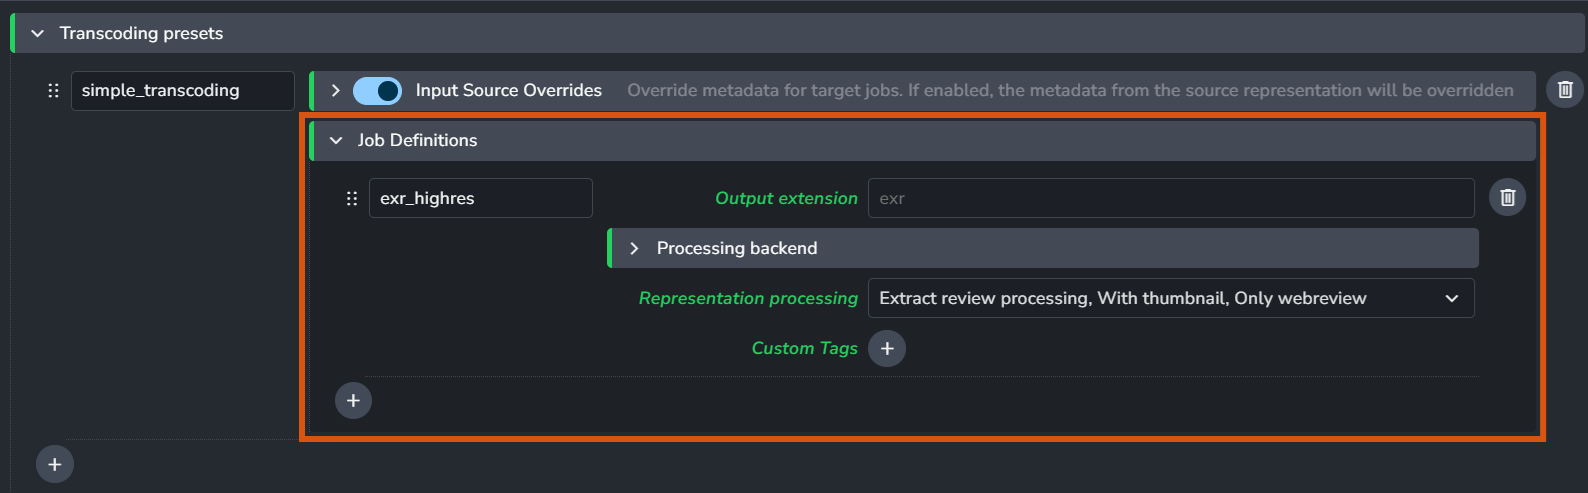
A single preset can contain multiple Job Definitions (e.g., exr_proxy and exr_highres).
All job definitions listed under a single preset are processed within the same Deadline job.
Output Extension: Specify the target file extension (e.g.,
mov,jpg,exr).Processing Backend: Choose the engine used for the conversion (see Nuke Processors below).
Representation Processing: Define post-processing tasks:
Extract Review processing: Tell AYON to generate a reviewable from this output.
With Thumbnail: Generate a thumbnail.
Only webreview: Tell AYON to use the direct output of the processing job as reviewable. This bypasses the standard review workflow (e.g., extraction of reviews or burn-ins), expecting the job definition’s output to be compatible with the supported file formats for AYON Web player.
Custom Tags: Add specific tags to the resulting representation.
Nuke Processors
Currently, delivery addon only supports Nuke-based backends which have two distinct ways to handle the transcode:
Nuke Transcoder (Via Nuke - transcoder)
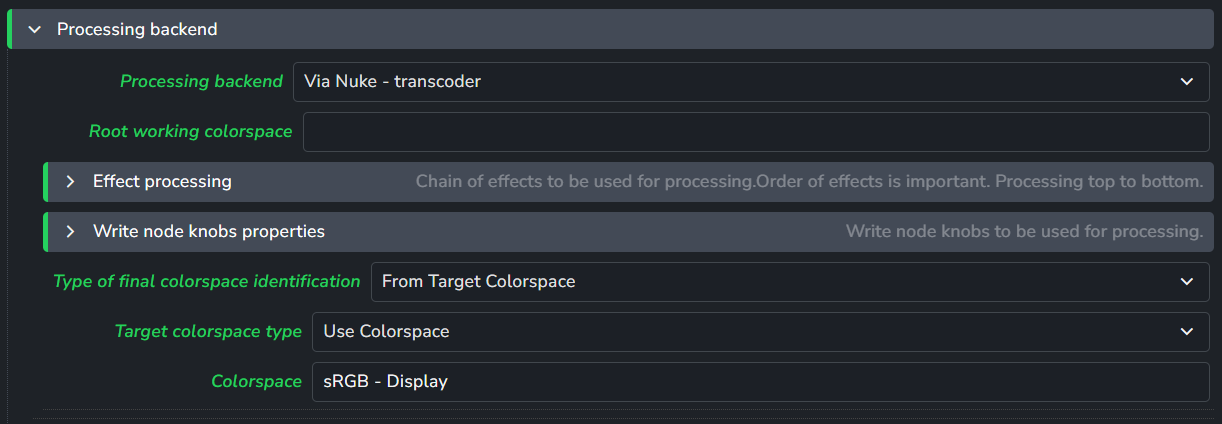
The Transcoder is procedural. You describe the nuke graph in the settings, and AYON builds a Nuke script dynamically with a single Write node.
This transcoder comes with the following settings:
Working Colorspace: Define the internal Nuke working space (e.g.,
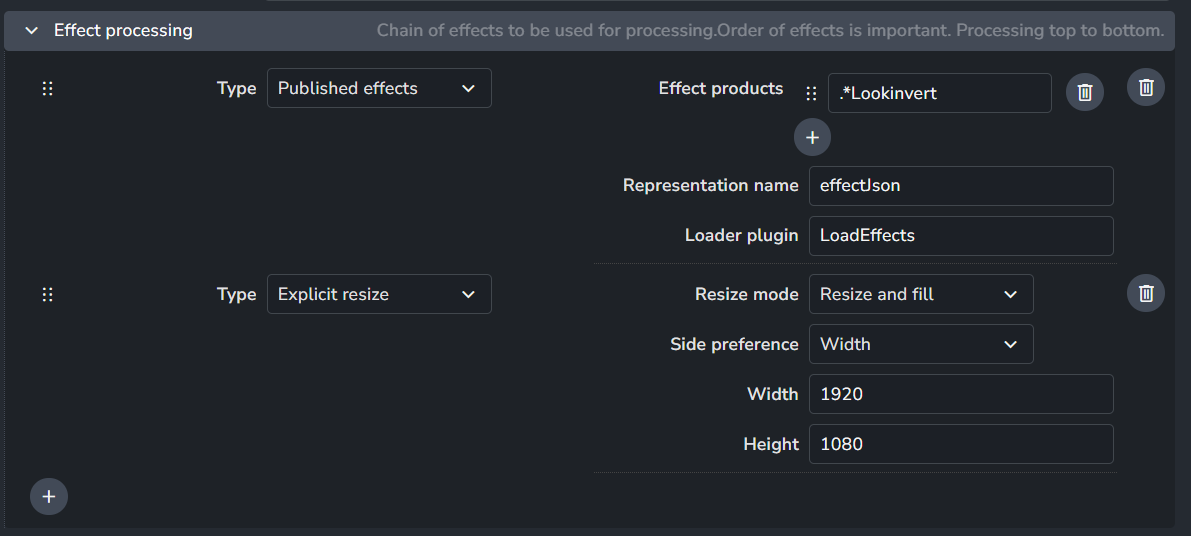
ACES - ACEScg).Effect Processing: Add specific Nuke nodes to the chain.
Published Effects: Automatically load effects previously published from Hiero.
Explicit Resize: Add a dedicated reformat node to match client resolution.
Write Node Knobs: Directly set values for any knob on the final Write node (e.g., toggle the value of
premultiplied).
Final Colorspace Identification: Tell AYON which colorspace to set to the final file with:
From Effect Chain: Inherit from the last node in your effect list.
From Write Node: Use the value currently set on the Write node's colorspace knob.
Explicit Target: Manually select a specific colorspace from a list.
Nuke Template Builder (Via Nuke - template builder)
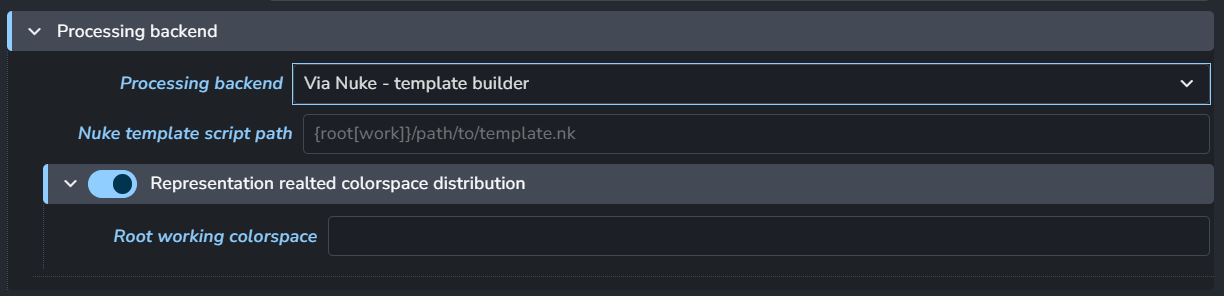
This is a simpler, file-based approach. Instead of building the graph in settings, you point the addon to an existing .nk script.
Template Path: The file path to your Nuke template. You can use Anatomy Template Keys like
{root[work]}to ensure the path works across Windows, Linux, and macOS.Working Colorspace: Define the internal Nuke working space (e.g.,
ACES - ACEScg).
Nuke Template Builder processor uses a a standard Nuke script to handle the transcoding logic. It is distinct from the "Workfile Template Builder" found in the Nuke addon.
Node Requirements: The system expects the template Nuke script to contain exactly one Read node and one Write node.
Format: This is a standard Nuke script (
.nk). It does not use AYON placeholders.Color Management: The output color space is inherited directly from the Write node or from any OCIOColorspace node positioned immediately above the Write node in the script's hierarchy.
Specify Nuke Version for Transcoder

To ensure the farm uses the correct version of Nuke, you must match the Application Name and Variant from your AYON Applications settings.
The format is: [Application Name]/[Variant Name]
Examples:
Specific Version:
nukex/16-06Major Version Match:
nukex/16.*(Picks the highest 16.x version available).Latest NukeX:
nukex/.*(Picks the highest version of NukeX installed).
For convivence, here’s a list of application names related to Nuke.
for Nuke, it’s
nukeFor Nuke X, it’s
nukexFor Nuke Studio, it’s
nukestudioFor Nuke Assist, it’s
nukeassist
AYON will then pick the highest version in the matched list.
How to Find Application & Variant Names
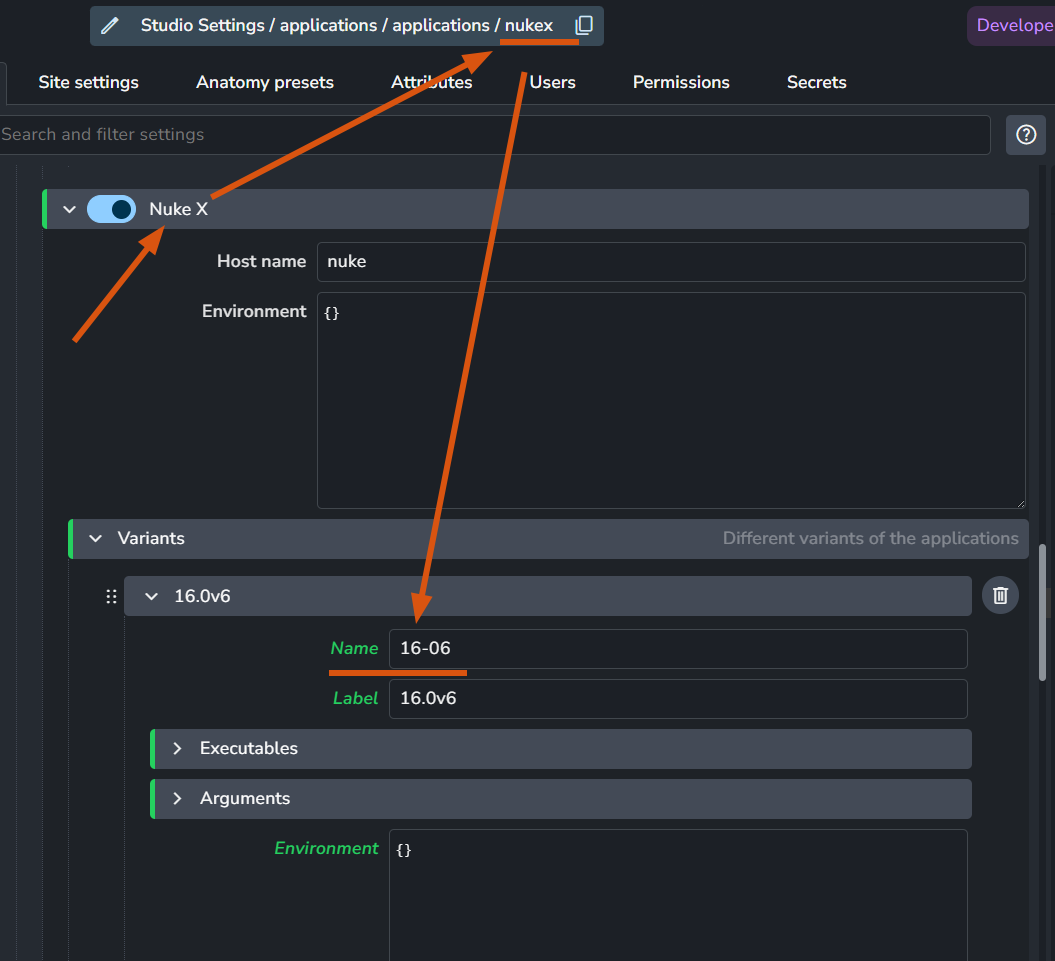
If you are unsure of the exact strings to use, you can find them in the Applications addon settings:
Application Name: Select any Nuke application (e.g., NukeX). The Setting URI displayed at the top of the interface contains the name key.
Variant Name: This is the value found in the Name field of each specific version entry under that application.
Example: If the URI shows
.../nukexand the variant name is16-06, your configuration string isnukex/16-06.
Anatomy Configuration
Before configuring presets within the addon, you must define where deliverables "live" in your project’s physical and logical structure. This is done in the Project Anatomy.
Without a template in the Project Anatomy, the Batch Delivery addon will not have a "Target" to write to. This template is the bridge between the logic in the addon and the actual files on your storage.
1. Dedicated Delivery Root

It is recommended to create a separate root for your deliverables to keep them isolated from production work on your storage.
Navigate to your Project Anatomy > Roots.
Add a new root named
deliverables.Define the specific path for your OS (e.g.,
P:/deliverables).
2. Delivery Anatomy Template
Next, let’s add a Delivery anatomy template and define folder and file naming structure for the deliverables themselves.
Navigate to Project Anatomy > Templates > Delivery.
Add a new template. This template determines how the
{root[deliverables]}and other keys (like{folder},{version}, and{ext}) combine to form the final path on disk.
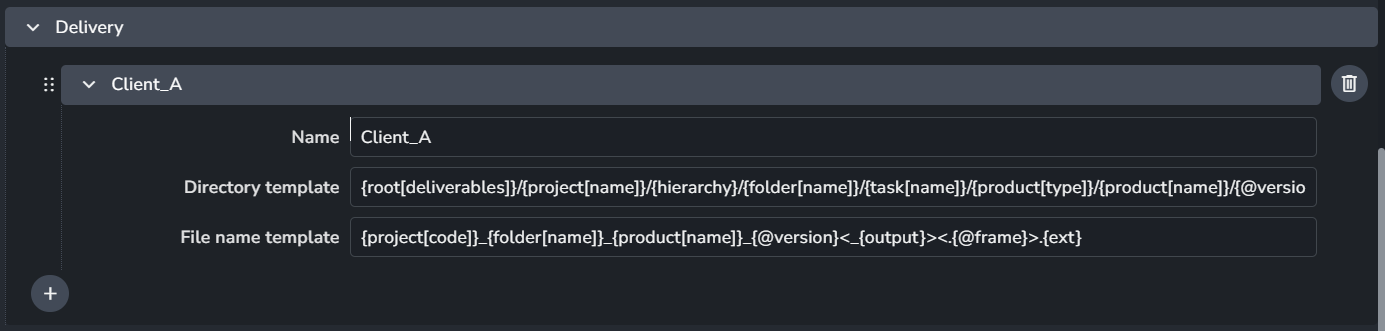
Example Delivery Template:
Copy the example below, Click the + button under the Delivery templates section, right-click the new entry, select Paste, and click Save Changes.
{
  "name": "Client_A",
  "directory": "{root[deliverables]}/{project[name]}/{hierarchy}/{folder[name]}/{task[name]}/{product[type]}/{product[name]}/{@version}",
  "file": "{project[code]}_{folder[name]}_{product[name]}_{@version}<_{output}><.{@frame}>.{ext}"
}
Delivery Presets
First-Time Setup: The addon comes with a default preset, but it requires to set the Anatomy template name to match the template you created in Project Anatomy.
The default product name it works with is renderCompositingMain but you can always configure it maybe to render.* to deliver any render product.
Delivery Presets are the command center of the addon. They tell AYON which representations to look for in selected versions and which rules to apply when processing them.
Creating a New Delivery Preset

Navigate to ayon+settings://batchdelivery/delivery_presets and click the + button.
Name: Let’s use
delivery_test.Task Filters: Leave this blank to allow the preset to work across all tasks, or specify a Task Type (e.g.,
Compositing) to restrict its use.
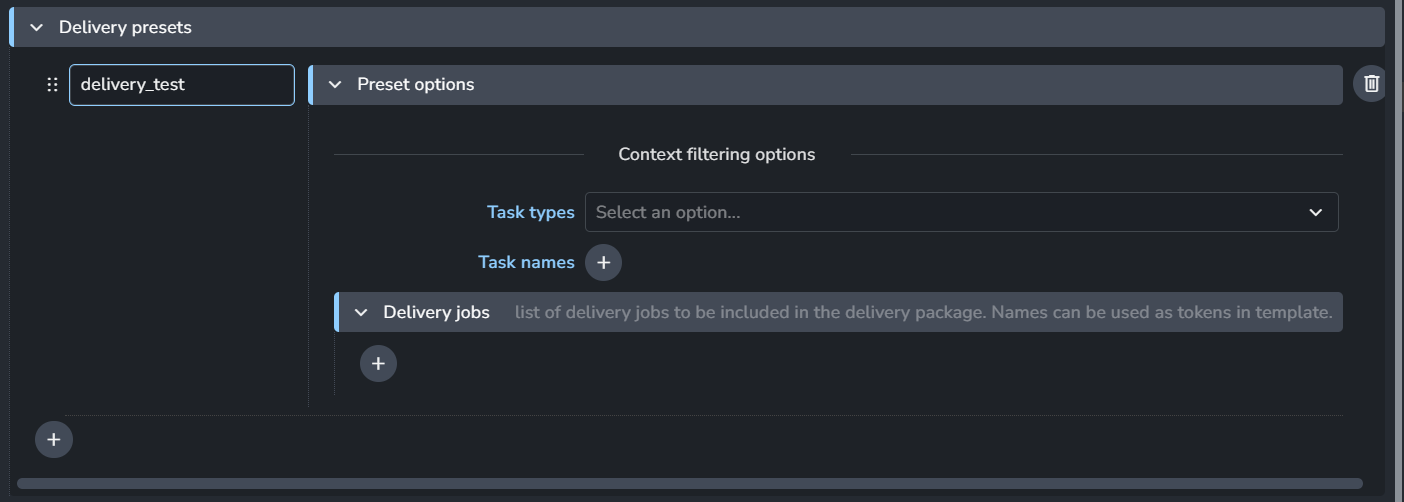
Configuring Delivery Jobs

Each item in the Delivery Jobs list represents a separate Deadline job. For every job you add:
Anatomy Template Name: Enter the name of the delivery template you defined in your Project Anatomy.
Version Distribution Type:
Version Separately: Deliverables start at their own version 1.
Align Versions: The deliverable version number mirrors the production version number (e.g., v004 in production becomes v004 in delivery).
Version Linking Type: Typically set to Generative. This creates an entity link showing that the new version was generated from the original source.
Type of Delivery Job: Currently, this is set to Reprocessing Published Data. This mode unlocks the transcoding engine.
Reprocessing Published Data
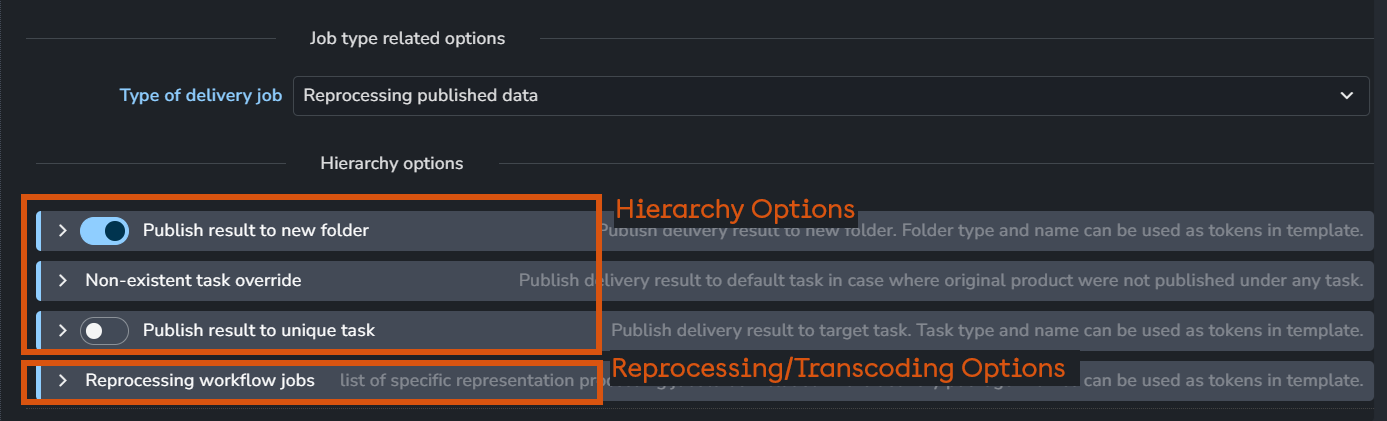
Once you select this delivery type, two additional configuration sections will appear:
1. Hierarchy Options
Since deliverables are standard AYON publishes, they need a home in the project tree. Hierarchy Options allow publishing deliverables back into the original folder and task or defining a new destination folder and task for deliveries. (For detailed examples, see the Batch Delivery Hand Book).
2. Reprocessing Jobs
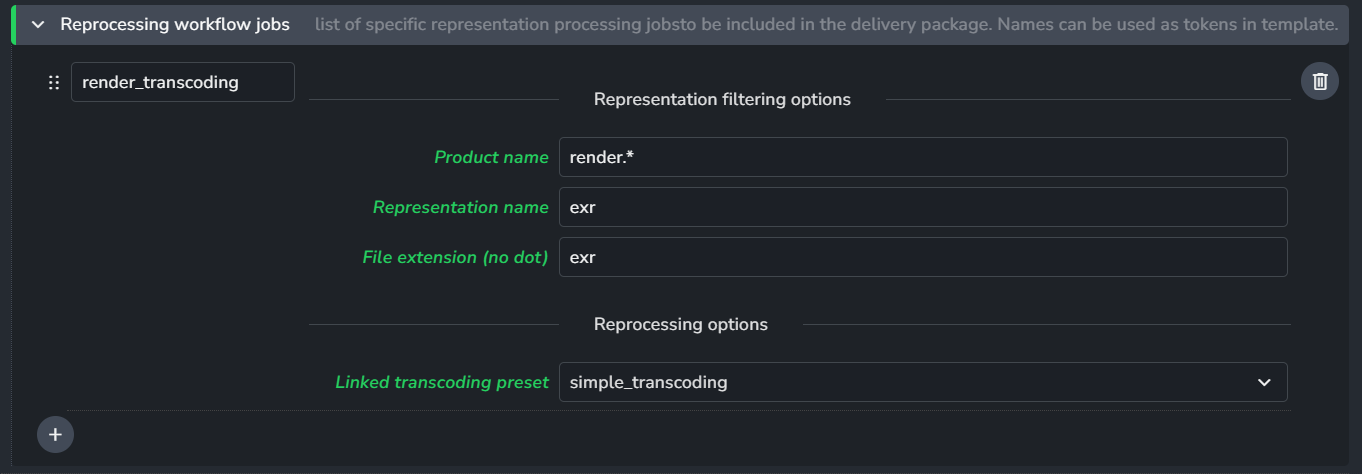
This is where you define which specific files within a version get transcoded. You can add multiple jobs here to target different products.
Product Name (Regex): Enter a regular expression to match your product names (e.g.,
renderCompositing.*). This acts as a filter to ensure only the correct data is delivered.Representation Name & Extension: A version can have many files (exr, mov, wav). Use these fields to pick the source representation for transcoding.
Transcoding Preset: Select the Transcoding Preset (e.g.,
simple_transcoding) that you created in the Transcoding Presets setting.
Identifying Representations
To find the correct names for your filters, look at a Version Entity in the AYON Browser. You can see the representation names listed there. To find the file extension, right-click a representation, view its Details, and check the files within.
Deadline Job parameters
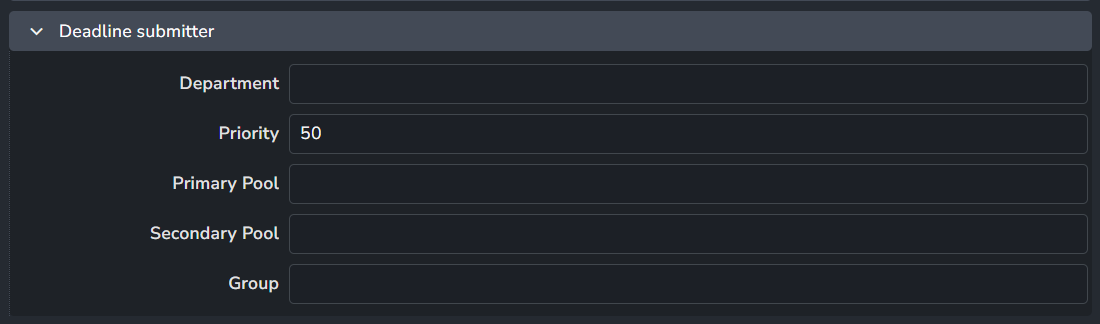
The Batch Delivery addon uses a simplified Deadline settings to manage both transcoding and delivery jobs on the farm.
These are the available settings:
Department
Priority
Primary Pool
Secondary Pool
Group
Anatomy Template Keys
The following keys are provided by the addon for use in your Anatomy Templates. These allow for dynamic path generation:
Go to Batch Delivery Hand Book to see examples of how these template keys can be used.
Integrate Enroll Offloaded Transcoding
By enabling this plugin in the AYON Publisher, you can automate transcoding during publishing. When an artist publishes their work, the system automatically triggers “Submit Batch Transcode“ for the version being created.
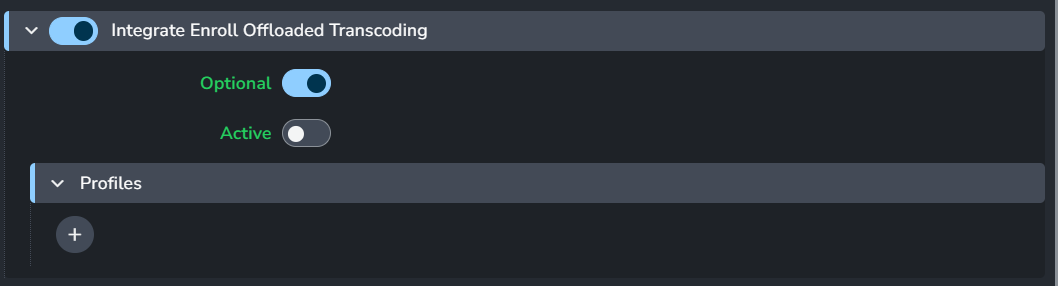
Plugin State
Configure how the plugin appears and behaves for the artist in the Publisher UI:
Enabled: Toggles the plugin on or off for studio or the project.
Optional: When enabled, artists can manually check or uncheck the plugin in the Publisher.
Active: Sets the default state (checked or unchecked) when the Publisher opens.
To allow artists to trigger transcoding on demand, enable Optional but disable Active. This makes the plugin available in the UI but leaves the final choice to the artist.
For an example of how this appears from the artist's perspective, see: Trigger Transcode Process From AYON Publisher
Profiles
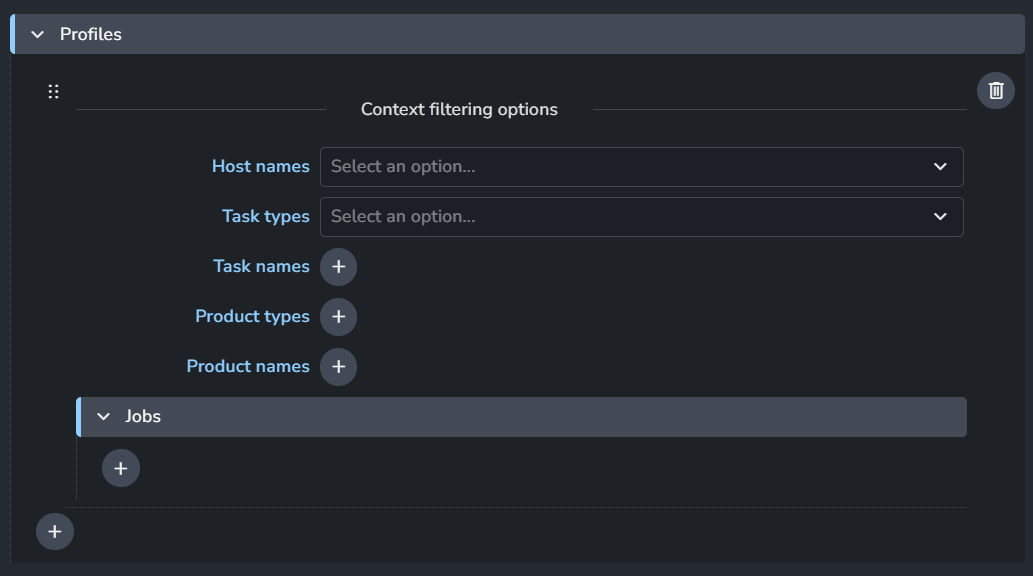
Profiles determine when the plugin should run. Create a profile via the + button to define your criteria:
Filters: Restrict the plugin to specific Host names, Task types/names, or Product types/names.
Global Run: Leave all filter fields blank to allow the plugin to run on every publish across the project.
Transcoding Jobs
Once a profile matches the publish context, define which transcoding jobs to perform:
Representation Name & Extension: Specify which representation within the publish should be used as the source (e.g.,
exr).Transcoding Preset: Select the preset to be applied to that representation.

A single publish instance often contains multiple representations (e.g., an
.exrsequence, an.mp4review, and a.pngthumbnail).You can add multiple transcoding jobs to target different representations or apply multiple presets to the same source if your client requires different delivery formats for the same product.
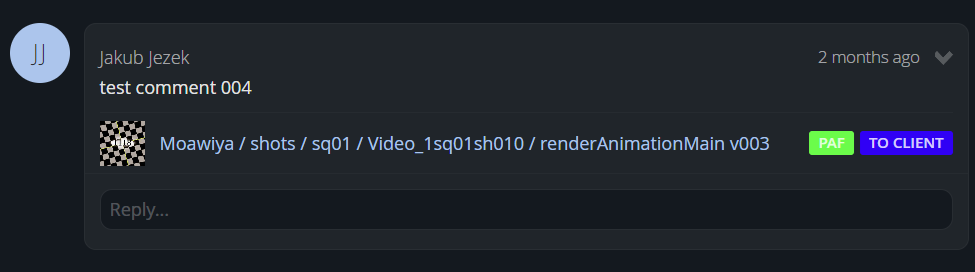
ftrack batch delivery action
When the Submit Batch Delivery action is triggered from an ftrack version list, the addon scans the notes (comments) on each version. A version is only processed if it contains a comment with a specific label.
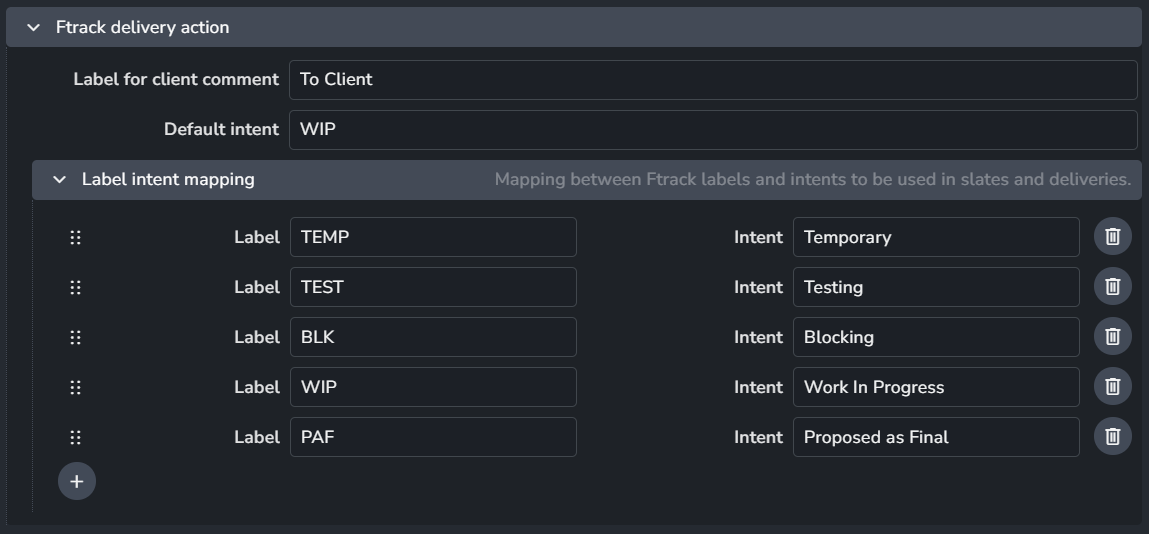
Label for client comment: Configure this setting to specify the ftrack label the addon should look for on version notes.
Intent Mapping
The system expects two labels: one for the Client Comment and another to define the Intention of the version.
Label Intent Mapping: Configure this list to map ftrack intent label to a specific value.
Usage: If a matched label exists, its value fills the
{intent}template key. If no match is found, the Default Intent Label is used and mapped. Then, this key can be used in burn-ins or file naming.This mapping fills the template key for the current job only; it does not update the
intentattribute on the AYON version entity.
FAQ
Delivery and Transcoding jobs are not being submitted
If you trigger a delivery or transcoding submission but no jobs appear in the Deadline Monitor, check the following:
Service Status: Ensure the Batch Delivery Deadline Submitter service is running.
Service Connectivity: Verify that the submitter service has network access to the Deadline Web Service URL configured in your Deadline Addon settings.
Logs: Check the AYON service logs for any "Connection Refused" or "Authentication" errors related to Deadline.